Crochet Baby Bib: Easy Little Treasure in 13 Rows
A crochet baby bib built from shells is one of the prettiest little treasures you can make for a newborn, and this one is worked in one piece: you start with a flat strip of V stitches, shape the neckline with slip stitches, then finish with a border of big fans and two ties. It fits a baby from newborn to 6 months, and the finished bib has a round, romantic look in either a soft pink or a pale grey. This guide gives every step with a photo, our own row-by-row count of the fans, a comparison with four other free bib patterns and a short section on tie safety.
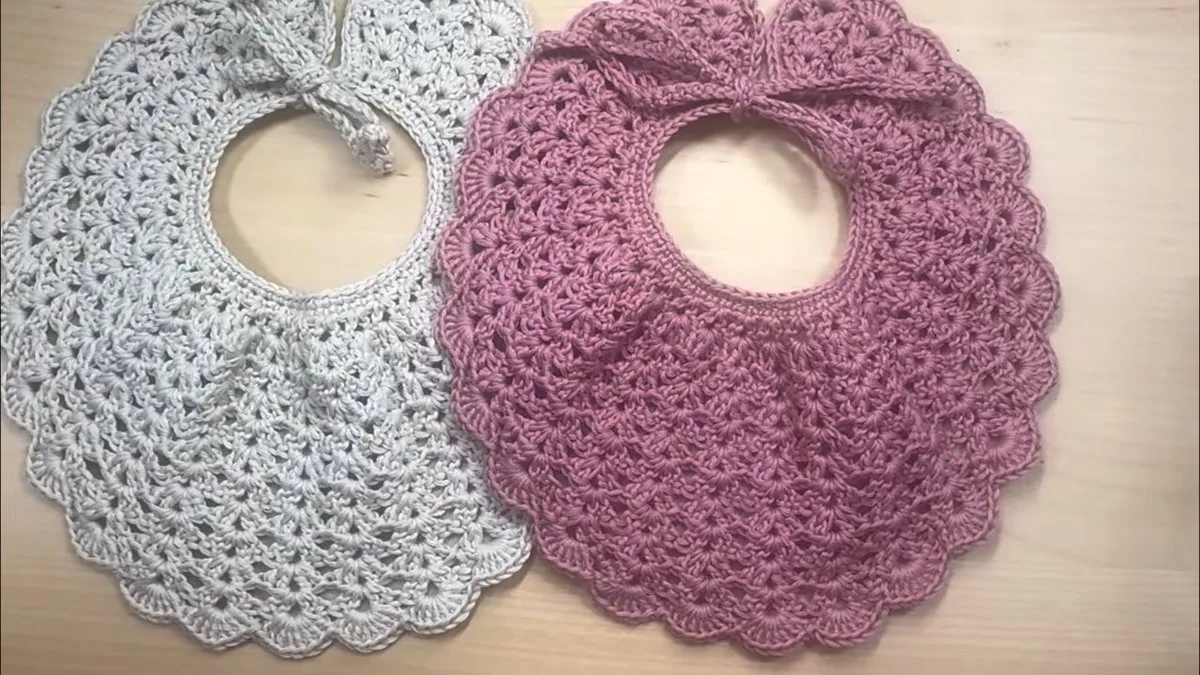
What makes this bib different: there is no motif to join and no seam. The strip is worked from the base, the rows get shorter as you slip stitch across the ends, and the large fans at the edge are what give the bib its round shape. The designer works the sample in two colours, a grey called Sable and a pink called Spring Rose, so you can see how the same pattern looks light and dark.
The row counts, the hook and the order of the steps come from the designer’s own instructions. The fan counts per row, the totals and the notes on resizing are our own arithmetic, marked as ours, because we have not made this bib ourselves. Where the designer prints no number, we say so and do not invent one.
- Crochet Baby Bib at a Glance
- Stitch Names Used in This Bib
- Materials for a Crochet Baby Bib
- Fans in Every Row of the Bib
- Crochet Baby Bib: Step by Step
- Mistakes When You Crochet a Baby Bib
- Tie Safety on a Crochet Baby Bib
- Crochet Baby Bib Patterns Compared
- Crochet Baby Bib FAQ
- Other Free Baby Makes to Pair With This Bib
Crochet Baby Bib at a Glance
The bib has three parts: a flat strip of V stitches, a shaped section where you slip stitch across the ends to make the neckline, and a border of large fans with two long ties. Here is the short version before the photos.
| Part | What you work | Count printed by the designer |
|---|---|---|
| Foundation | Chain, then single crochet in every chain | 53 chains, 53 single crochets in row 1 |
| Row 2 | V stitch: double crochet, chain 1, double crochet in one stitch, skip one | Last stitch is a double crochet |
| Rows 3 to 5 | Double V: 2 double crochet, chain 1, 2 double crochet in each chain-1 space | Rows 4 and 5 repeat row 3 |
| Rows 6 to 12 | Slip stitch across the start, leave fans at the end | 20, 10, then 5 slip stitches |
| Row 13 | Big fans of 8 double crochet, single crochet along the straight edge, ties | Ties: chain 41 in grey, chain 51 in pink |
Stitch multiple: the strip has 53 stitches, which is 2 x 26 + 1. We read that as a stitch multiple of 2 plus 1: each V stitch uses 2 stitches of the row below and one stitch is left over for the double crochet at the end. If you want a wider bib, add a multiple of 2 to the chain. That is our reading of her counts, not a rule she states, so work a swatch before you commit to a new width.
Stitch Names Used in This Bib
The designer uses the Spanish stitch names. In English patterns the same stitches have two naming conventions, so a stitch can have a different name depending on which one a pattern uses. In this guide we name them the way most free patterns in English do, and the table shows the match.
| In this guide | What you do | Spanish name |
|---|---|---|
| Chain | Yarn over and pull through the loop on the hook | Cadeneta |
| Single crochet | Hook in the stitch, yarn over, pull up a loop, yarn over, pull through both loops | Punto bajo |
| Double crochet | Yarn over, hook in the stitch, pull up a loop, then yarn over and pull through two loops, twice | Punto alto |
| Slip stitch | Hook in the stitch, yarn over, pull through the stitch and the loop on the hook | Punto deslizado |
| False double crochet | A single crochet worked over the first stitch of the row that stands in for a double crochet; you can chain 3 instead | Punto alto falso |
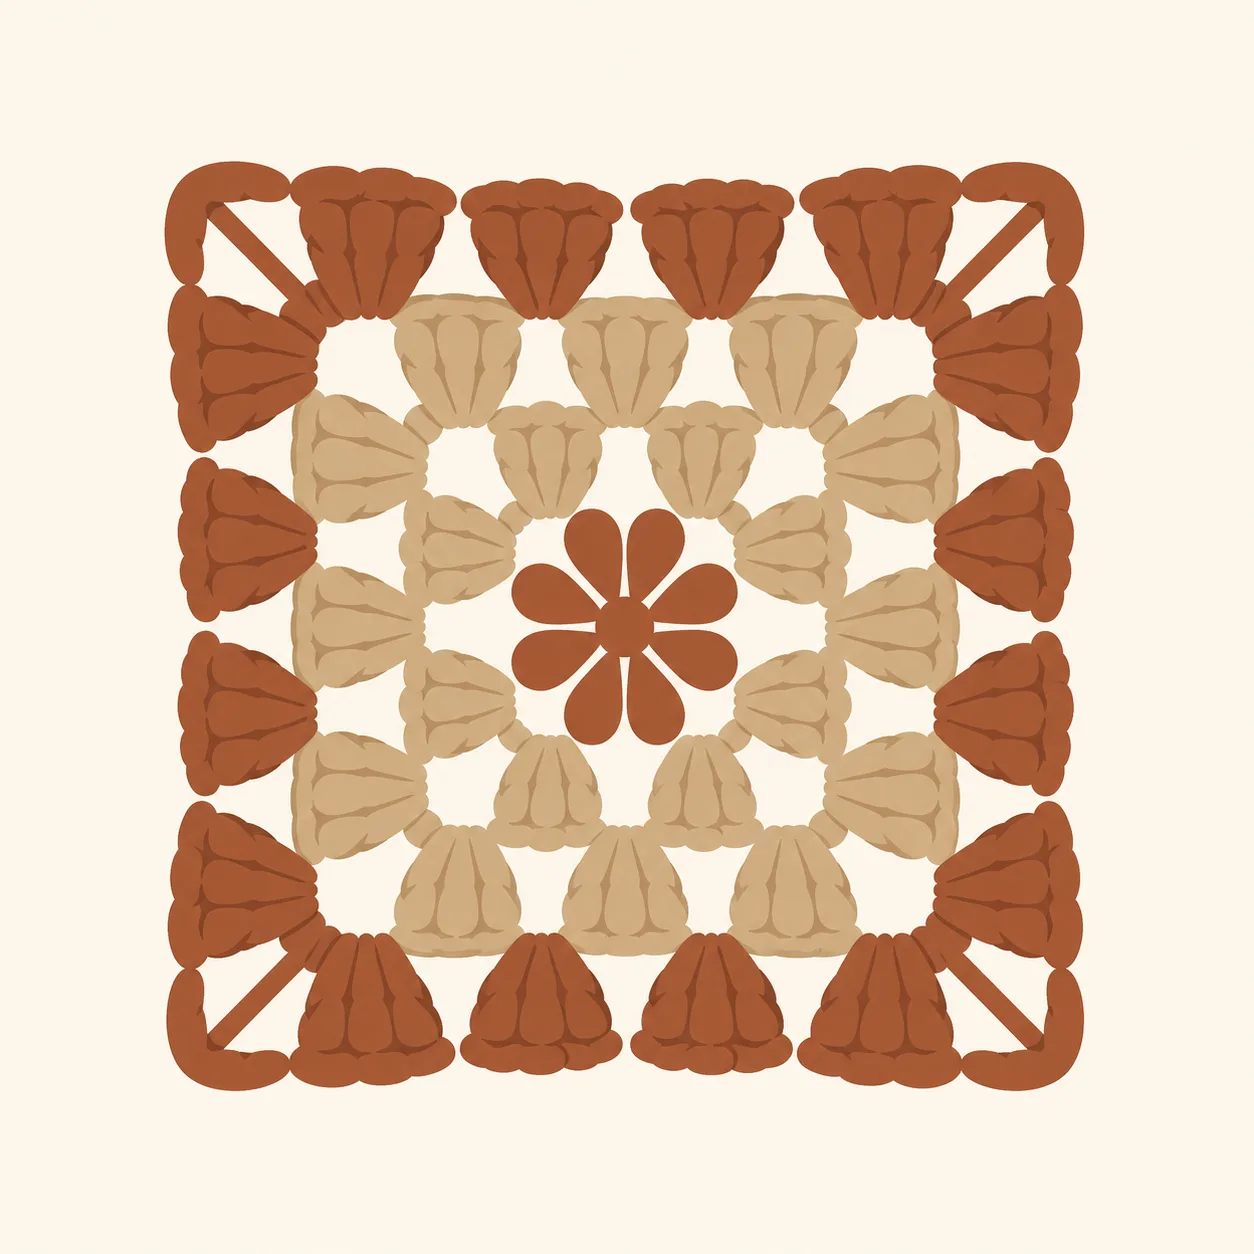
| Fan | A group of stitches worked in one space so the row fans out | Abanico |
Two ways to start a row: the designer begins most rows with a false double crochet, which is a single crochet worked on the first stitch so the edge stays flat. She says you may start with chain 3 instead, because both count as a double crochet. Chain 3 gives a more visible edge, so choose the one you like and use it on every row.
Materials for a Crochet Baby Bib
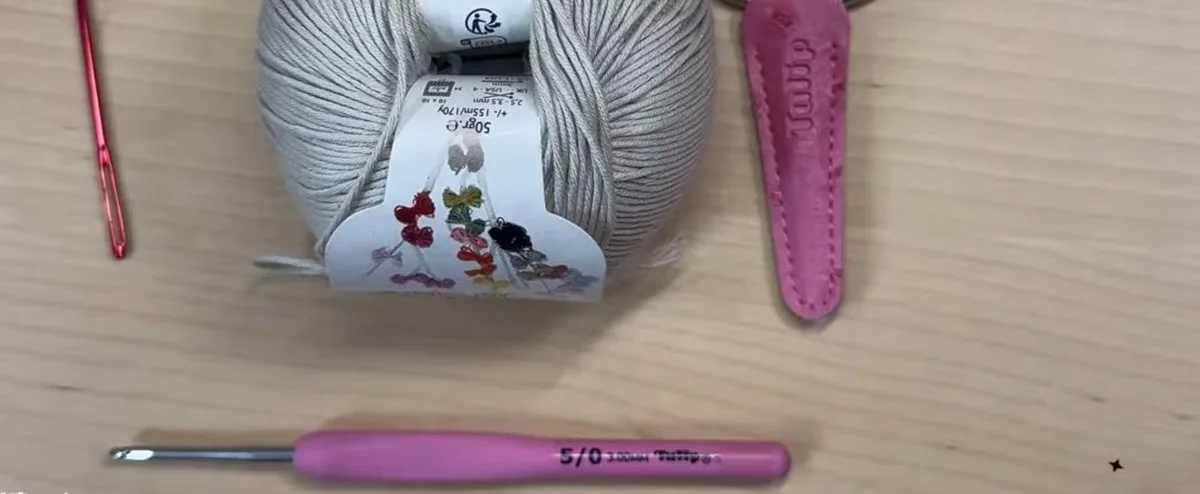
You need very little for this bib: one colour of cotton yarn, a small hook, scissors and a yarn needle. The designer uses DMC Natura Just Cotton, a 100% cotton yarn sold in 50 g balls, with a 3 mm Tulip hook. We did not find a yardage on the page for the ball she uses, so we print none.
| Item | What to use |
|---|---|
| Yarn | DMC Natura Just Cotton, 50 g, 100% cotton; sample colours N03 Sable (grey) and N07 Spring Rose (pink) |
| Hook | 3 mm (the size printed on the yarn label and used in the sample) |
| Tools | Scissors and a yarn needle for the ends |
| Size | Newborn to 6 months; the designer gives no measurements |
| Skill level | Confident beginner: chain, single crochet, double crochet, slip stitch, counting spaces |
Hook note: a 3 mm hook is what the label and the designer use. We could not confirm from a yarn-maker page which Craft Yarn Council weight category this cotton belongs to, so we do not name one. If you swap yarns, pick a cotton that works up with a similar drape, and swatch a few rows of V stitch to check the fabric is soft and not stiff. We give no yardage because none is printed; a single bib is a small project and one 50 g ball is what the designer shows in the sample.
Why cotton: a bib is washed often, so a cotton or cotton-rich yarn is the sensible choice. We found no brand care page for this exact yarn, so read the ball band for washing instructions before you give the bib away, and wash a swatch first if you are not sure.
Fans in Every Row of the Bib
The designer prints the slip stitch counts but not how many fans each row has. We worked it out from her own numbers, using one fact from her instructions: 20 slip stitches skip 4 fans, so a fan is 5 stitches wide (4 double crochets and the chain). The table is our arithmetic and was not tested, but it lets you check your piece row by row.
| Row | What you work | Fans or V stitches in the row (ours) |
|---|---|---|
| Row 2 | V stitches across | 26 V stitches |
| Rows 3 to 5 | Double V in every chain-1 space | 26 fans in each row |
| Row 6 | 20 slip stitches, then fans, leave 4 unworked | 18 fans |
| Row 7 | 10 slip stitches, then fans, leave 2 unworked | 14 fans |
| Row 8 | 5 slip stitches, then fans, leave 1 unworked | 12 fans |
| Row 9 | Same as row 8 | 10 fans |
| Row 10 | Same as row 8 | 8 fans |
| Row 11 | Same as row 8 | 6 fans |
| Row 12 | Same as row 8 | 4 fans |
How we got these: row 2 has 53 stitches with a false double crochet at the start and a double crochet at the end, then a V stitch in every second stitch, stitches 2, 4 and so on up to 52, which gives 26 V stitches, and the last stitch, number 53, is a double crochet. Rows 3 to 5 put one double V in each chain-1 space, so the count stays at 26. In row 6 you lose 4 fans at the start and 4 at the end, which leaves 18. Row 7 loses 2 and 2, which leaves 14. Rows 8 to 12 each lose 1 and 1, so the count drops by 2 each time: 12, 10, 8, 6 and 4. Together that is 150 double V fans in rows 3 to 12, or 600 double crochets, plus 55 slip stitches (20 + 10 + 5 x 5). If your own count of fans differs, check the chain-1 spaces of the row below before you go on.
Crochet Baby Bib: Step by Step
Work all steps with the same yarn and the 3 mm hook. Steps 1 and 2 make the foundation, steps 3 to 6 build the strip of V stitches and fans, steps 7 to 10 shape the neckline, and steps 11 to 18 work the border, the ties and the finish. Step 19 weaves in the ends.
Step 1: Chain 53 and add one turning chain
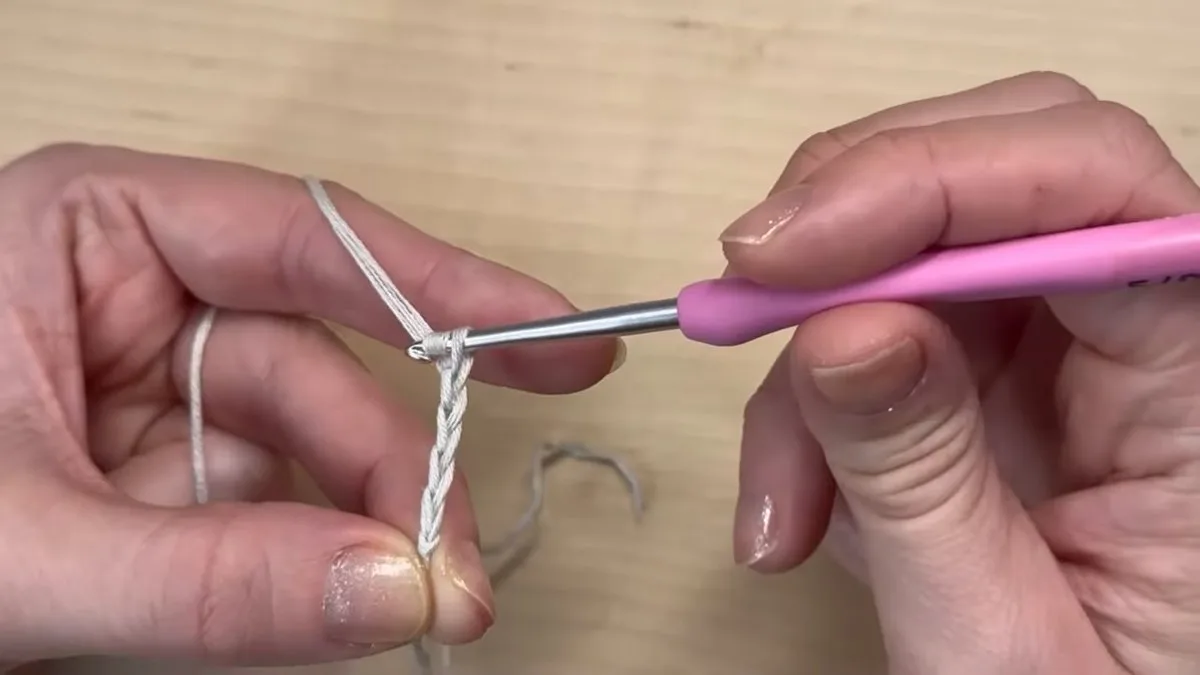
Make a slip knot and chain 53. Keep the chain loose, not tight; the designer points out that hers is relaxed so the first row goes in easily. Then add one more chain to turn. Her count for the first row is 53 single crochets, so we read the start as 53 chains plus one turning chain.
Step 2: Work a single crochet in each chain
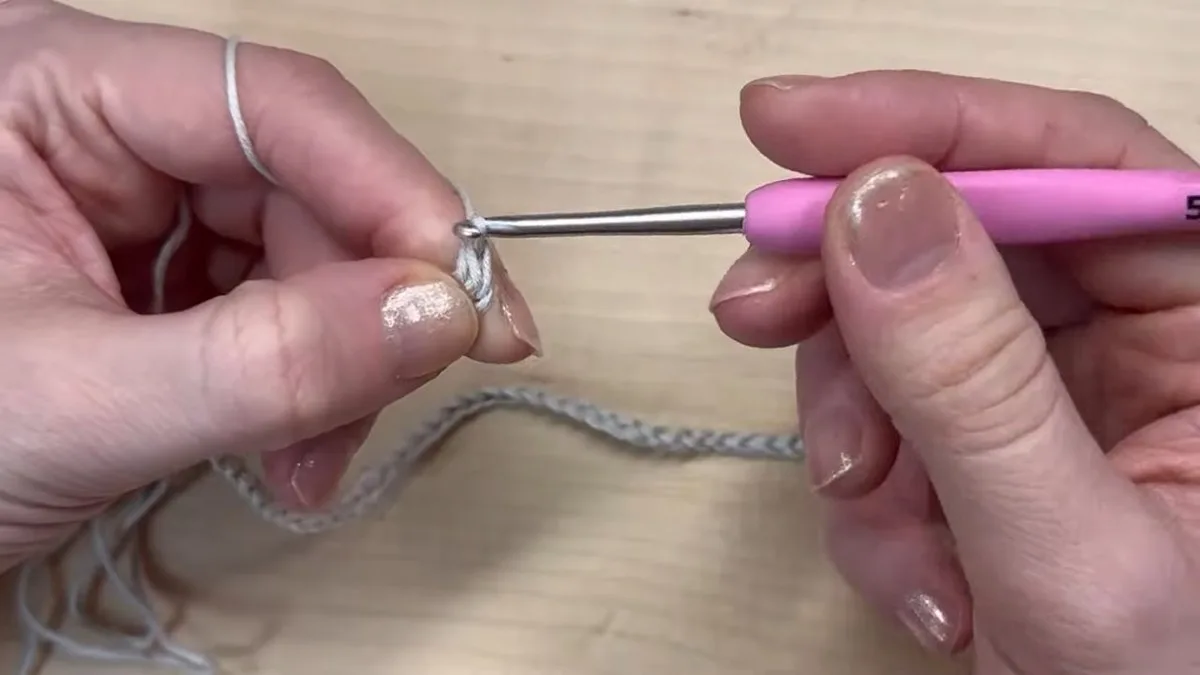
Put the hook in the second chain from the hook and make a single crochet. Carry on with one single crochet in each chain to the end. Check the count: row 1 should have 53 single crochets. Turn the work.
Step 3: Row 2: begin with a false double crochet

Chain 1 and turn. In the same stitch make a false double crochet: work a single crochet, then insert the hook under the back of that single crochet and make a second single crochet. This counts as a double crochet. You can start with chain 3 instead if you prefer a taller edge.
Step 4: Row 2: make V stitches across
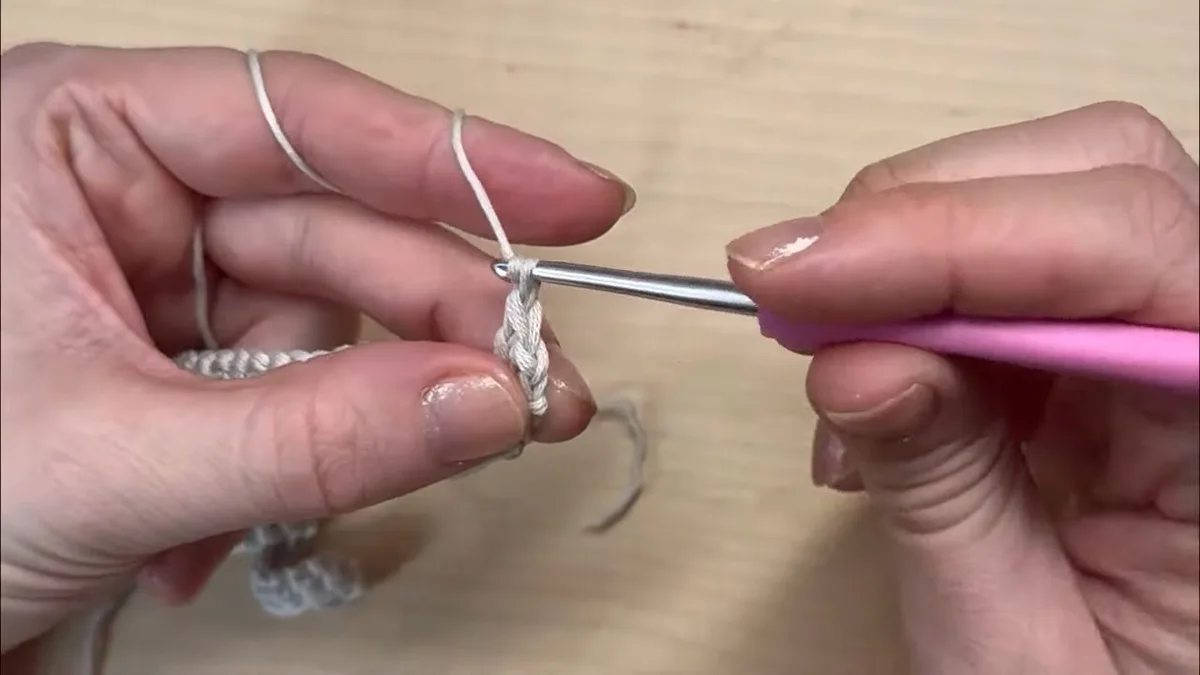
In the next stitch make a double crochet, chain 1, and another double crochet in the same stitch. That is a V stitch. Skip the next stitch and make the next V stitch in the one after. Repeat to the end. One stitch is left over; work a double crochet in it. By our count that gives 26 V stitches.
Step 5: Row 3: work a double V in every chain-1 space
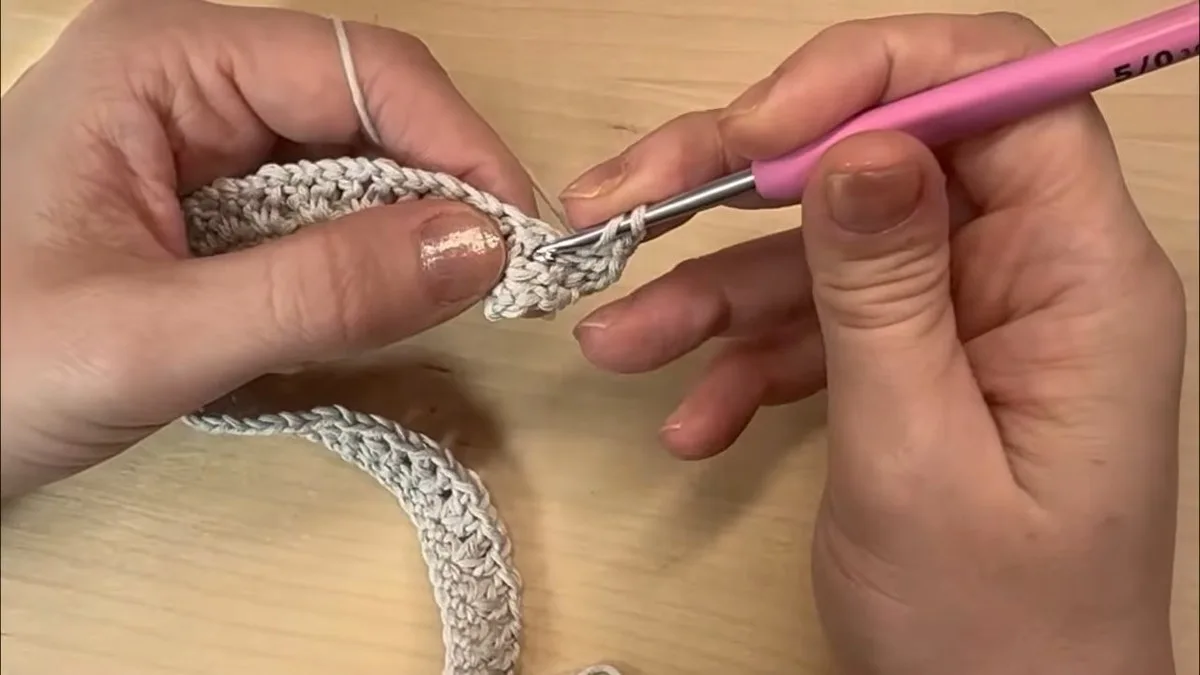
Chain 1, turn, and make a false double crochet in the first stitch. Now work in the chain-1 spaces of the V stitches, not in the stitches. In each space make 2 double crochets, chain 1 and 2 double crochets. That is the double V, which the designer calls a fan. Finish the row with a double crochet in the last stitch.
Step 6: Rows 4 and 5: repeat row 3

Rows 4 and 5 are worked exactly like row 3: false double crochet or chain 3, a double V in every chain-1 space, and a double crochet in the last stitch. After row 5 the strip has a flat top with a lace of fans, and it already starts to curve a little.
Step 7: Row 6: slip stitch across 20 stitches
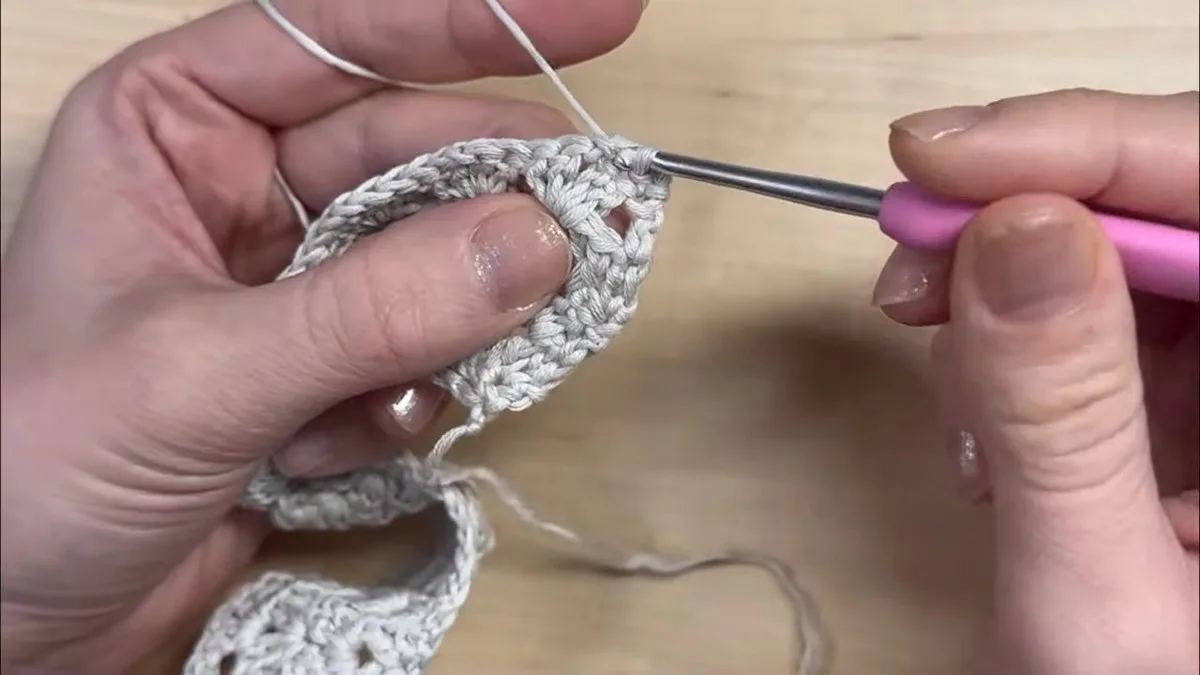
Chain 1 and turn. To shape the bib, slip stitch across 20 stitches, working into the stitches and the chains. The designer says 20 slip stitches mean you skip 4 fans. Work the 20 slip stitches as she does, a little tighter than your other stitches.
Step 8: Row 6: work fans and leave 4 unworked
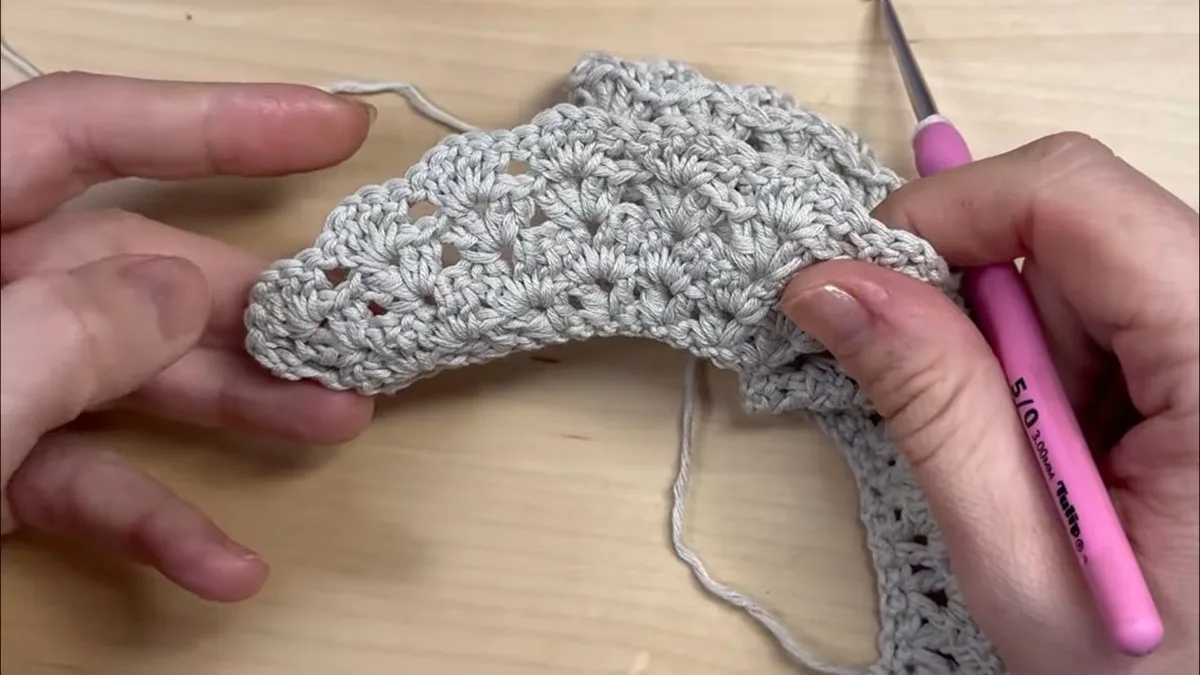
In the last slip stitch make a false double crochet, then work a double V in each chain-1 space as before. At the end of the row leave 4 fans unworked. Make your last double crochet in the first stitch of the first fan you are leaving, and finish the row there. We count 18 fans in this row.
Step 9: Row 7: slip stitch across 10 stitches
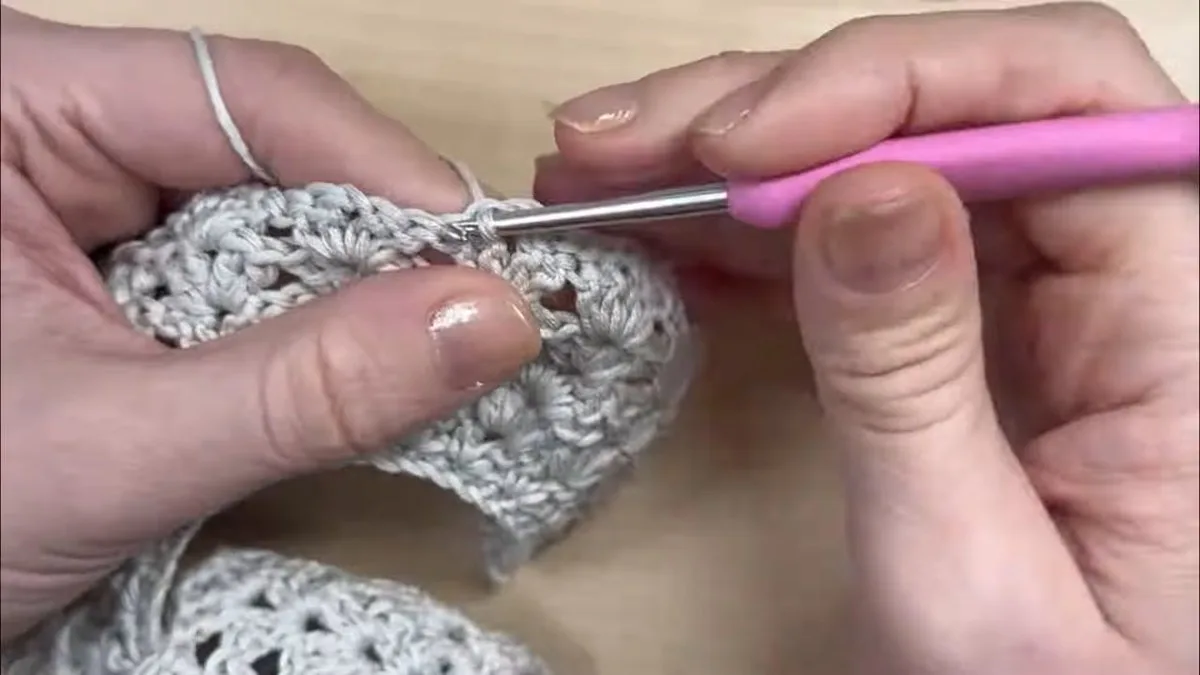
Chain 1 and turn. Slip stitch across 10 stitches, which skips 2 fans. In the last slip stitch make your false double crochet and work the double V fans across, leaving 2 fans unworked at the end. Work your last double crochet at the start of the fan you leave. We count 14 fans.
Step 10: Rows 8 to 12: slip stitch across 5 and leave 1 fan
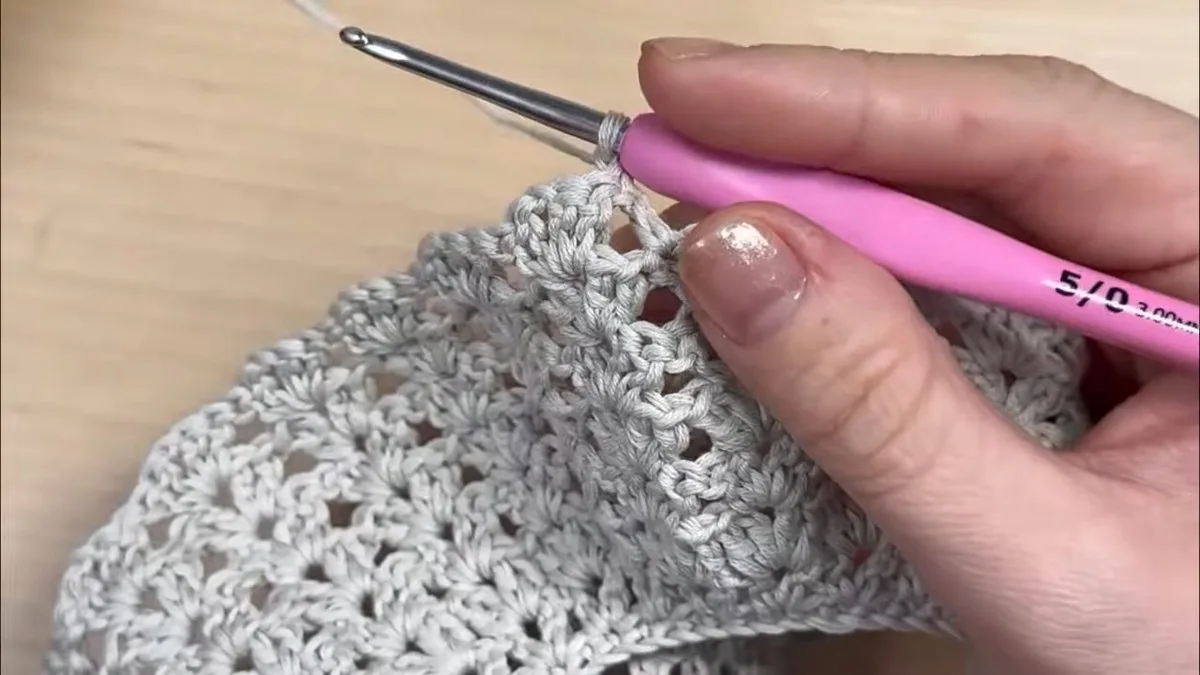
Row 8 starts with 5 slip stitches, skipping 1 fan, and ends with 1 fan left unworked. Rows 9 to 12 are the same as row 8. Count your fans after each row against our table, because every row loses 1 fan at each end. After row 12 you have 4 fans left, and the bib already looks like a curved collar.
Step 11: Row 13: work big fans of 8 double crochets
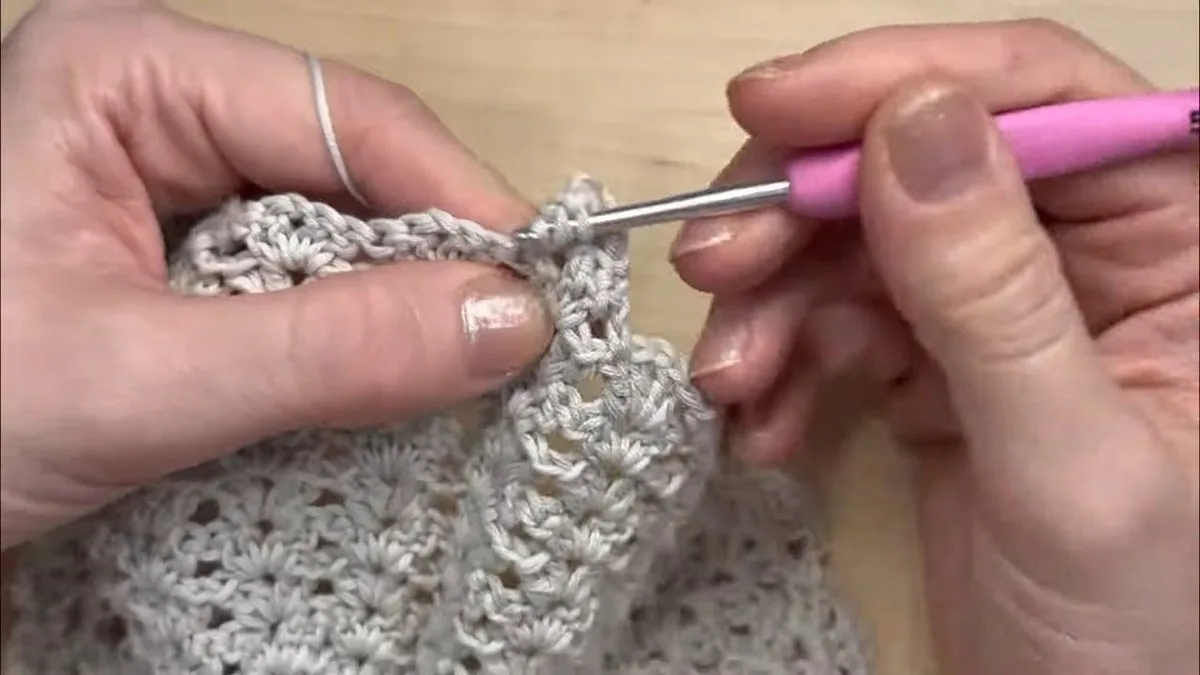
Now the shell border begins. Work in the chain-1 spaces of the last row and make 8 double crochets in each space. This is a big fan. Count to 8 aloud for the first few fans, because it is easy to lose count. The designer keeps going in this way across the work until she reaches the edge.
Step 12: Work 10 single crochets along the straight edge
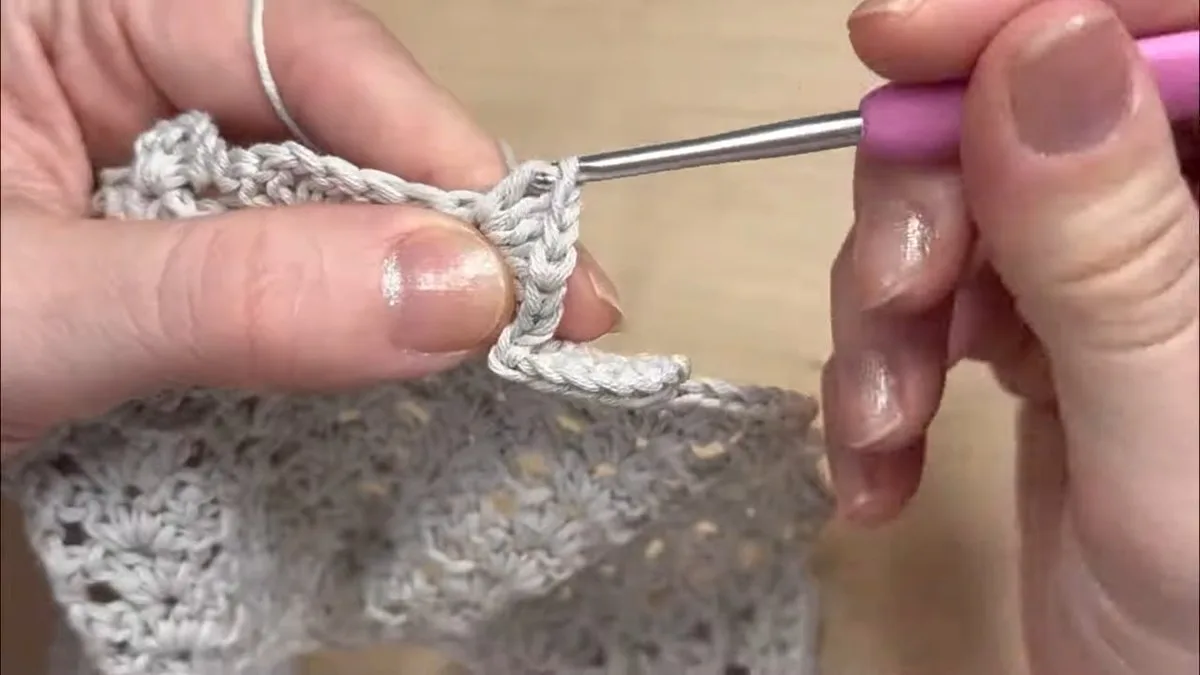
At the side edge work single crochets so the border runs straight. In each double crochet make 2 single crochets, in each false double crochet space make 1 single crochet, and in the chain make 1. The designer ends with 10 single crochets along this edge in all. Count them: 10 is the number that keeps the edge neat.
Step 13: Lay the bib flat and check the shape
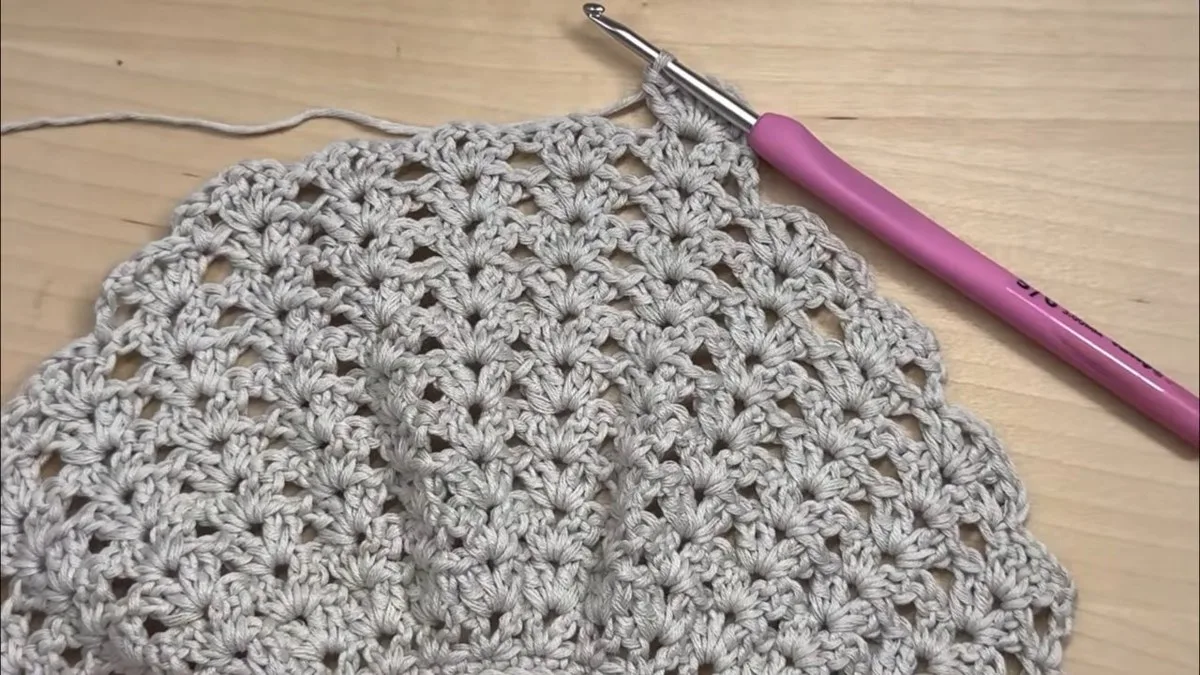
Before you add the ties, lay the work flat. It should form a half circle with fans around the curve and a straight side where you will work the ties. If one side is longer, count the fans on each side before you go on.
Step 14: Make the first tie: chain 41
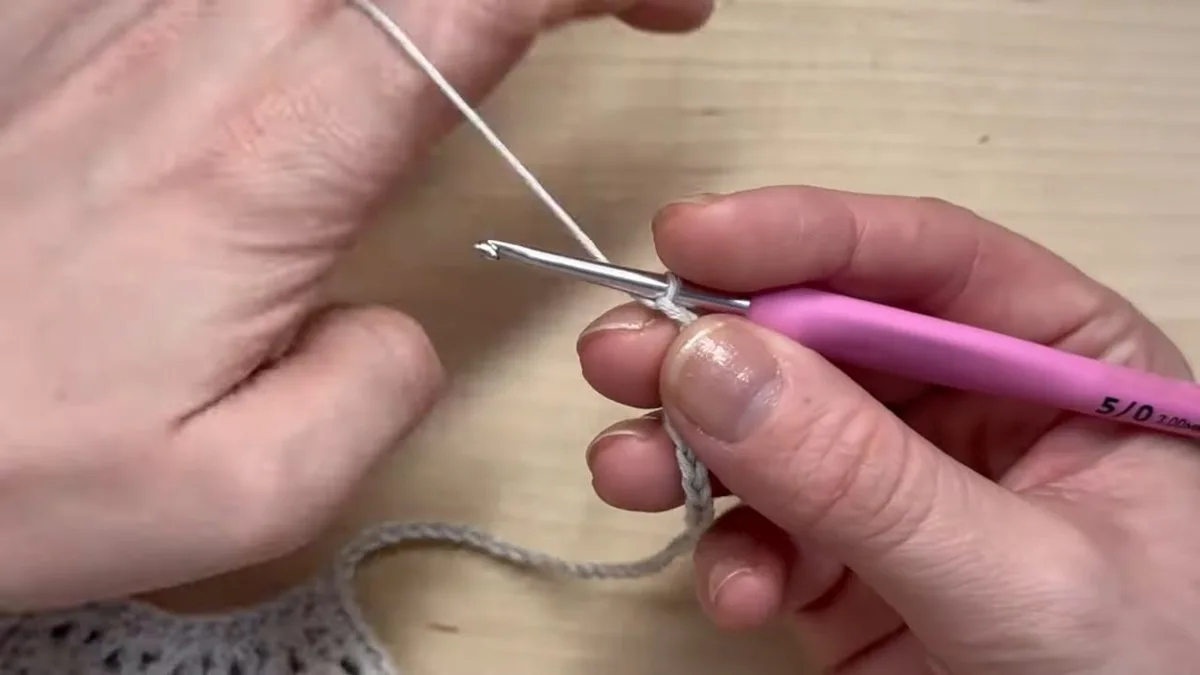
At the corner of the straight edge, chain 41 for the grey bib. The pink bib in the sample has a longer tie of 51 chains. The designer tries the shorter tie on the grey bib to see how it hangs. Pick the length that suits your baby and your idea of how the bow should look.
Step 15: Work single crochets back along the tie

Make a single crochet in the second chain from the hook and another single crochet in each chain back to the bib. For a chain of 41 you work 40 single crochets. This turns the chain into a firm, flat tie.
Step 16: Work single crochets along the neckline
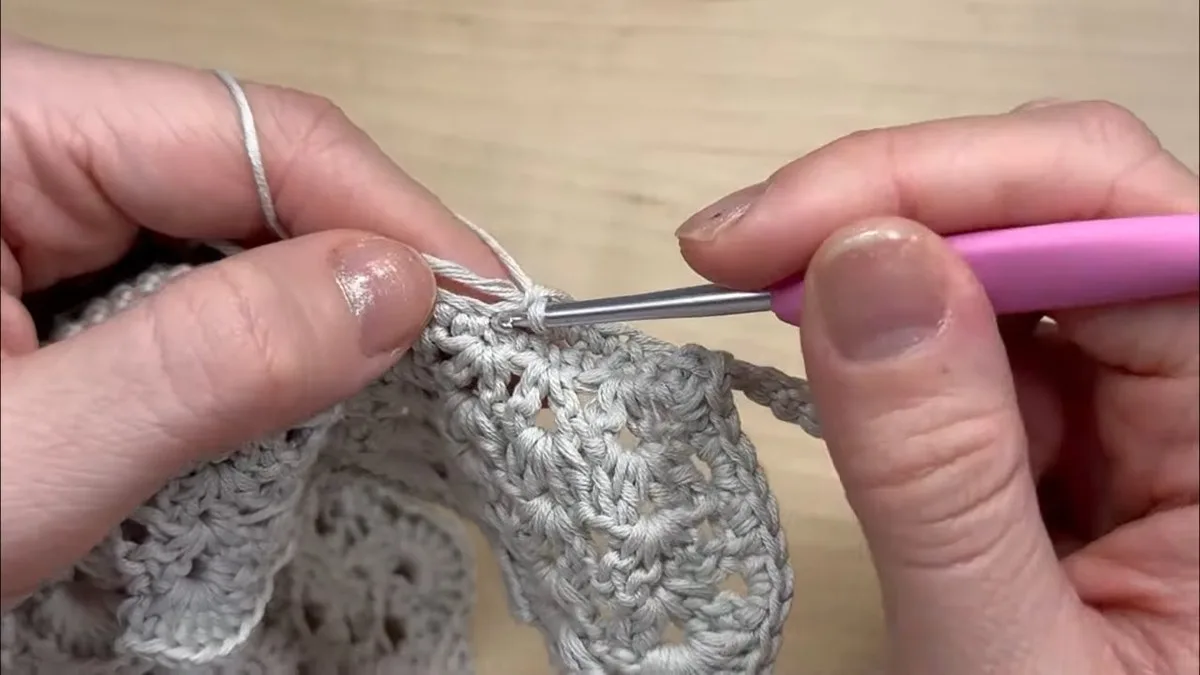
At the end of the tie, work 1 single crochet where the chain started, then go along the neck edge with single crochets, working each one in line with the stitches of the first row. While you do this, work over the starting tail so it is hidden as you go. Stop at the other end of the neck edge.
Step 17: Make the second tie and the second straight edge
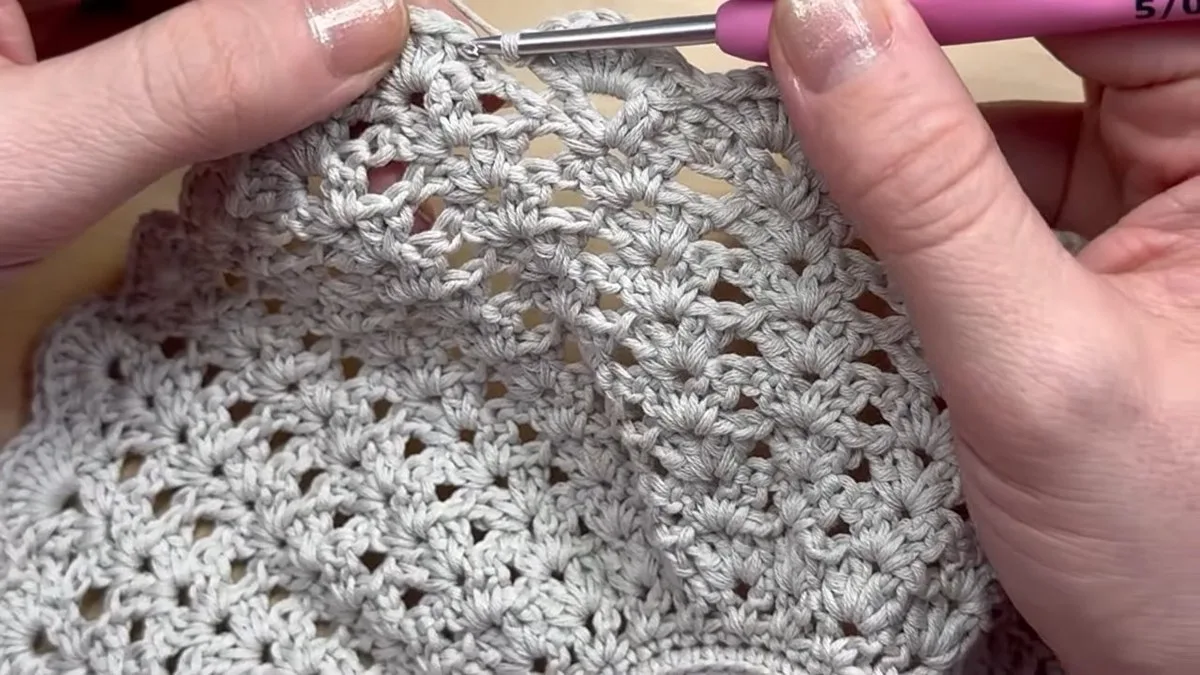
At the other end chain 41 again and work 40 single crochets back along it, as before. On the straight edge work 10 single crochets, with 2 in each double crochet and 1 in each false double crochet space. Then repeat the big fans of 8 double crochets in the spaces of the V stitches until you have fans all around.
Step 18: Close the round with a slip stitch
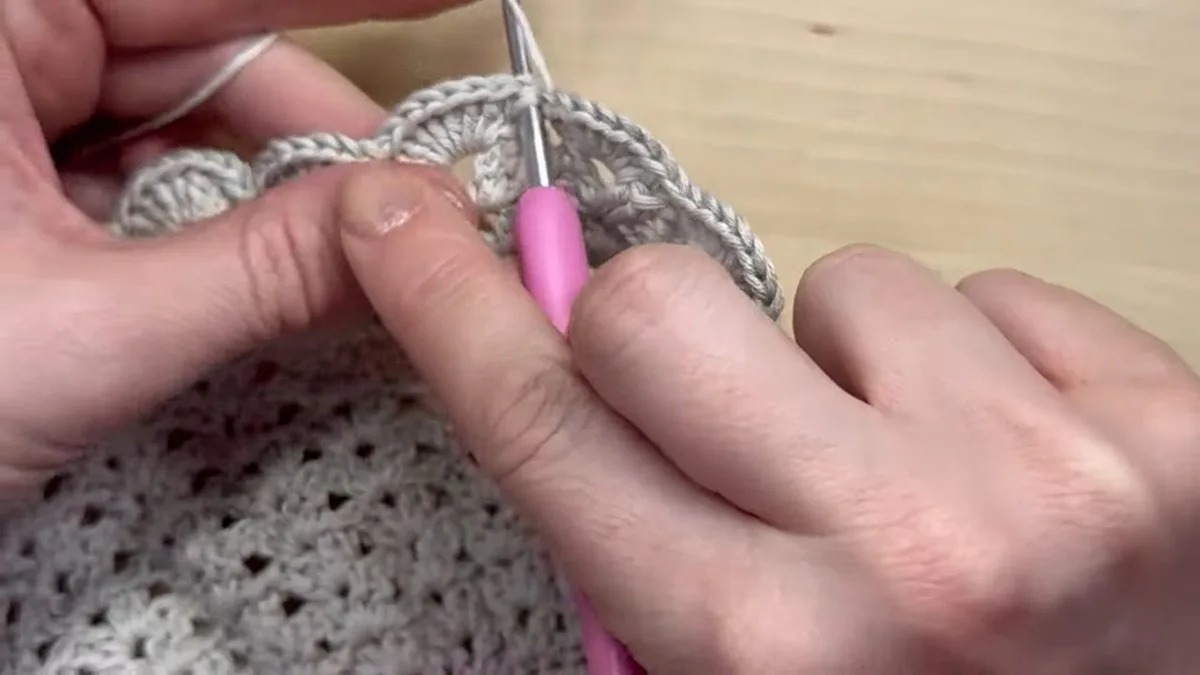
At the end of the round slip stitch into the first double crochet, which is the third chain of the false double crochet. Do this step carefully and check that you slip stitch into the right stitch. Chain 1, cut the yarn, leaving a tail a little long, and pull it through the loop.
Step 19: Weave in the ends
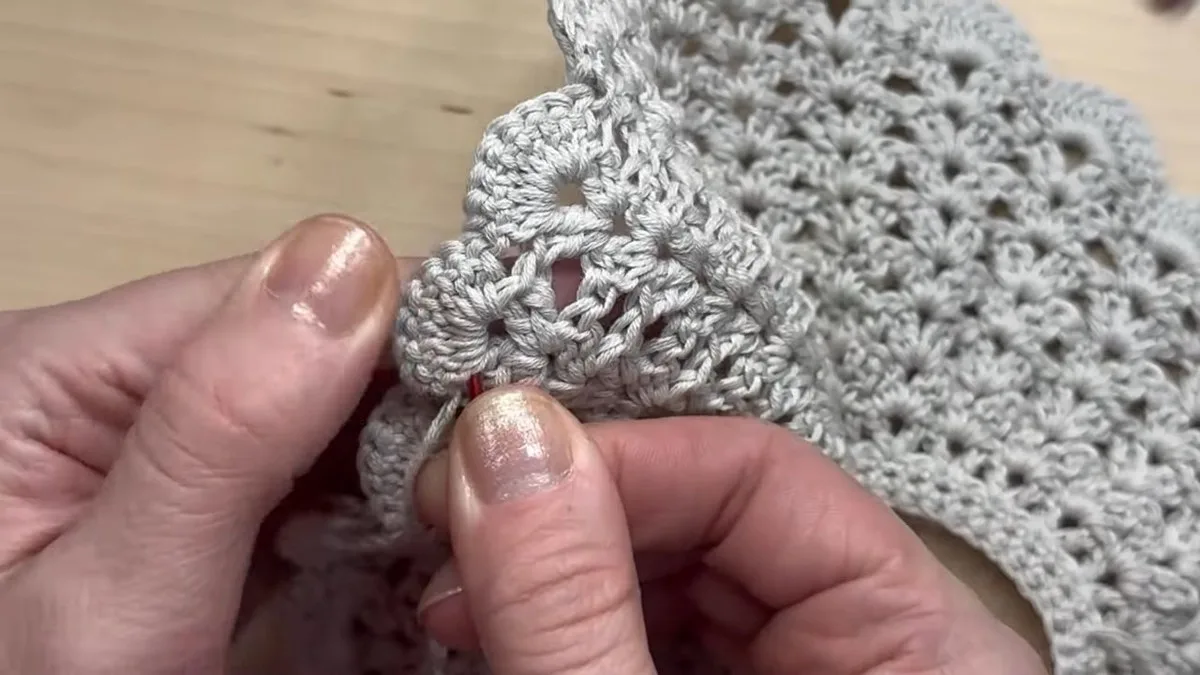
Thread the tail on a yarn needle and weave it through the stitches on the wrong side. Go through the body of the stitches without pulling, so the front does not distort. Cut the tail close. The starting tail was hidden while you worked the neckline, so you may only have one end to weave in.
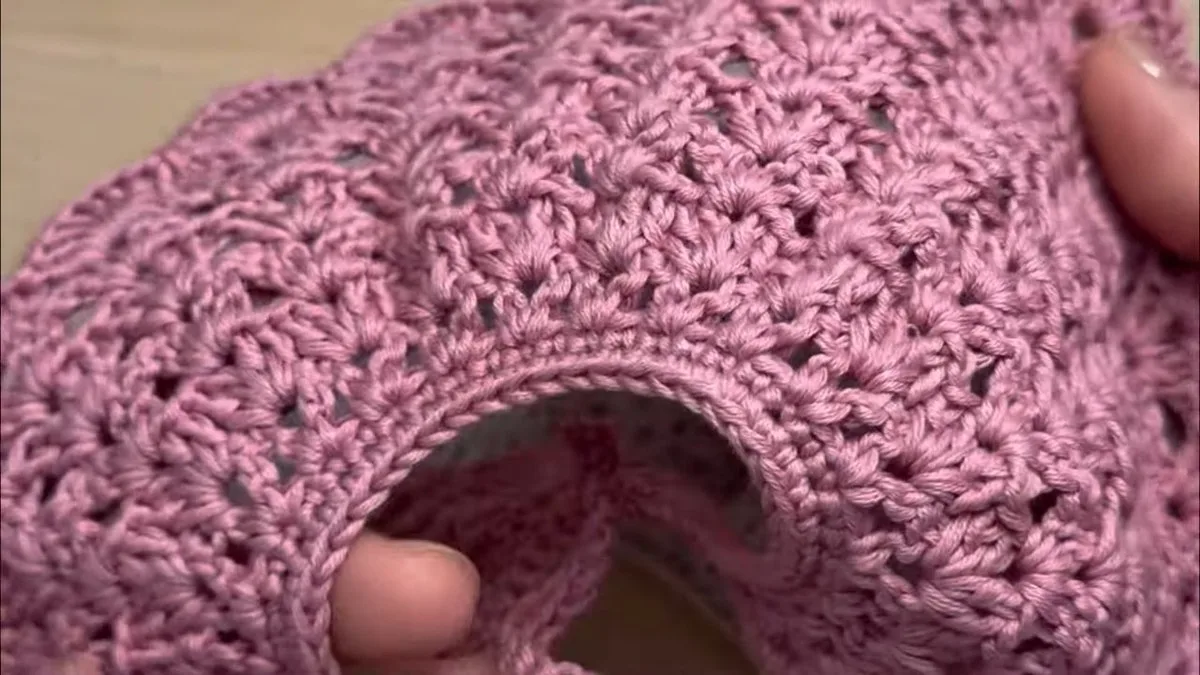
You can make the bib in any soft colour. The designer says you can use neutral tones, pastels or a mix of colours for a special finish. Work the edge in a second colour if you like; the sample is one colour from edge to edge.
Mistakes When You Crochet a Baby Bib
Counting the chain-1 spaces wrong
Rows 3 to 5 depend on working into the chain-1 spaces, not into the stitches. If you work into the stitches by mistake, the fans will not sit on top of each other and the bib will pull to one side. Mark the first space with a stitch marker and compare your count with the table above after each row.
Uneven shaping at the two ends
Rows 6 to 12 lose fans at both ends, the same number on each side. If you leave 4 fans at the end in row 6 but skip only 3 at the start, the neckline will tilt. Count the fans you skip at the start and the fans you leave at the end, and write the numbers on a scrap of paper: 4 and 4, 2 and 2, then 1 and 1 for rows 8 to 12.
A wavy or tight shell edge
The big fans of 8 double crochets can ruffle or cup if you work them tightly. Keep the same tension as the rest of the bib, count 8 in every space and check that the fans lie flat. The same goes for the ends: no stitch should look distorted after you weave them in.
Tie Safety on a Crochet Baby Bib
This bib closes with two ties, so it is worth thinking about how it will be used. The Nemours KidsHealth page on strangulation and entrapment says: “Remove your infant’s bib before naptime and bedtime.” The same page advises against drawstrings on young children’s clothes. It does not rule on crochet bibs, and the federal drawstring page we read covers outerwear for older children, so we make no claim about a rule that covers bib ties.
- Take the bib off for naps and for bedtime, and never leave a baby unattended in it.
- Keep the ties as short as will still make a bow; the sample shows two lengths, 41 chains and 51 chains, so you can choose the shorter one.
Crochet Baby Bib Patterns Compared
This bib is a round, shell-edged design. If you want a plainer or faster bib, here are four other free patterns we read, with only what each page prints.
| Pattern | Yarn | Hook | Notes | Source |
|---|---|---|---|---|
| Crochet Baby Bib with fan edge (this guide) | DMC Natura Just Cotton, 50 g | 3 mm | Newborn to 6 months; ties of 41 or 51 chains | The designer |
| Handicrafter Cotton Bibs and Booties | Bernat Handicrafter Cotton | Only in the PDF | Single size, newborn to 6 months; free download | Bernat |
| Blossom Bib | Coats Creme de la Creme cotton | Only in the PDF | Flower on the bib and one 3/4 in button | Red Heart |
| Owl Bib | Lion Brand Cotton-Ease | Not printed | Single crochet; 16 stitches to 4 in; a cotton blend, not pure cotton | Lion Brand |
| Baby Bib (6 months plus size) | Bernat Handicrafter Cotton | 5 mm | Two ties of 36 chains; for 6 months and older, not a newborn | Oombawka Design Crochet |
What the sources leave out: none of the four pages we read prints a width and length in inches for a newborn bib, and none gives a yardage on the page itself. That is why this guide offers no size table: measure your own baby’s neck and check the fit before you gift it. For the same reason we do not give a yardage; buy a little more than one ball if you plan to make a pair.
Crochet Baby Bib FAQ
What size is this crochet baby bib?
The designer says it is for a newborn up to a baby of 6 months. She gives no width, length or neck measurement, so we print none. Lay the finished bib flat, measure the neck opening and compare it with your baby, and make the ties longer if you need more room.
What yarn is best for a crochet baby bib?
A cotton yarn is the usual choice because it is soft, absorbent and can be washed often. The sample uses DMC Natura Just Cotton with a 3 mm hook. If you pick another cotton, swatch a few rows of the V stitch and check that the fabric is soft and not stiff, and read the ball band for care.
Is this a beginner crochet baby bib pattern?
It suits a confident beginner. You need chain, single crochet, double crochet and slip stitch, and you have to count spaces. The V stitches in rows 2 to 5 are repeats of one move, and the shaping is a row of slip stitches, so there is nothing harder than counting.
How many rows does the crochet baby bib have?
The strip has 12 rows, and the border is a thirteenth round of big fans with the ties and the single crochet edging. Row 1 is the single crochet foundation, row 2 is the V stitches, rows 3 to 5 are double V fans, and rows 6 to 12 are the shaping rows.
Are the ties on a baby bib safe?
Remove an infant’s bib before naps and bedtime, as Nemours KidsHealth advises, and never leave a baby alone in it. Keep the ties short, and choose the 41-chain tie over the 51-chain one if you want it shorter. We found no rule on bib ties specifically, so use your own judgement.
Can I make the crochet baby bib in other colours?
Yes. The sample shows pale grey and dusty pink, and the designer says neutral tones, pastels or a mix of colours all work. If you change colours, do it at the start of a row, and weave the ends in as you go if you can.
Other Free Baby Makes to Pair With This Bib
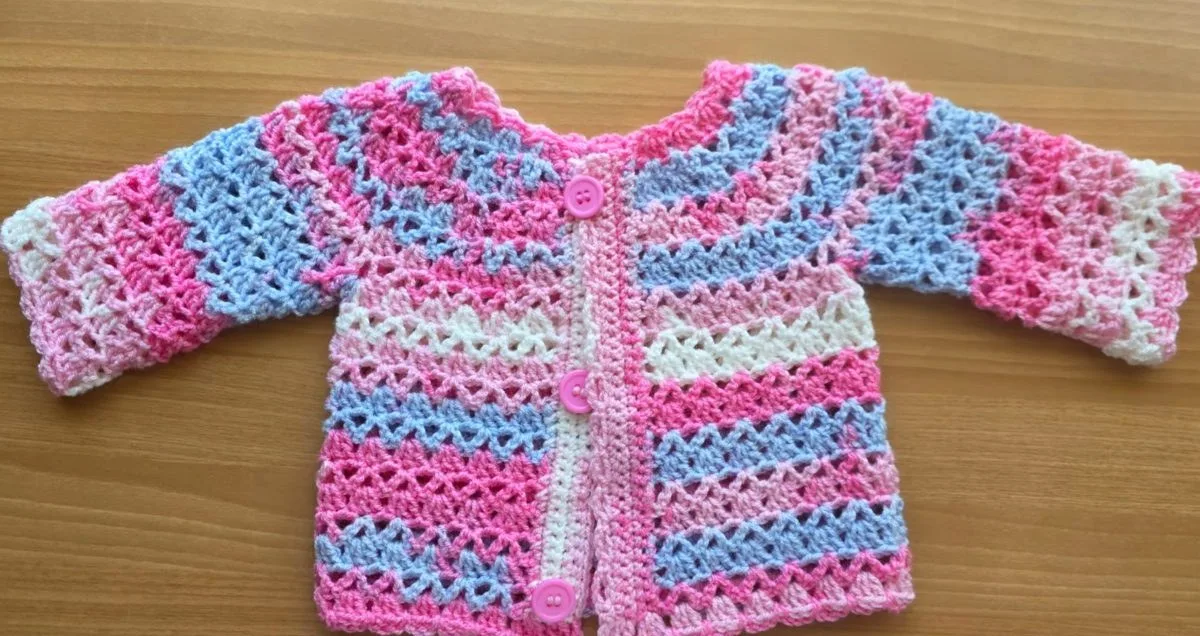
A bib looks lovely beside a matching set. Our crochet baby cardigan gives you a layer for the same newborn, the free crochet baby shoes pattern gives you a tiny pair to go with it, and the crochet baby hat finishes the set. Browse all baby clothes on the site.
Sources
- Yarnspirations, Bernat Handicrafter Cotton Bibs and Booties
- Yarnspirations, Red Heart Blossom Bib
- Lion Brand, Owl Bib
- Oombawka Design Crochet, Baby Bib 6 months plus size
- Nemours KidsHealth, Preventing Strangulation and Entrapment
- Craft Yarn Council, yarn weight system
Pattern credit: this bib design comes from the crochet channel Diy Ter.