Crochet Chenille Bear: Easy Gift to Make in 21 Steps
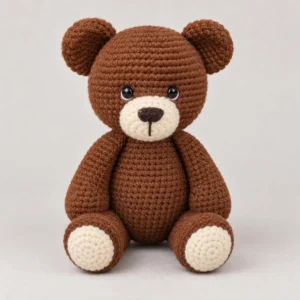
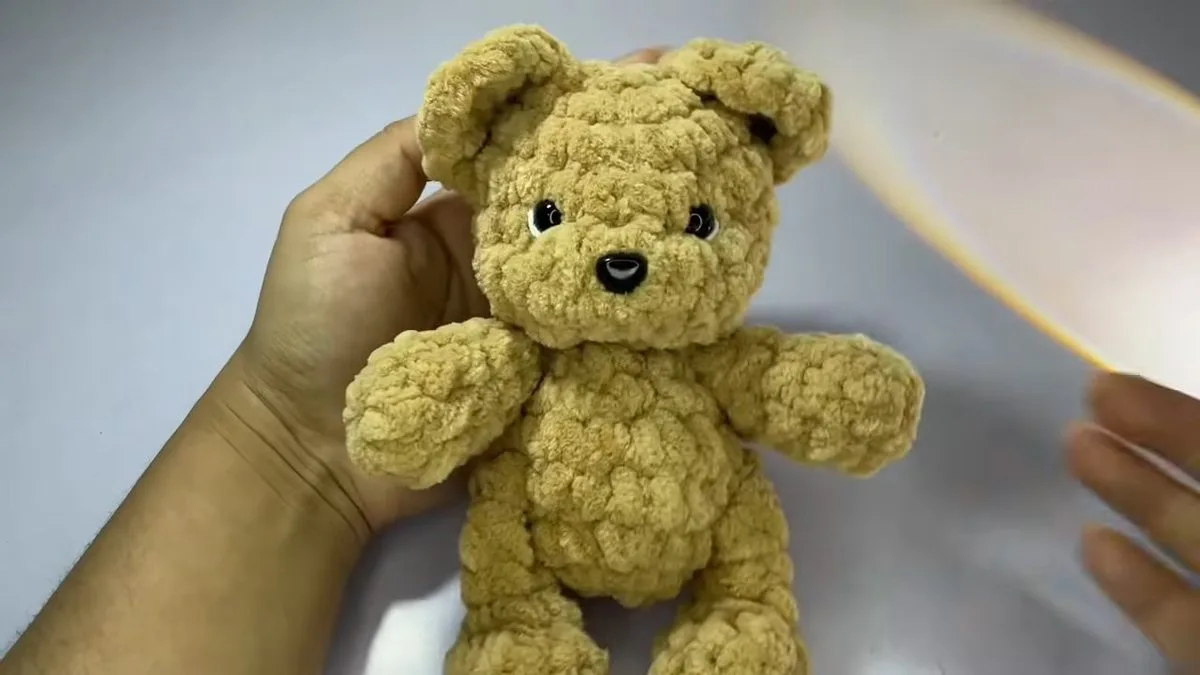
A crochet chenille bear is a small, huggable teddy worked in soft chenille yarn, and this one comes out about 18 cm (7 inches) tall with a 6 mm hook and a 7 mm yarn. It is all single crochet, increases and decreases in the round, so there is nothing fancy to learn, which makes it an easy gift to make for a child or a friend. Below you get every round in order, a photo for each of 21 steps, a size table, and a clear list of what goes wrong with chenille and how to fix it.
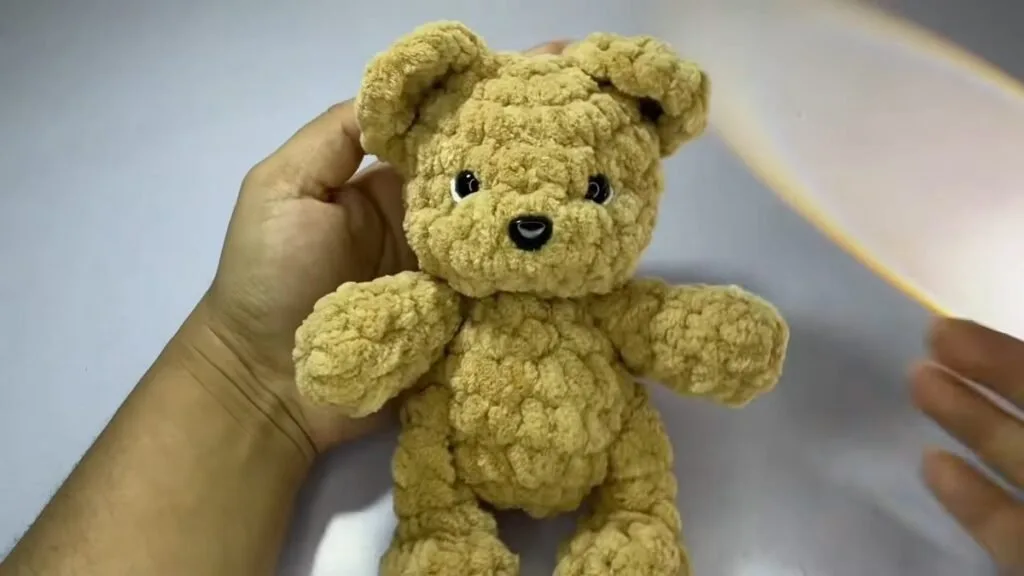
What makes this crochet chenille bear different: the head is one round ball with eyes set in at round 4, the body is a small tube, and the arms, legs and ears are sewn on afterwards. The creator says it is fast to make, and the stitch counts are low because the yarn is so thick. A few numbers are not spoken, so we worked them out and mark them as ours.
- Crochet Chenille Bear Pattern at a Glance
- Yarn and Hook for the Crochet Chenille Bear
- Crochet Chenille Bear Size and Yarn Amount
- Crochet Chenille Bear Head: Steps 1 to 11
- Crochet Chenille Bear Body, Legs, Arms and Ears: Steps 12 to 17
- Sewing the Crochet Chenille Bear Together: Steps 18 to 21
- Where a Crochet Chenille Bear Goes Wrong
- Four More Free Crochet Chenille Bear Patterns
- Safety Eyes and the Crochet Chenille Bear
- Crochet Chenille Bear FAQ
- Soft Toys and Baby Gifts to Make After Your Bear
Crochet Chenille Bear Pattern at a Glance
The crochet chenille bear has five crocheted parts: a head, a body, two legs, two arms and two ears. Everything is worked in single crochet except the face, which you finish with a little embroidery. Here is the short version before the photos.
| Part | What you work | Stitches by round |
|---|---|---|
| Head, rounds 1 to 8 | Magic ring, increases, a few decreases, eyes and nose set in, stuffed before the last round | 7, 14, 21, 21, 21, 21, 11, 6 |
| Body, rounds 1 to 7 | Magic ring, increases to 21, then decreases | 6, 12, 18, 21, 14, 14, 10 |
| Leg (make 2) | Magic ring, increases, 6 decreases, three even rounds, folded and closed | 6, 12, 6, 6, 6, 6, then 3 |
| Arm (make 2) | Magic ring and four rounds of 8, then a decrease round | 8, 8, 8, 8, 6 |
| Ear (make 2) | Magic ring of 4, turn, increase, then a short last row | 4, 8, 5 |
Stitch multiple: the head is built on a multiple of 7. Round 1 has 7 stitches, round 2 doubles it to 14 and round 3 reaches 21, so every plain round of the head should read 21. If a round does not, find the spot where you dropped or added a stitch before you go on.
Stitches used: magic ring, chain (ch), slip stitch (sl st), single crochet (sc), increase (two sc in one stitch), decrease (two sc worked together) and an increase worked in the front loop only. Each round after the first starts with a chain 1 that does not count as a stitch.
Yarn and Hook for the Crochet Chenille Bear
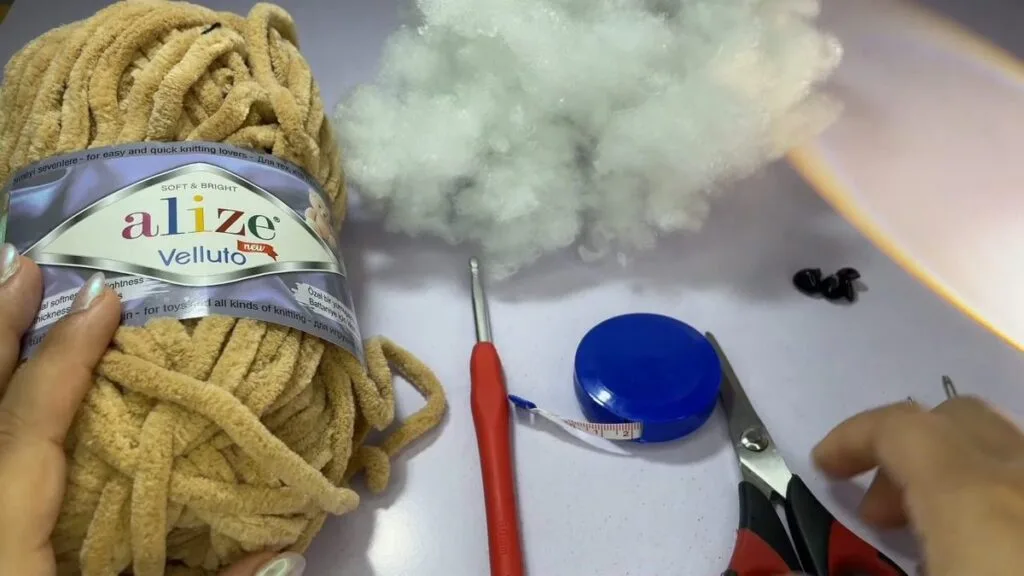
The creator uses a chenille yarn about 7 mm thick (a 100 g ball of Alize Velluto), a 6 mm crochet hook, scissors, a tape measure, stuffing and stitch markers. The eyes are 10 mm safety eyes and the nose is an 11 mm safety nose, and she also keeps a short strip of white yarn and one of black yarn for the face. She used about 60 to 70 g of the 100 g ball, so one ball is enough for a crochet chenille bear with some left over.
A correction worth knowing: a 6 mm hook is below the Craft Yarn Council range for any bulky yarn, which is 6.5 to 9 mm for bulky and 9 to 15 mm for super bulky. That is normal for toys: a smaller hook gives a tight fabric so the stuffing does not show. The free bears we compared use 4, 5, 5.5 and 8 mm hooks, so treat the table of other bears below as a guide and swatch your own yarn.
| Item | Size or amount |
|---|---|
| Chenille yarn | 7 mm thick, 60 to 70 g used from a 100 g ball |
| Crochet hook | 6 mm |
| Safety eyes and nose | 10 mm eyes, 11 mm nose (or embroider them for a small child) |
| Extras | Stuffing, scissors, tape measure, white and black yarn, stitch markers |
The creator’s tip for fuzzy yarn is to use a stitch marker in the first stitch of every round, because chenille hides the stitches. She also closes the magic ring almost completely before working into it, since this yarn resists a tight ring.
Crochet Chenille Bear Size and Yarn Amount
The size of a crochet chenille bear depends on the yarn and the hook, not on the stitch counts. The creator made the same pattern twice to show it: once in the thick yarn, and once in a thinner 4 mm yarn with a 3.5 mm hook.
| Yarn and hook | Finished height | What it is good for |
|---|---|---|
| 7 mm chenille, 6 mm hook | 18 cm (7.1 in) | The main bear in this pattern |
| 4 mm yarn, 3.5 mm hook | 12 cm (4.7 in) | The same pattern as a keyring-size bear |
Yarn amount: by our count the finished bear has 417 stitches: 122 in the head, 95 in the body, 90 in the two legs, 76 in the two arms and 34 in the two ears. Divide that by the 60 to 70 g the creator says she used and you get about 6 to 7 stitches per gram of this chenille. That is our arithmetic, not a measured figure, and the creator gives no yardage, so we do not either. If your yarn is thinner, expect a smaller bear and a lower weight.
The designers we compared agree that you must keep the hook small. One of them uses a hook smaller than the label so the fabric is tight, and another notes that single-ply yarn can break when you close the head, which is why a gentle hand matters.
Crochet Chenille Bear Head: Steps 1 to 11
Work this crochet chenille bear in a spiral and mark the first stitch of every round. The creator also joins each round with a slip stitch and chains 1, which is easier to read in fuzzy yarn. The photos show the head as it grows so you can compare your own.
Step 1: Make a magic ring and 7 single crochet
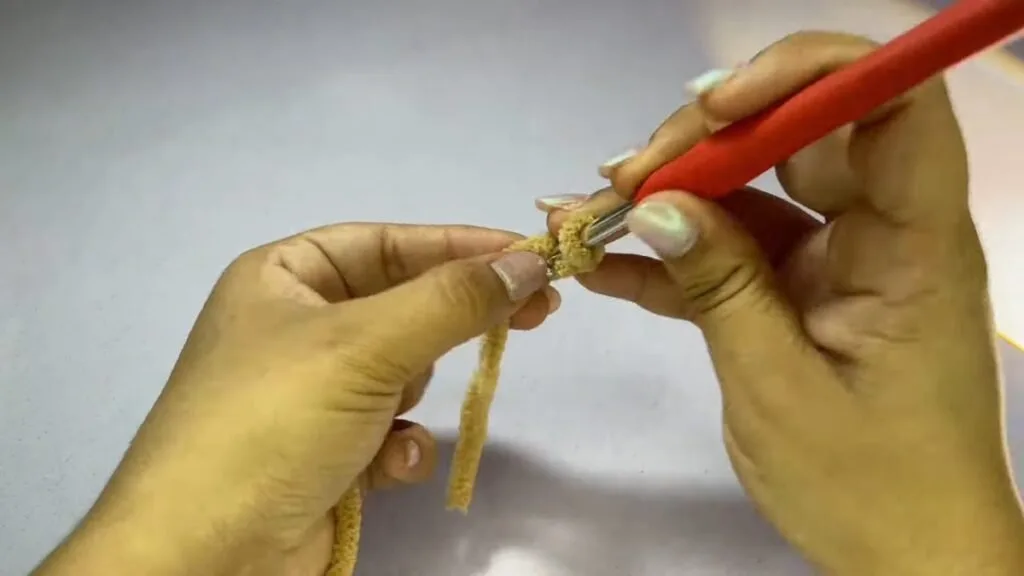
Make a magic ring and work 7 single crochet into it. With chenille, close the ring almost all the way first, because this yarn is slippery and hard to pull tight. Then pull the tail to close the ring completely and slip stitch into the first single crochet. A stitch marker in that first stitch will save you a lot of searching later.
Step 2: Rounds 2 to 4: 14, 21 and 21 stitches
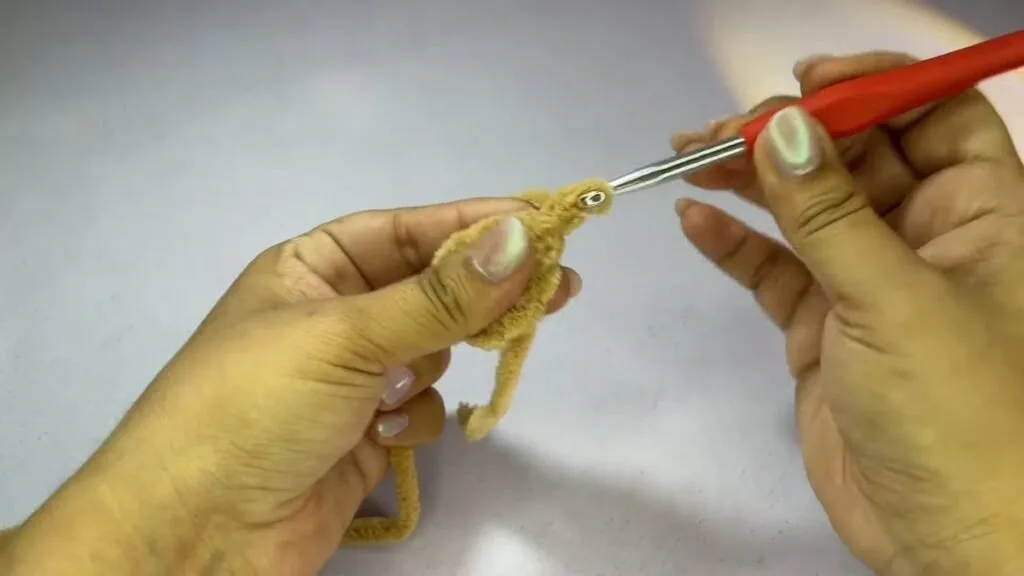
Round 2: chain 1 and work an increase (2 single crochet) in each of the 7 stitches to make 14. Round 3: single crochet in one stitch, then an increase in the next, around the round, to reach 21. Round 4: one single crochet in each stitch for 21. Join with a slip stitch each time and count. The head should already look like a small ball.
Step 3: Round 5: decreases and front-loop increases
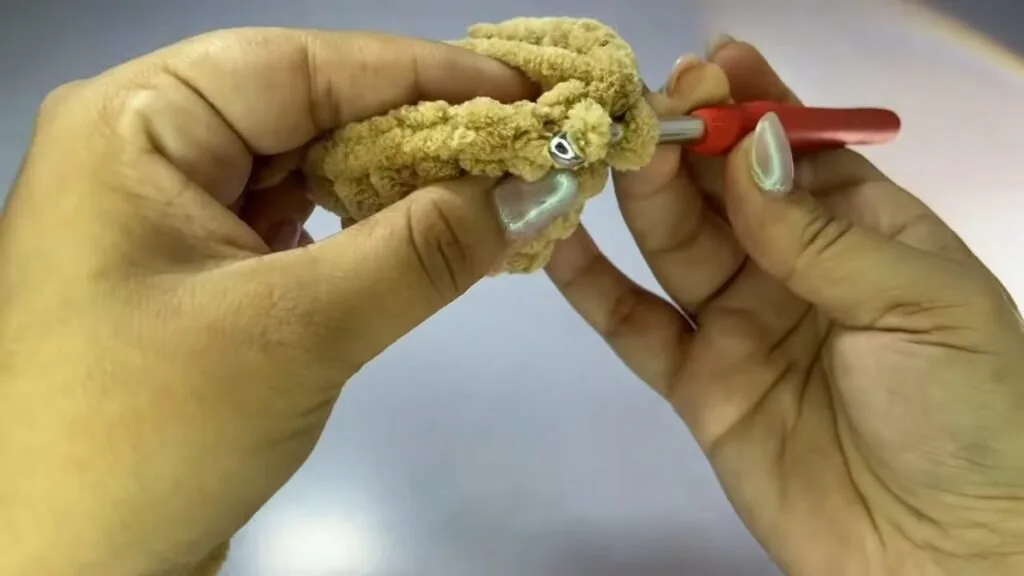
Work 2 single crochet, a decrease, 2 single crochet and another decrease. Then work 4 increases, but this time only into the front loop of each stitch. Finish with a normal decrease through both loops, 2 single crochet, one more decrease and 3 single crochet. Join, and the round still has 21 stitches. The front-loop increases push out a small ridge that becomes the muzzle.
Step 4: Round 6: 21 single crochet
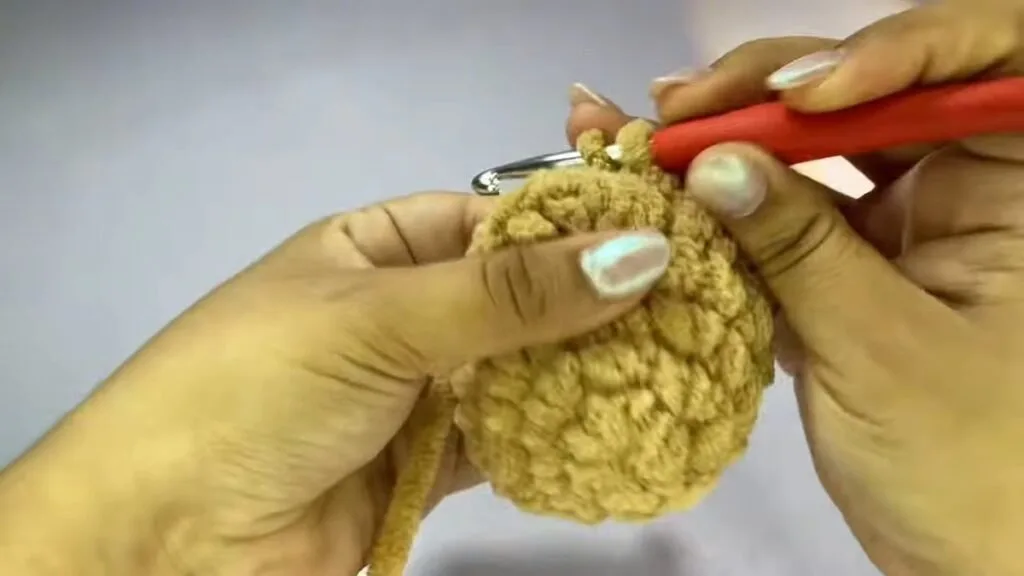
Work one single crochet in each of the 21 stitches and join. Count them aloud if you can, because the next step puts the face in place and a wrong count shifts the eyes. The creator counts every stitch of this round aloud, which is a good habit with a yarn that hides its stitches.
Step 5: Place the safety eyes at round 4
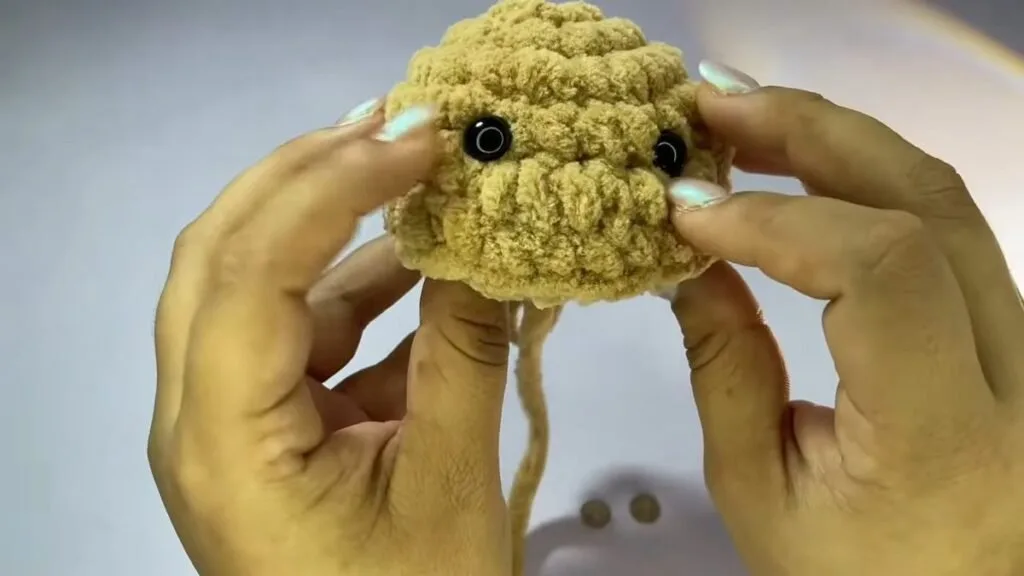
Count down to round 4 and push the first safety eye through the gap you choose. Leave 4 stitches between the eyes, so count one, two, three, four, and push the second eye through. Check that both sit in the middle of the 4 increases you made in round 5. Fix the backs on firmly. If a child under 3 will have the bear, embroider the eyes instead (see the safety section below).
Step 6: Place the nose between the eyes
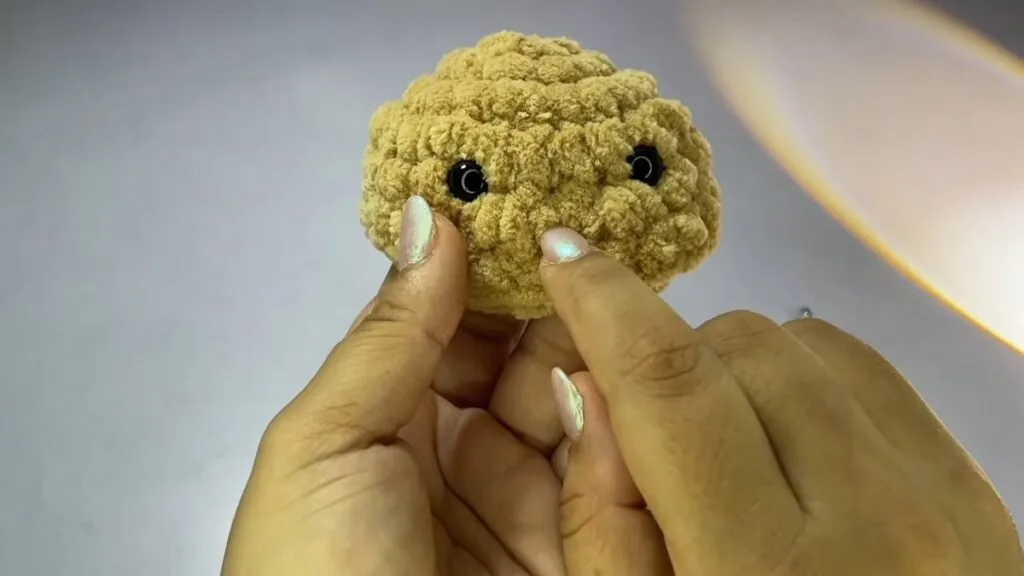
The nose goes in the middle of the face, between the eyes and a little lower, in the gap between two rounds. The creator counts from each eye (two stitches in from each side) to find the centre. Push the nose through and lock it. Step back and hold the head at arm’s length before you commit, because the eyes and nose set the whole expression of the bear.
Step 7: Round 7: ten decreases
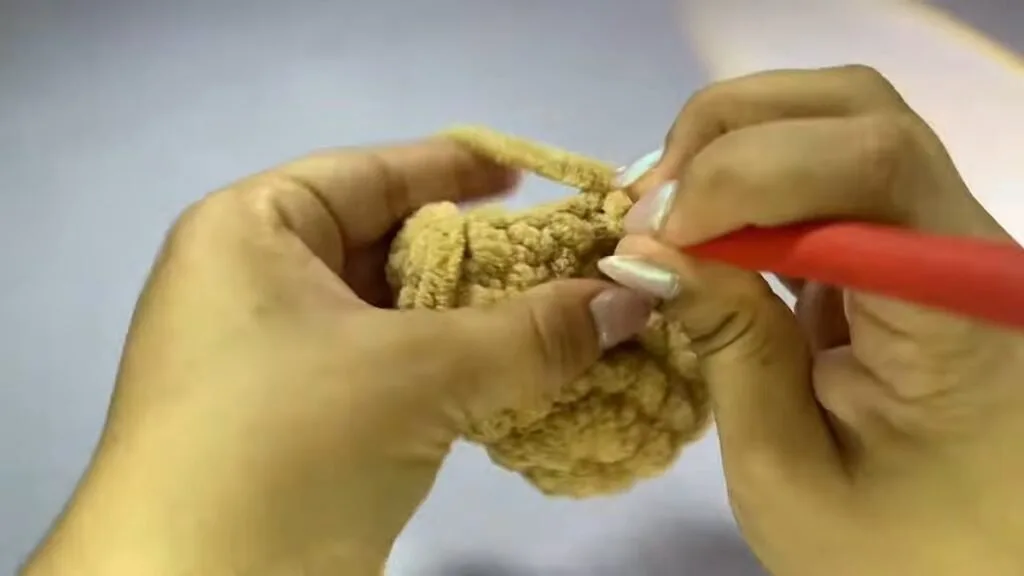
Chain 1, then work 10 decreases in a row around the round and 1 single crochet. Join with a slip stitch. You now have 11 stitches. Decreasing in chenille is fiddly, so go slowly and use the marker to see where each decrease sits.
Step 8: Stuff the head
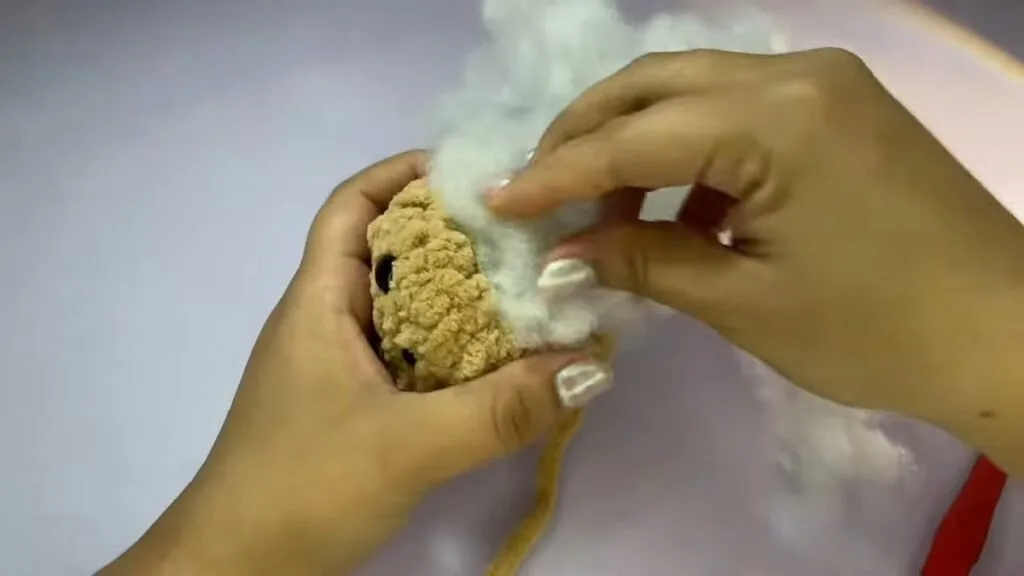
Fill the head now, while the opening is still wide enough to push stuffing in. Do not overstuff: chenille is thick and stretchy, and a head packed too hard gets a lumpy, stretched look. The head should feel firm but still give a little.
Step 9: Round 8: five decreases and close
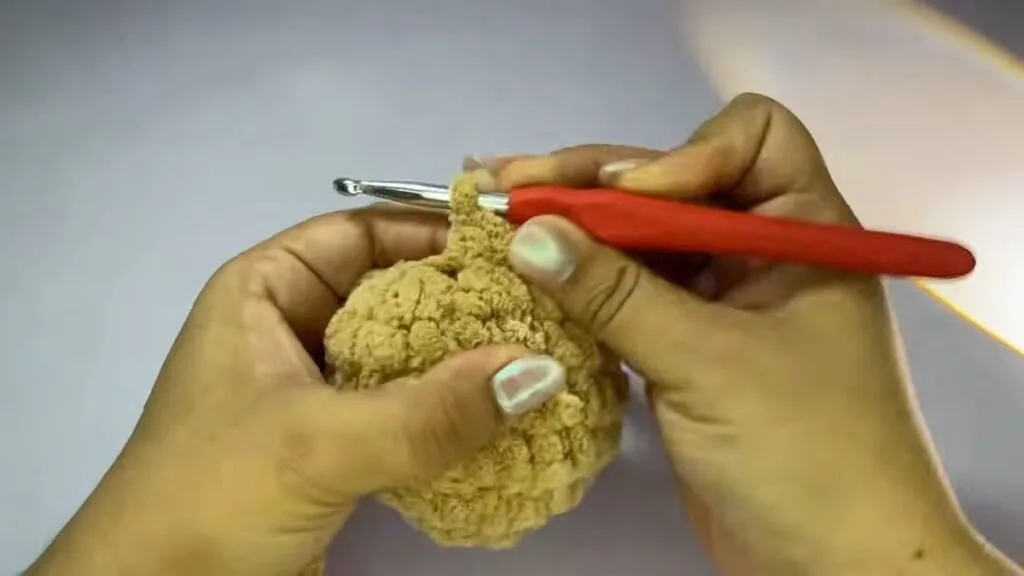
Work 5 decreases and 1 single crochet to leave 6 stitches, and join with a slip stitch. Cut a long tail and use it to close the opening: weave through the remaining stitches and pull tight. Keep the tail. The creator uses it for the next step, which gives the face its depth.
Step 10: Sew the face in for depth
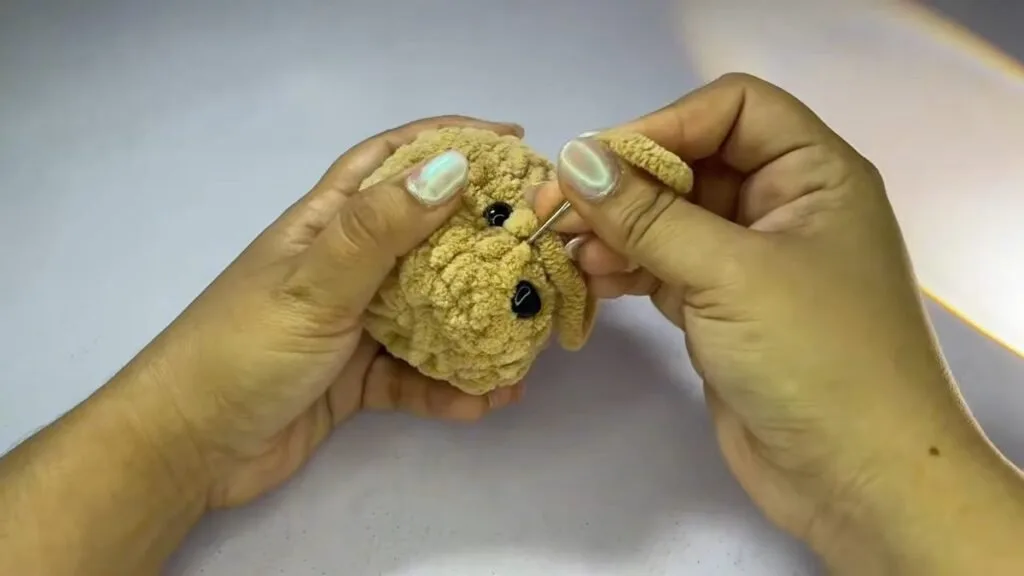
Thread the tail on a needle and go in at one eye and out below the nose, then in at the other eye and back out. Pull gently and tie a small knot. This pulls the face in a little so the eyes sit deeper. The creator says you can skip this step if you do not like the look.
Step 11: Add white highlights around the eyes
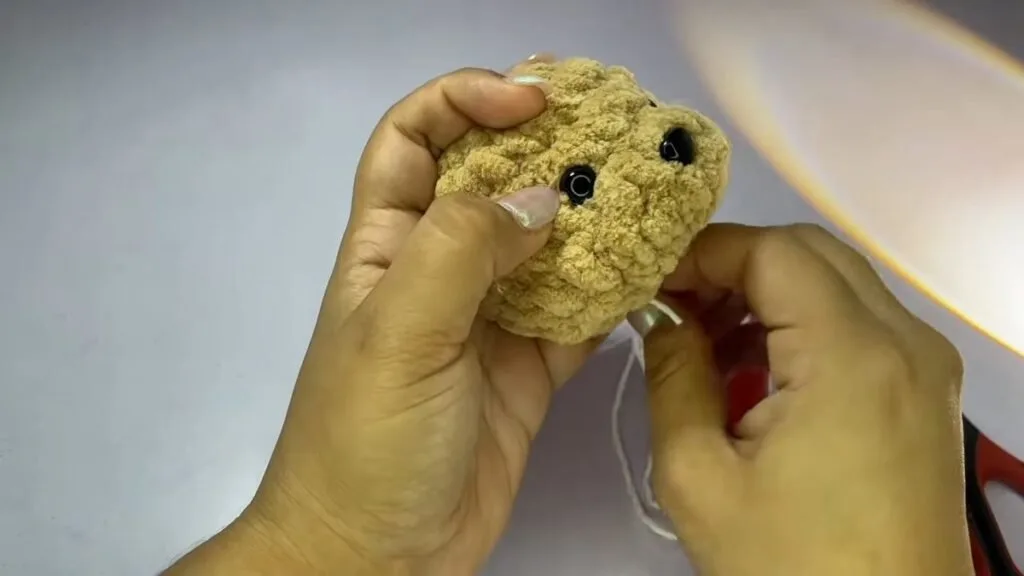
With a short piece of white yarn, make a tiny knot at the eye, go in under the stitches and come out at the side of the eye. Repeat on the other side. It is a small detail, but it gives the face a friendlier look. Cut the ends short and hide them inside.
Crochet Chenille Bear Body, Legs, Arms and Ears: Steps 12 to 17
The body is a short tube and the limbs are small tubes, which is why this crochet chenille bear comes together quickly. Count each round, and keep all the long tails for sewing.
Step 12: Body rounds 1 to 3: 6, 12 and 18
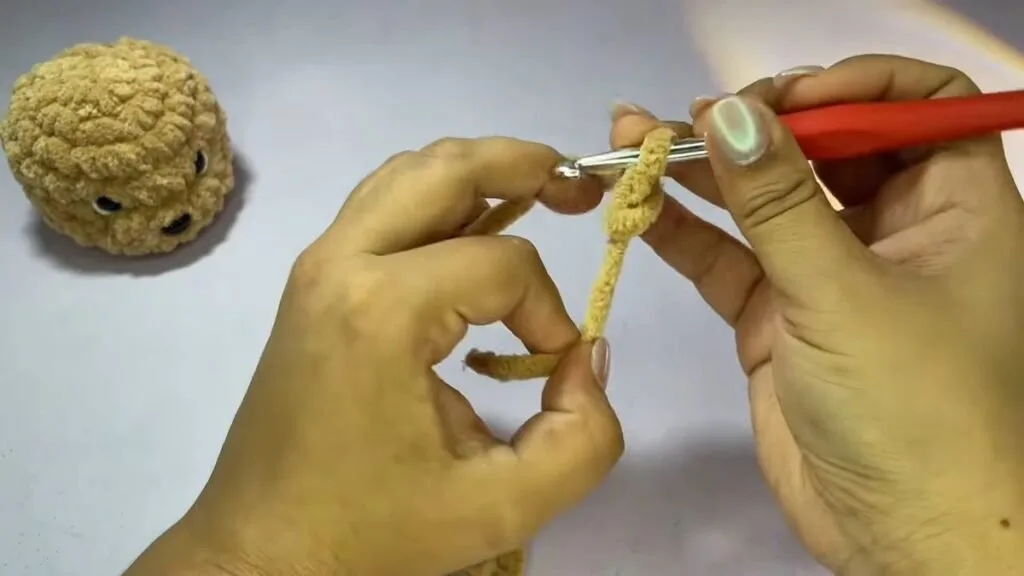
Make a magic ring with 6 single crochet. Round 2: one increase in each stitch for 12. Round 3: single crochet in one stitch, then an increase in the next, around, for 18. Join each round with a slip stitch and chain 1. The body is a small tube, so the counts stay low.
Step 13: Body rounds 4 to 7: shape the tummy
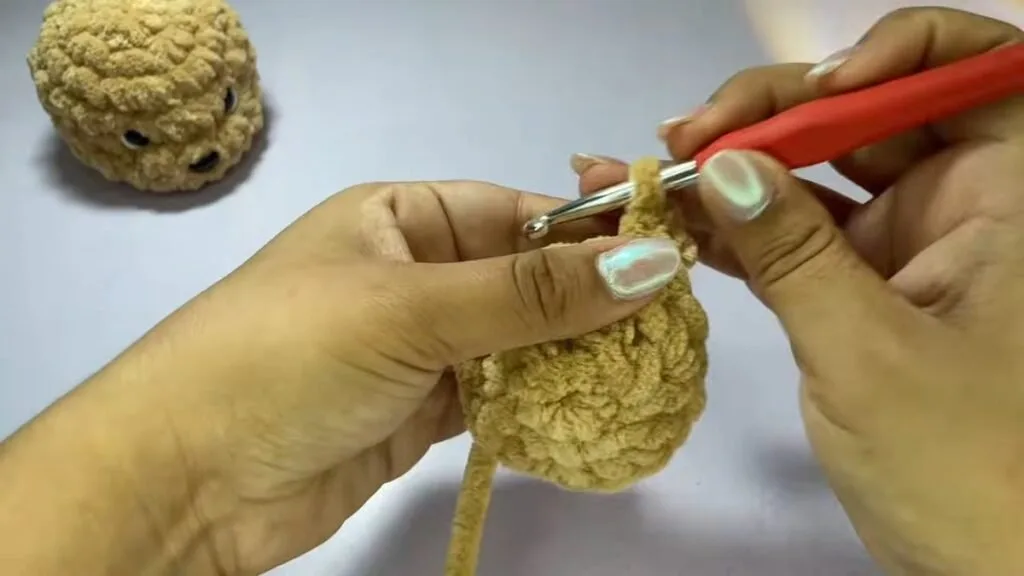
Round 4: 7 single crochet, 3 increases worked in the front loop only, then 8 single crochet, for 21 stitches. Round 5: single crochet, decrease, repeated around, for 14. Round 6: 14 single crochet. Round 7: single crochet and decrease four times, then 2 single crochet, which by our count leaves 10 stitches. Stuff lightly. The creator says she leaves the body softer so it stays long and not round, and cuts a long tail for sewing.
Step 14: Sew the body to the head
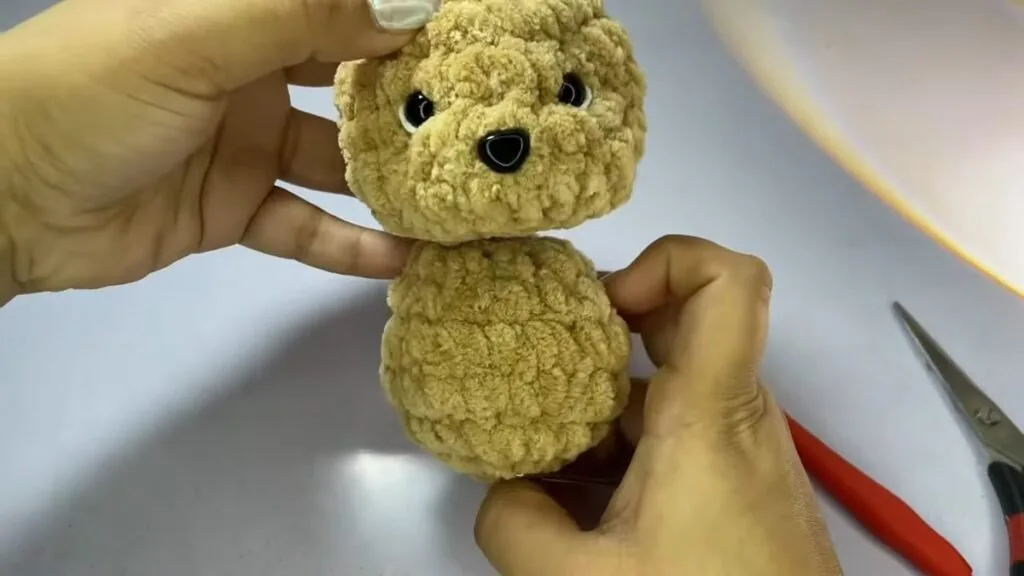
Place the body under the head and sew it on with the long tail, going round the base of the head and back through the body. Pull gently so the head sits straight. Knot the thread inside and hide the end. Before sewing, check which way the face looks, because the head cannot be turned once it is stitched.
Step 15: Make two legs
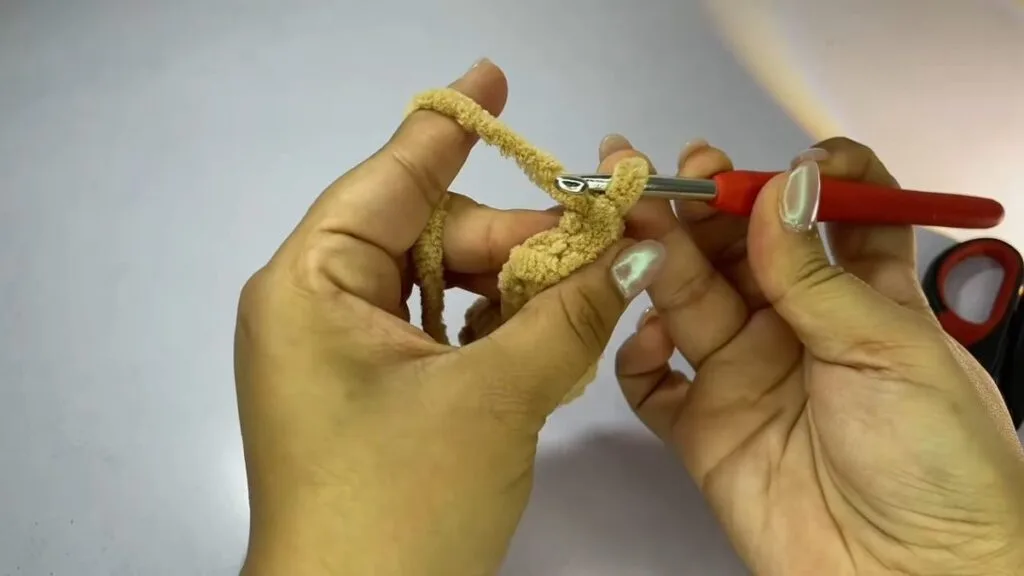
Make a magic ring with 6 single crochet, then increase in each stitch for 12. Work 6 decreases to get back to 6. Then work three rounds of 6 single crochet. Stuff the leg very lightly, only at the bottom, to give it a small foot. For the last round, fold the leg flat, chain 1 and single crochet through both layers; by our count that closes it in 3 stitches. Leave a long tail and make a second leg.
Step 16: Make two arms
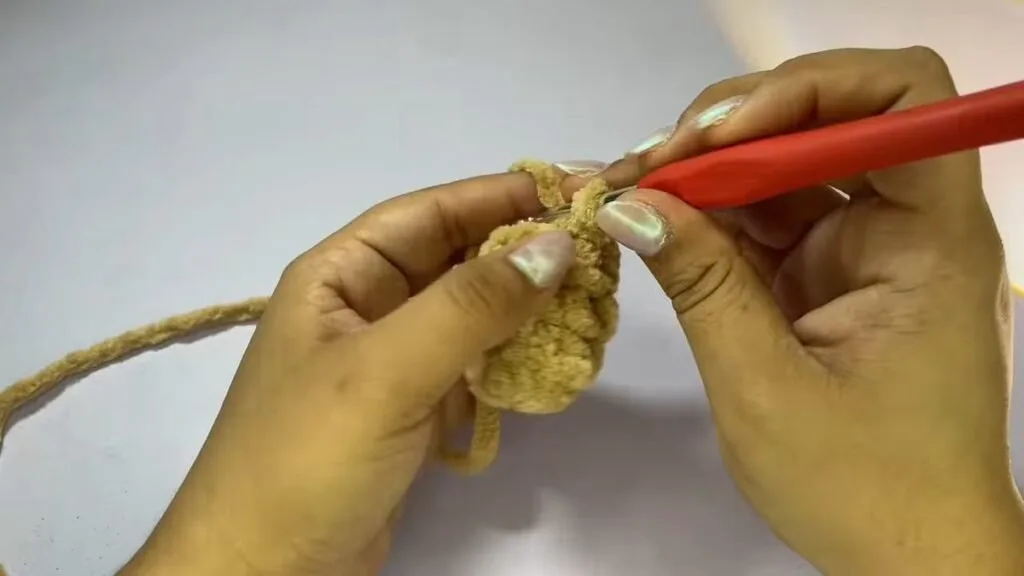
Make a magic ring with 8 single crochet and join. Then work rounds of 8 single crochet, four in all counting the ring round. The creator is a little loose about the number when she speaks, so we followed the round numbers she gives. Round 5: single crochet, decrease, single crochet, decrease, 2 single crochet, which leaves 6 stitches. Cut a long tail. She does not stuff the arms because they were already chunky, but you can add a little.
Step 17: Make two ears
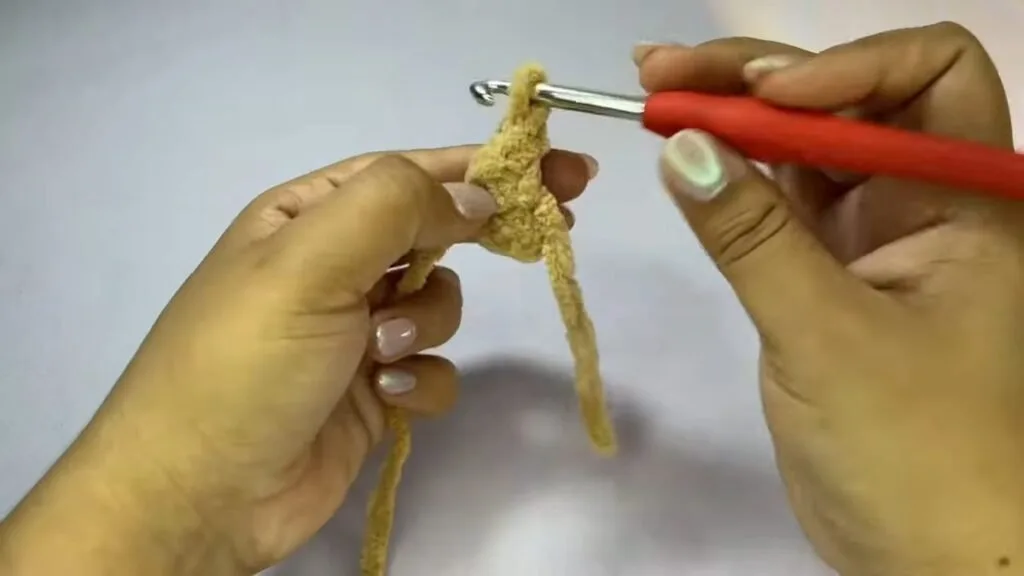
Make a magic ring with 4 single crochet and stop without joining. Chain 1 and turn, then increase in each of the 4 stitches to make 8. Chain 1 and turn again, and work 5 single crochet; the spoken count of this last row is garbled, so check it against the photo and make the ear the size you like. Cut a long tail and make a second one.
Our total: counting the stitches in every round gives 417 for the whole bear: 122 in the head, 95 in the body, 45 in each leg, 38 in each arm and 17 in each ear. These are our own sums of the counts in the tutorial, and the last round of the body, the leg closing row and the ear’s final row are our reading, not printed numbers.
Sewing the Crochet Chenille Bear Together: Steps 18 to 21
Sewing is where a crochet chenille bear gets its character, so take your time and look at the bear from the front after each limb. Use the long tails you kept, and a thick needle with a large eye.
Step 18: Sew on the legs
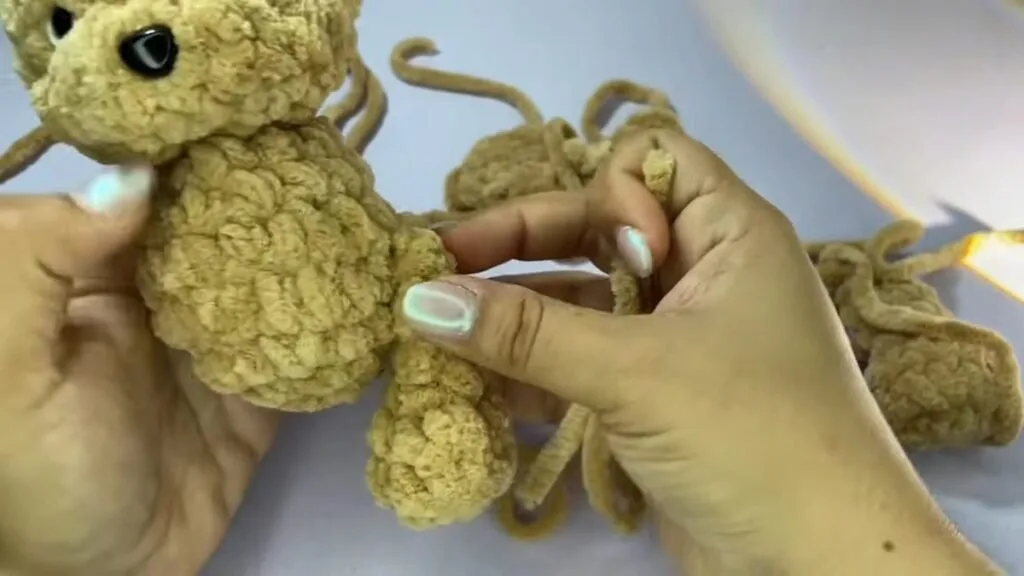
Count from the bottom of the body up to the 4th row and place the leg there, with the foot facing forward. Sew around the top of the leg, and sew a little extra higher up so the leg lies flat against the body. Knot the thread at the back, pass the needle through and cut. Repeat on the other side on the same row so both legs match.
Step 19: Sew on the arms
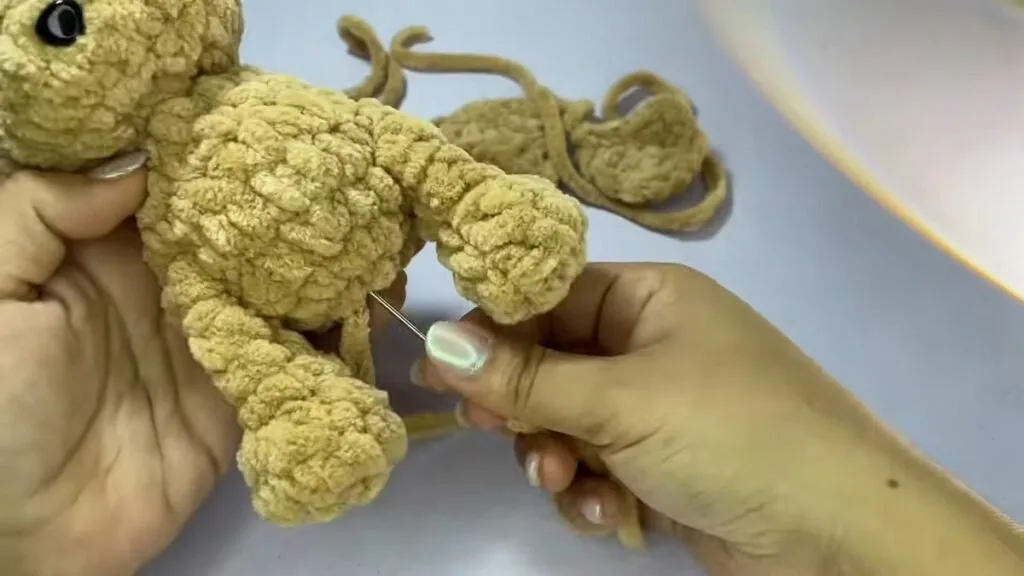
Move the arm around until it looks right, then sew it on. The creator does not give a row number for the arms: she says to place them where the bear looks good. Sew all the way round the open end, knot the thread, cut it and repeat for the second arm. The first one may sit a little crooked, so compare the two before you knot the second.
Step 20: Sew on the ears
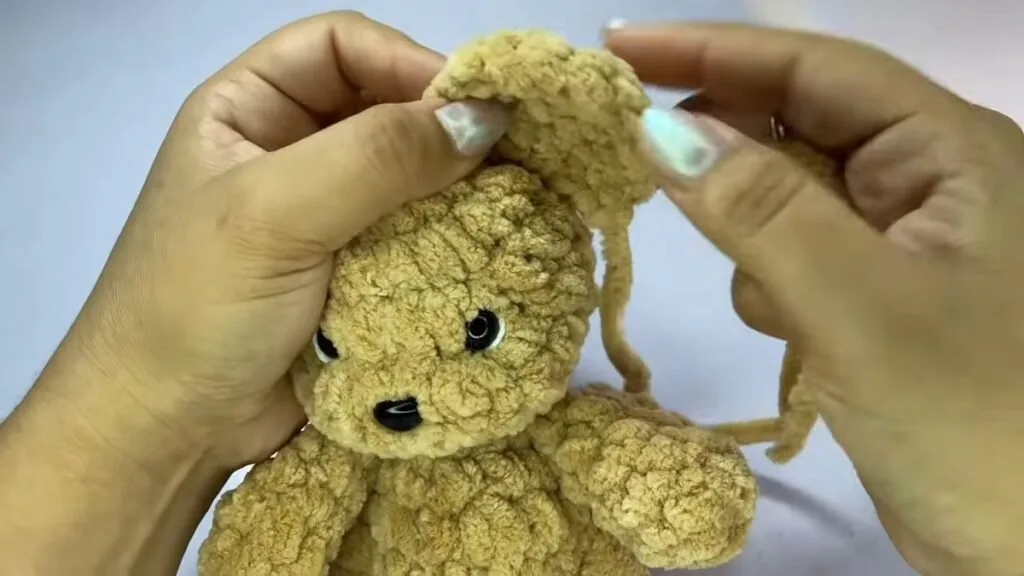
Find the first round of the head, count 3 rows down from it, and mark where the ear goes. Leave 4 stitches between the two ears, and sew the ear on with the curved edge up. Pull a stitch through at the back so the ear stays in place. Repeat on the other side and check from the front that both match.
Step 21: Outline the eyes with black yarn (optional)
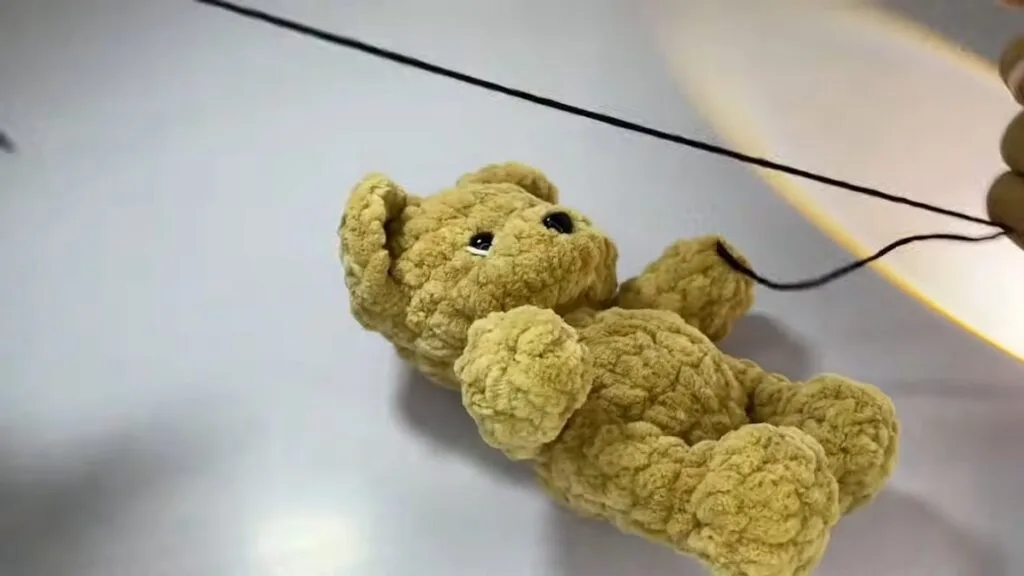
The creator says you can leave the bear as it is and it still looks lovely. For a sharper face, tie a small knot, run a short piece of black yarn under the stitches and outline each eye, then cut and hide the end. Your crochet chenille bear is finished.
Where a Crochet Chenille Bear Goes Wrong
Most trouble with a crochet chenille bear comes from the yarn, not the pattern. Read these three before you start.
You cannot see the stitches
Chenille hides its stitches. Put a marker in the first stitch of every round, count again at the end, and work in good light. One designer even recommends smooth yarn for counting, but the creator and three other designers we checked use chenille anyway, so the marker is the fix, not a different yarn.
The magic ring will not close
Chenille slips, so a magic ring can stay open or break when you pull. Close it almost completely before you work into it, as the creator does. One designer skips the ring altogether and starts with chain 2, working round 1 into the first chain, which is a good fallback if your yarn keeps breaking.
The face ends up crooked
Set the eyes at round 4 with 4 stitches between them, and set the nose between them, a little lower. Pin or push the parts in and look from a distance before you lock the backs. A safety eye cannot be moved once it is fixed, so check twice.
Four More Free Crochet Chenille Bear Patterns
If you want a different size or yarn, these four free bears are worth a look. We list only what is printed on their pages, and we say plainly when a number is missing. None of them matches the 18 cm size of this tutorial exactly.
| Pattern | Designer | Yarn | Printed size or count |
|---|---|---|---|
| Amigurumi Teddy Bear | Yarn + Chai | Bulky velour, 4 mm hook | 12 in tall; about 185 yd plus about 12 yd; 18 stitches and 20 rows = 4 in |
| Bear Crochet Pattern: Easy And Cute | Maria’s Blue Crayon | Bulky chenille, 5.5 mm hook | About 9 in tall; a ball is 92 yd; total not given |
| Todd the Teddy Bear | Mariska Vos | Super bulky chenille, 5 mm hook | 12 cm; no yardage; embroidered eyes |
| Big Teddy Bear | MarlyBird | Bernat Blanket, 8 mm hook | 19 in tall; 2 skeins of 220 yd |
What the numbers tell us: the hooks run from 4 to 8 mm and the finished bears from 12 cm to 19 in, so size is a choice you make with yarn and hook, not a fixed result. Only two of the four pages give a yardage. If you want a bigger bear from this pattern, use a thicker yarn and a larger hook, and swatch before you start.
Safety Eyes and the Crochet Chenille Bear
Safety eyes and noses lock on with a washer, but they are still hard parts, and a small child can pull them off. In the United States, the Consumer Product Safety Commission bans small parts in products for children under 3 when they fit its small-parts cylinder, which models a young child’s throat; see its business guidance on small parts. That page does not name safety eyes, so the advice below is our own reading and not a legal test.
- For a baby or a child under 3, embroider the eyes and nose with yarn. Mariska Vos embroiders hers, and MarlyBird says plastic safety eyes suit ages 3 and up.
- For an older child or a display bear, use safety eyes and push them in firmly, then check the washers.
- Pull on every eye, nose, ear and limb before you give the bear away, and stuff firmly enough that seams cannot open.
The creator uses 10 mm eyes and an 11 mm nose, and she does not give an age. If you are unsure who the bear is for, embroider the face: it takes a few minutes and removes the question.
Crochet Chenille Bear FAQ
What yarn is best for a crochet chenille bear?
The creator uses a 7 mm chenille (a 100 g ball of Alize Velluto) with a 6 mm hook and about 60 to 70 g of it. Other free bears use bulky chenille or blanket yarn with hooks from 4 to 8 mm. Pick a soft, washable chenille and swatch first.
How big is this crochet chenille bear?
About 18 cm (7 inches) tall in 7 mm yarn. The creator also made it in a 4 mm yarn with a 3.5 mm hook and got a 12 cm (4.7 inch) bear from the same stitch counts.
Is chenille hard to crochet?
It is fuzzy and the stitches are hard to see, so it feels slower at first. A stitch marker in the first stitch of every round, a hook a little smaller than the label and good light make it much easier.
Is this crochet chenille bear good for beginners?
Yes, if you can work a magic ring, single crochet, an increase and a decrease. There are no stitches beyond single crochet, and the parts are small, so a mistake is quick to fix. Beginners may want to practise the stitches in a smooth yarn first, as one designer suggests.
Can I give a crochet chenille bear to a baby?
Use embroidered eyes and a stitched nose, no hard parts, and sew every limb on firmly. Safety eyes suit older children. When in doubt, embroider the face.
How much yarn does a crochet chenille bear need?
The creator used about 60 to 70 g of a 100 g ball, so one ball covers a bear. She does not give a yardage, so we do not either.
Soft Toys and Baby Gifts to Make After Your Bear
Once your crochet chenille bear is finished, keep going with something small and soft. The crochet baby rattle is a quick bunny gift in 18 photo steps, the crochet cherry keychain is a tiny bag charm, and the crochet baby cardigan is a first wearable if you want to dress a gift set around the bear. Browse all baby toys and accessories on the site.
Sources and standards: hook ranges from the Craft Yarn Council yarn weight system; comparison patterns from Yarn + Chai, Maria’s Blue Crayon, Mariska Vos and MarlyBird; small-parts guidance from the Consumer Product Safety Commission.
Pattern credit: this bear design comes from the crochet channel solumar crochet.