Crochet Tank Top: Easy Happy Top to Make in One Piece
This crochet tank top is worked in plain half double crochet from one piece: the front panel goes up, over the shoulders and down as the back panel, then the sides are seamed and the edges get a contrasting border. Below you get seventeen photo steps in the order the stitches are worked, a panel-width table for every size from XS to 3X, the hook and yarn notes, and the mistakes that spoil a crochet tank top.
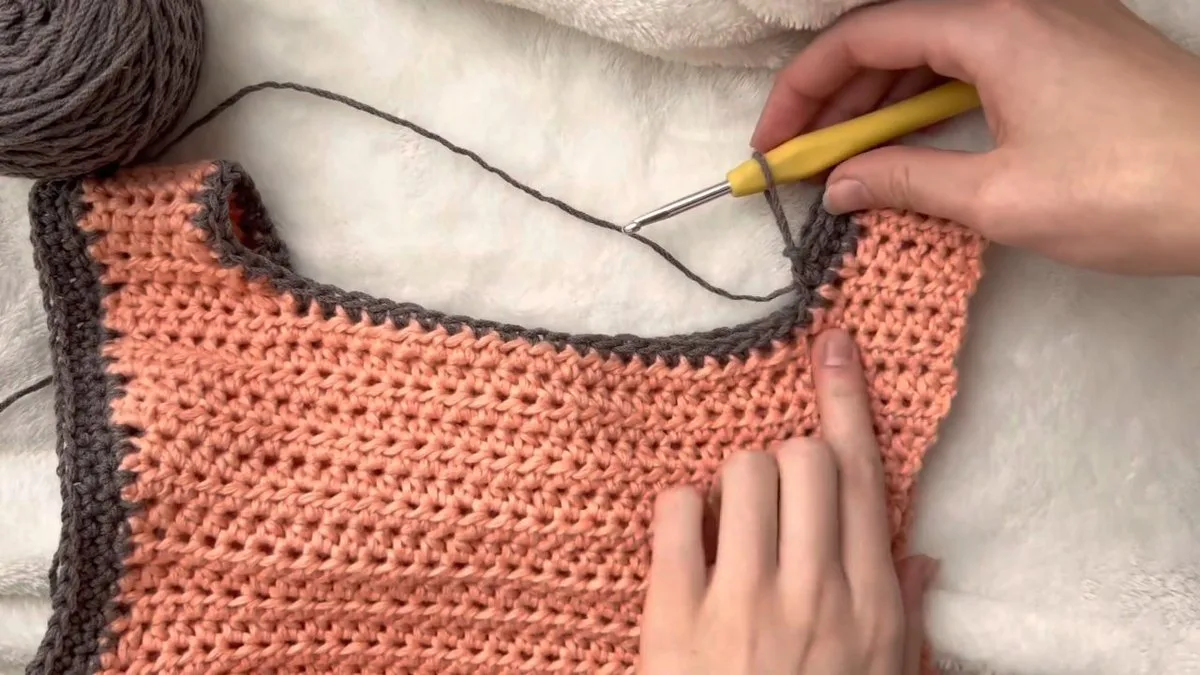
The correction up front: this crochet tank top design prints no stitch counts, no gauge and no finished measurements. It gives one sizing rule instead: make each panel about half your bust measurement, minus a couple of inches, because cotton stretches. We turn that rule into a size table below and we say so wherever a number is missing, rather than invent one. The design also calls its yarn medium weight while using a 4.5 mm hook, which sits lower than the Craft Yarn Council range for medium yarn, so swatch before you commit.
The only stitches you need are the half double crochet (hdc), a decrease, an increase and the single crochet (sc) of the border. A confident beginner can make this crochet tank top in a few evenings once the foundation half double crochet makes sense.
- Crochet Tank Top at a Glance
- What You Need for This Crochet Tank Top
- Crochet Tank Top Size and Panel Width Table
- Crochet Tank Top: Step by Step
- Where a Crochet Tank Top Goes Wrong
- Crochet Tank Top Fit, Ease and Cotton Care
- Five More Free Crochet Tank Top Patterns
- Crochet Tank Top FAQ
- Crochet Layers to Wear Over a Tank Top
Crochet Tank Top at a Glance
The crochet tank top has three parts that all use the same stitch. The body is one long piece with a shaped armhole on each side, the shoulders are two short straps joined across the back neckline, and the border is a second colour worked round each armhole and the neckline.
| Part | What the design says | Photo step |
|---|---|---|
| Foundation | Foundation half double crochet to the panel width | Steps 1 and 2 |
| Body | Half double crochet rows to just under the bust, about 15 rows on the sample | Step 3 |
| Armhole | 3 decrease rows, each followed by a plain row, then 2 plain rows; then 3 increase rows, each followed by a plain row, then 1 plain row | Steps 4 to 7 |
| Shoulders | About 9 stitches wide, 9 rows, 2 of them with a neckline decrease | Steps 8 to 11 |
| Back panel | Chain across the neckline, 2 plain rows, then the same shaping as the front | Steps 12 to 14 |
| Seams and border | Sew the sides, then 3 rows of single crochet round each armhole and the neckline | Steps 15 to 17 |
What is not printed: a gauge, the number of stitches in the foundation, the exact body length, the number of rows in the back panel after the shaping and the yardage beyond a rough estimate. The design names a 4.5 mm hook and a cotton yarn she calls medium weight, and that is all.
What You Need for This Crochet Tank Top
You need a cotton yarn, one hook, a second colour of the same yarn for the border, a darning needle, a tape measure and scissors. Cotton is the right fibre for a crochet tank top because it is cool to wear, though it has no memory, as the fit section explains.
| Item | What to use |
|---|---|
| Yarn | Cotton the designer calls medium weight (4), about 300 to 400 yd in total by her own estimate |
| Border yarn | A second colour, the same weight and the same hook as the body |
| Hook | 4.5 mm; the Craft Yarn Council lists 4.5 to 5.5 mm for light yarn and 5.5 to 6.5 mm for medium |
| Tools | Darning needle for the side seams, tape measure, scissors |
| Skill level | Confident beginner: foundation half double crochet, decreases, increases |
Hook size: the tutorial works a 4.5 mm hook with cotton she calls medium weight, which puts the hook one category below where the Craft Yarn Council places medium yarn. Free crochet tank top patterns vary: Goldenrod uses 4 mm with Lion Brand 24/7 Cotton, the Jenny and Teddy ribbed tank uses 3.5 mm with DK cotton and the Mama In A Stitch basic tank uses 5 mm with a lighter yarn. Cotton often wants a hook slightly larger than the label says, so make a swatch, wash it and measure it before you cast on.
How much yarn to buy: the designer estimates 300 to 400 yd for her top and says so with some doubt, so treat it as a guide. For comparison, the Jenny and Teddy hdc tank takes about 500 yd of DK cotton in the S-M size and the Mama In A Stitch tank takes one 306 yd skein in size S. A 100 g skein of Lion Brand 24/7 Cotton holds 186 yd, so two skeins give 372 yd, which sits inside her range for a small size. That is our arithmetic, not a tested figure. For a larger bust, buy a third skein and keep the label.
Crochet Tank Top Size and Panel Width Table
The design gives a rule, not a chart. Each panel should be half your bust measurement minus a couple of inches, because cotton stretches. The designer’s own example: she would usually make a panel 15 in wide, but she made 13 in for this crochet tank top. Using the Craft Yarn Council women’s size chart, we turned that rule into a panel width for every size.
| Size (CYC) | Bust in inches | Half the bust | Panel width (half minus 2 in) |
|---|---|---|---|
| XS | 28 to 30 | 14 to 15 | 12 to 13 |
| S | 32 to 34 | 16 to 17 | 14 to 15 |
| M | 36 to 38 | 18 to 19 | 16 to 17 |
| L | 40 to 42 | 20 to 21 | 18 to 19 |
| XL | 44 to 46 | 22 to 23 | 20 to 21 |
| 2X | 48 to 50 | 24 to 25 | 22 to 23 |
| 3X | 52 to 54 | 26 to 27 | 24 to 25 |
Turning width into stitches: because the design prints no gauge, work a swatch of 4 in in your own yarn, count the half double crochet stitches per inch and multiply by the panel width. As an illustration only, the Jenny and Teddy pattern states 4 hdc to the inch in DK cotton, so a 14 in panel would be 56 stitches in that yarn; your yarn and hook will differ. The foundation half double crochet makes the stitches and the chain at the same time, so you can stop the moment the strip matches your target width.
Body length: the design does not print a length either. She works about 15 rows on the sample, to just under the bust, and says you can stop sooner for a cropped crochet tank top. Hold the panel against your body and measure to the underbust, then count your rows, because row height depends on your hook and yarn. Our guide to sizes and measurements shows how we handle measurements on other posts.
Crochet Tank Top: Step by Step
Work these steps in order. Each step says what the design shows, and where it leaves a number open we say so. The stitch multiple is simple here, because the foundation half double crochet has no chain count to get right: you stop when the strip is wide enough.
Step 1: Measure and Decide the Panel Width
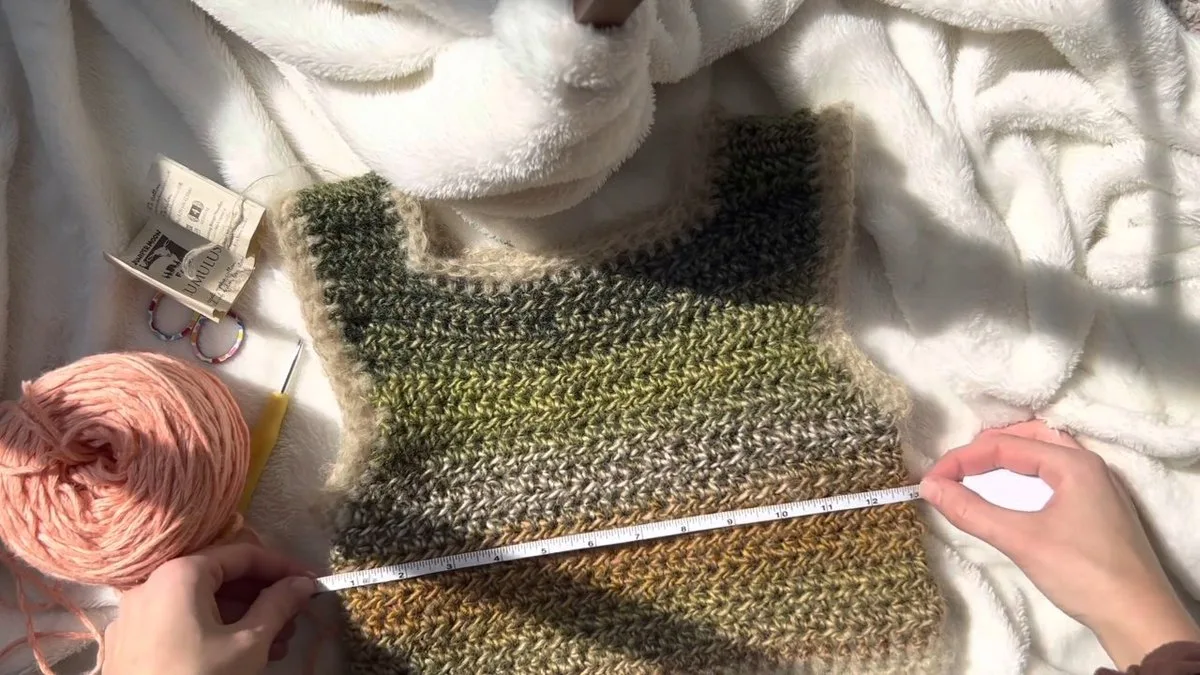
Measure a top that fits you, or your own bust, and use the table above to pick a panel width. The designer takes half her bust, subtracts a couple of inches and goes narrower than usual because cotton stretches. Write the width down, because you will measure against it on every foundation and every shaping row.
Step 2: Make the Foundation Half Double Crochet
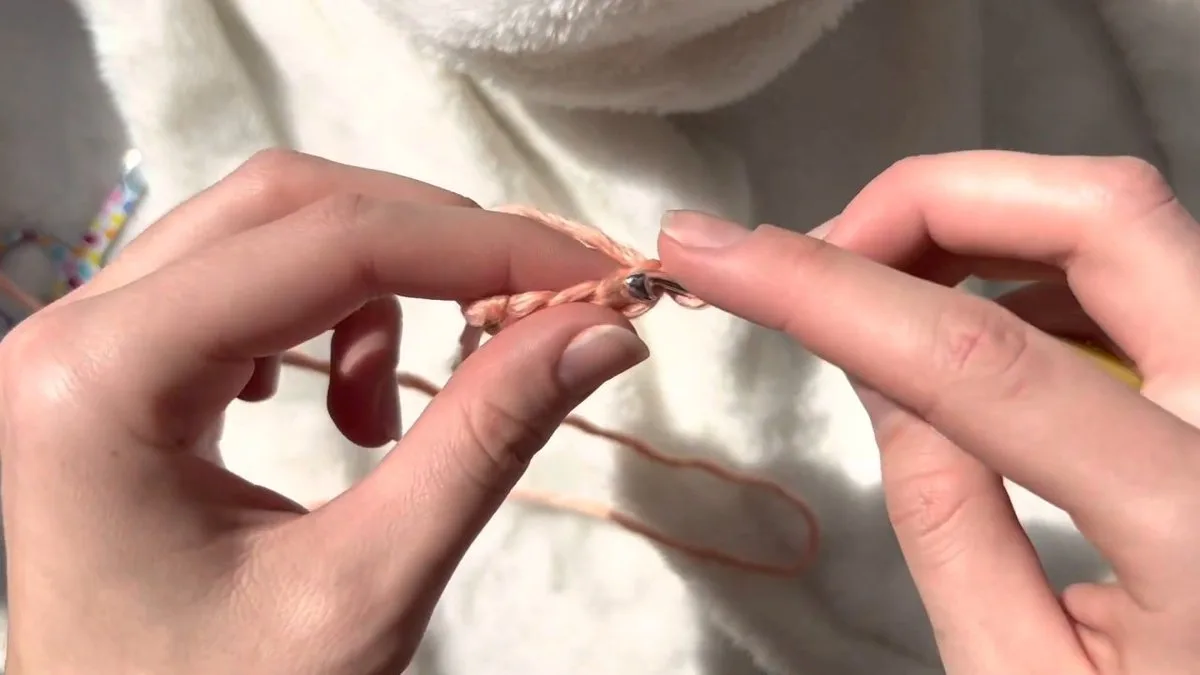
Start with a slip knot and a foundation half double crochet instead of a plain chain. Chain two, then work a stitch into that chain: wrap the yarn, pull through one loop, wrap again and pull through the loops on the hook. Each repeat makes the chain and a stitch together, so the base stays stretchy. Keep going until the strip matches your panel width.
Step 3: Work the Front Panel Rows
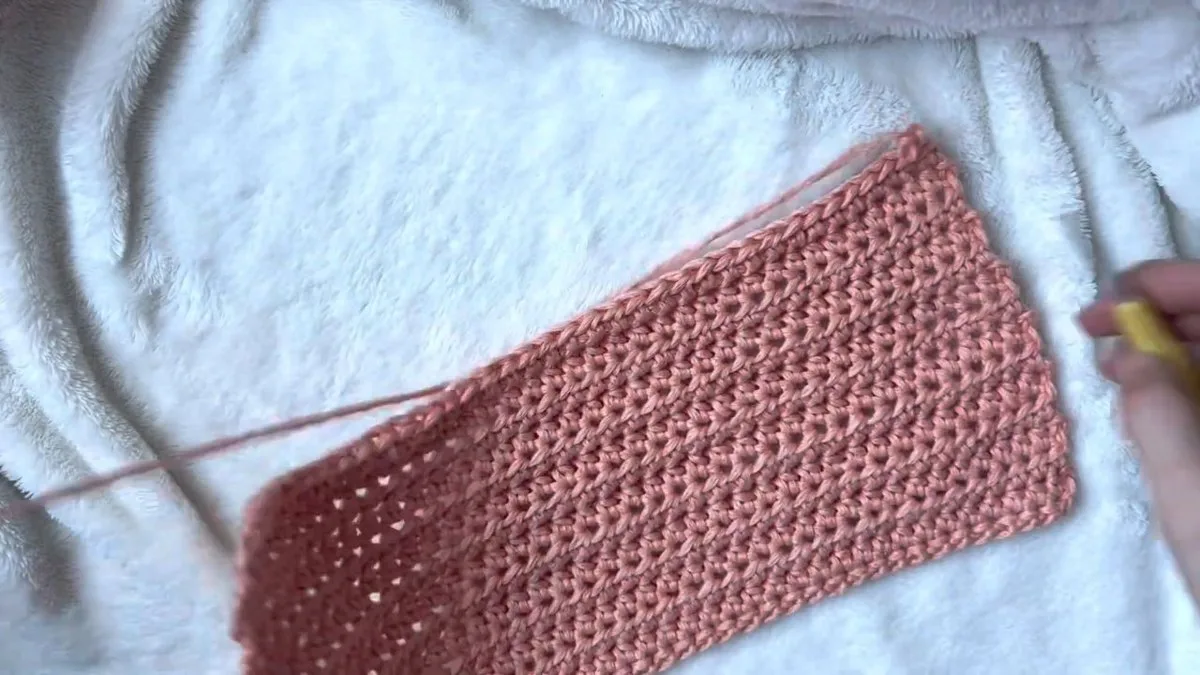
Chain two and work one half double crochet into every stitch of the row, turn, and repeat. The designer’s one firm rule is that you must not skip the first stitch at the start of a row, because that keeps the edges of the crochet tank top straight. She stops just under the bust, which was about 15 rows on her sample, and says you can stop earlier for a cropped top.
Step 4: Shape the Armhole With Decrease Rows
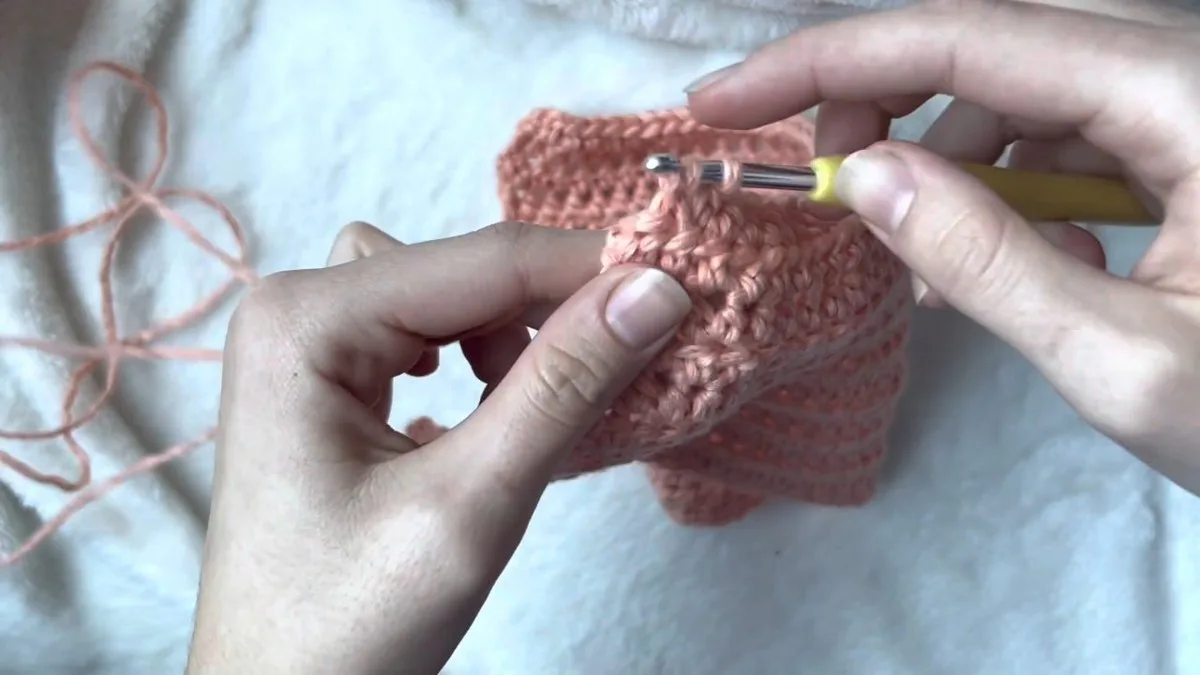
On the first shaping row, skip the first stitch and work half double crochet in the rest of the row. At the end of the row, decrease by pulling through two stitches together. The next row is plain: chain two and one half double crochet in every stitch. Repeat the pair of rows, decrease then plain, until you have worked three decrease rows and six rows in total.
Step 5: Finish the Armhole With Two Plain Rows
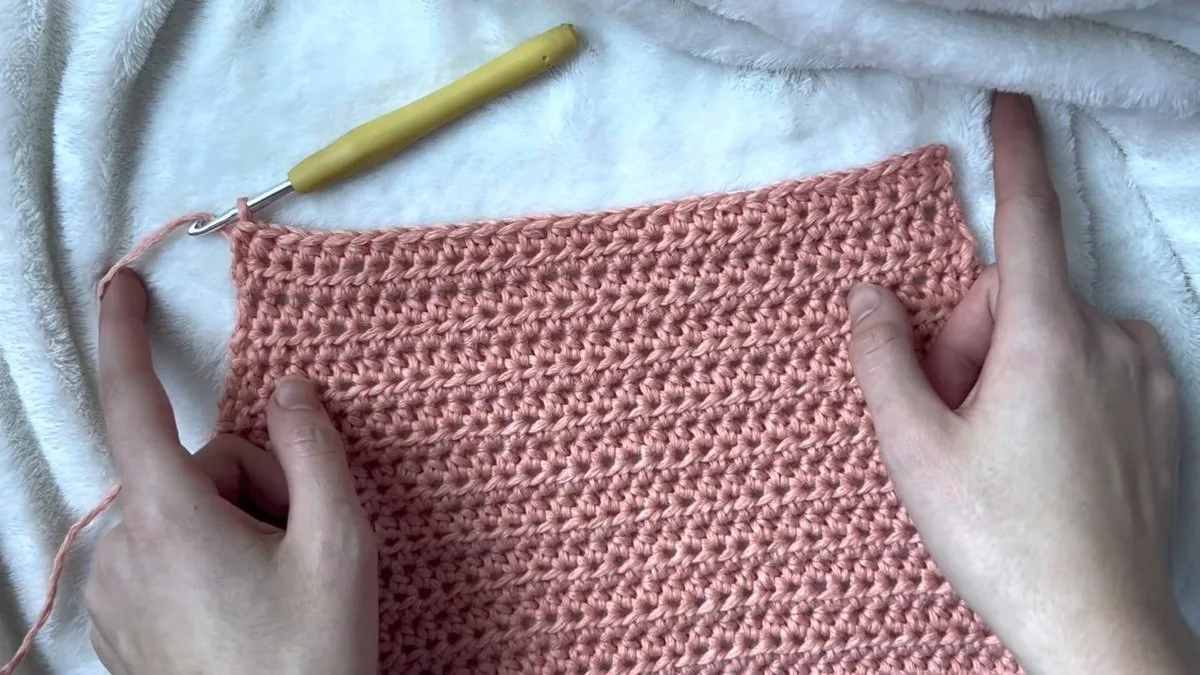
After the six shaping rows, work two more rows with no decrease, so the armhole section is eight rows tall. Lay the panel flat and compare the two sides: they should match, because the crochet tank top only looks right if both armholes start and finish at the same row.
Step 6: Add the Bust Increase Rows
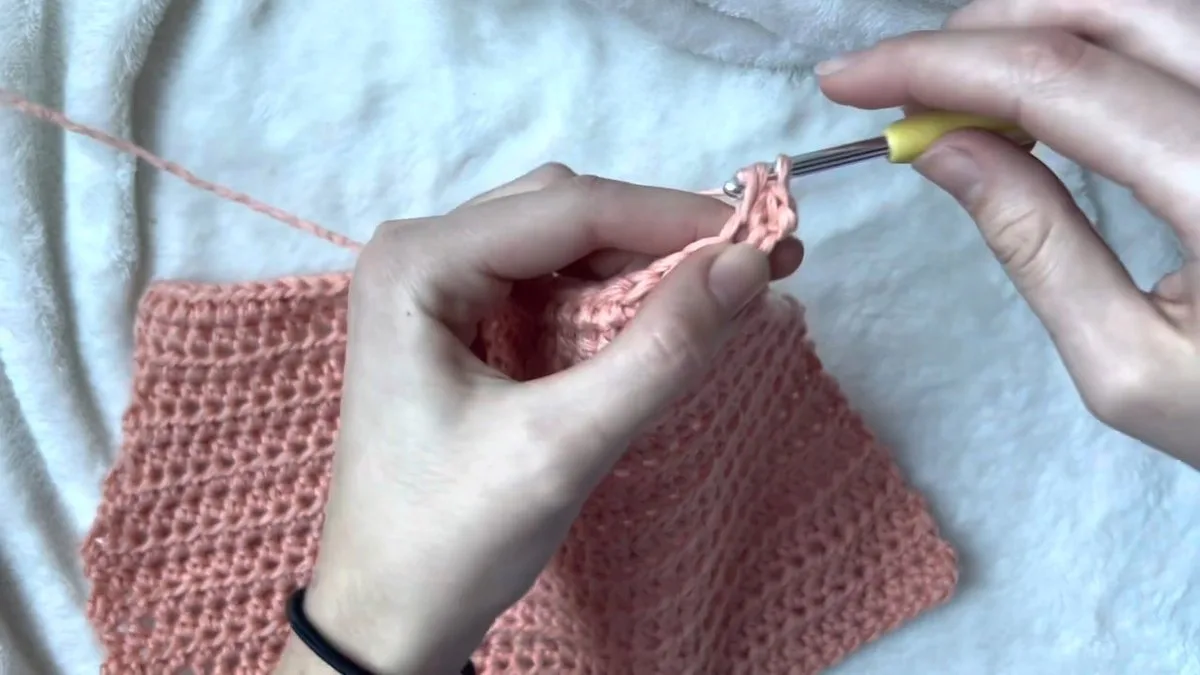
Now the width grows back. Chain two and work two half double crochets into the first stitch, then half double crochet across, and finish by working two half double crochets into the last stitch. The next row is plain, one half double crochet in each stitch. Repeat the increase row and the plain row until you have three increase rows, six rows in all.
Step 7: Check the Panel Before the Shoulders

Work one more row with no increase or decrease, and lay the panel flat. The sides should curve in at the armhole and back out above it. If the sides look uneven, count your rows against the sequence above.
Step 8: Start the First Shoulder
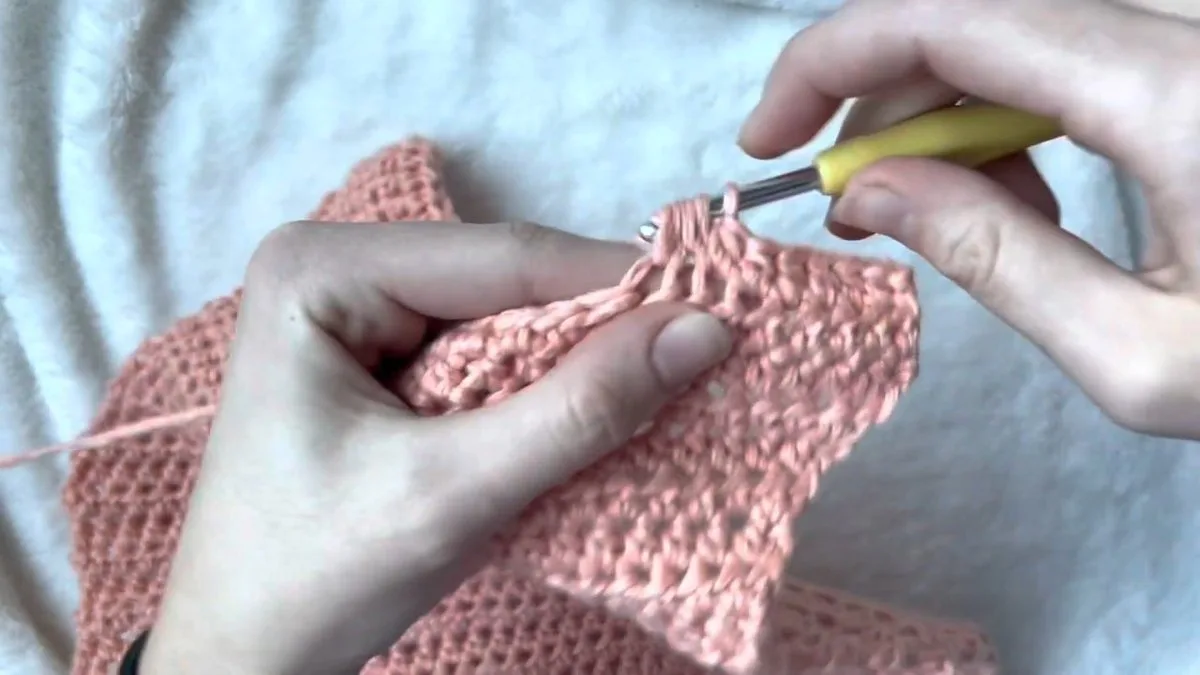
The shoulders are two short straps, and the design leaves the width up to you. She works about nine stitches on the first row, counted from the outer armhole edge, and you can go wider or narrower for a different strap. Work the first strap row across those stitches only, then leave the rest of the top edge unworked for the neckline.
Step 9: Angle the Neckline With a Decrease
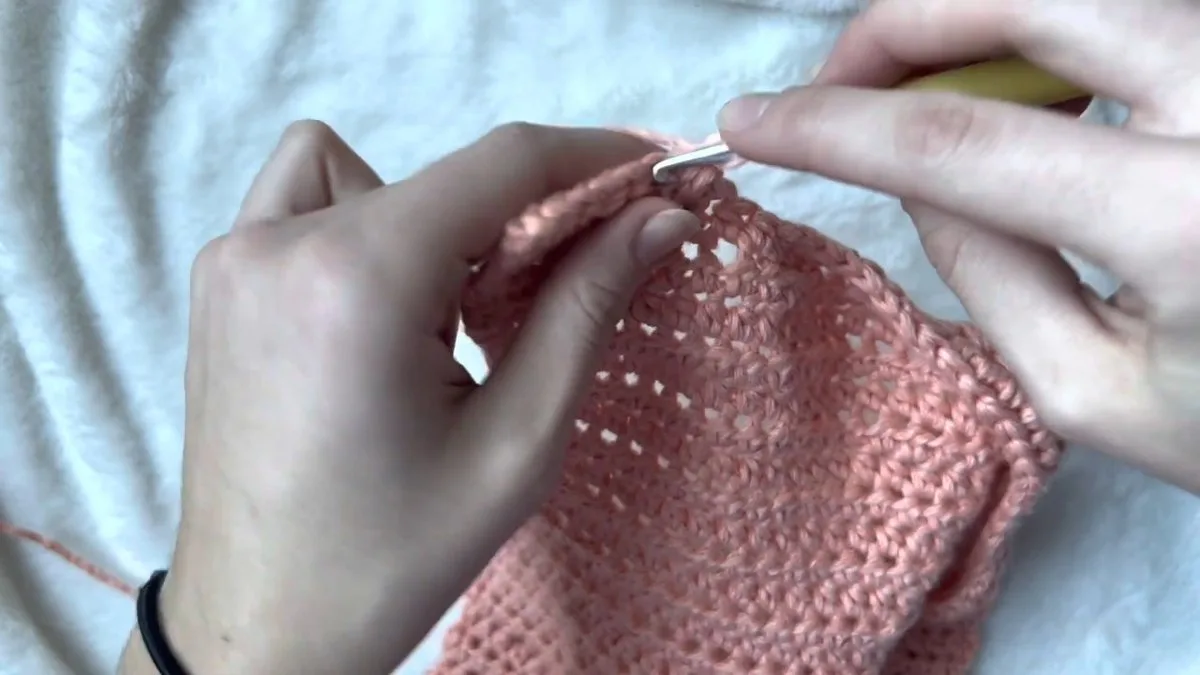
To tilt the neckline, decrease at the inner edge of the strap on the first two rows: skip the first stitch and work into the second. The rows after that have no decrease. That tiny slope is what turns a square cut-out into a crochet tank top neckline that lies flat against the collarbone.
Step 10: Finish the First Shoulder
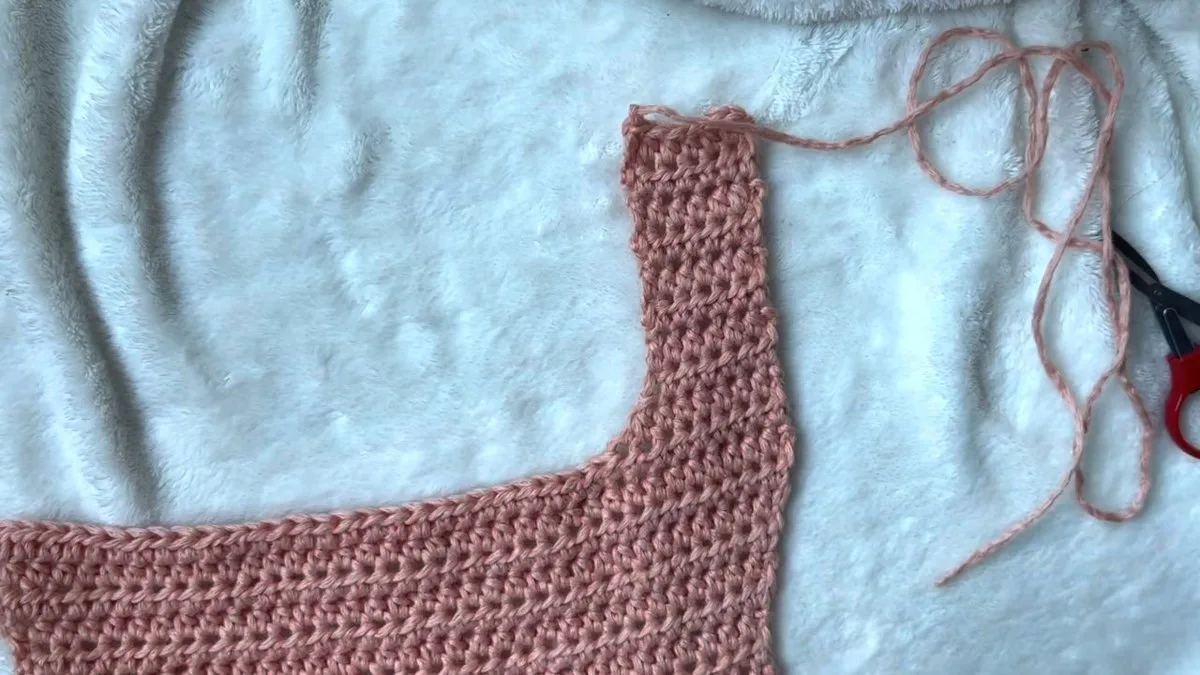
The strap is nine rows tall: the first two rows have a decrease and the remaining seven do not. Cut the yarn and fasten off. The other shoulder starts from the inside, because of the way the stitches run.
Step 11: Join Yarn and Work the Second Shoulder
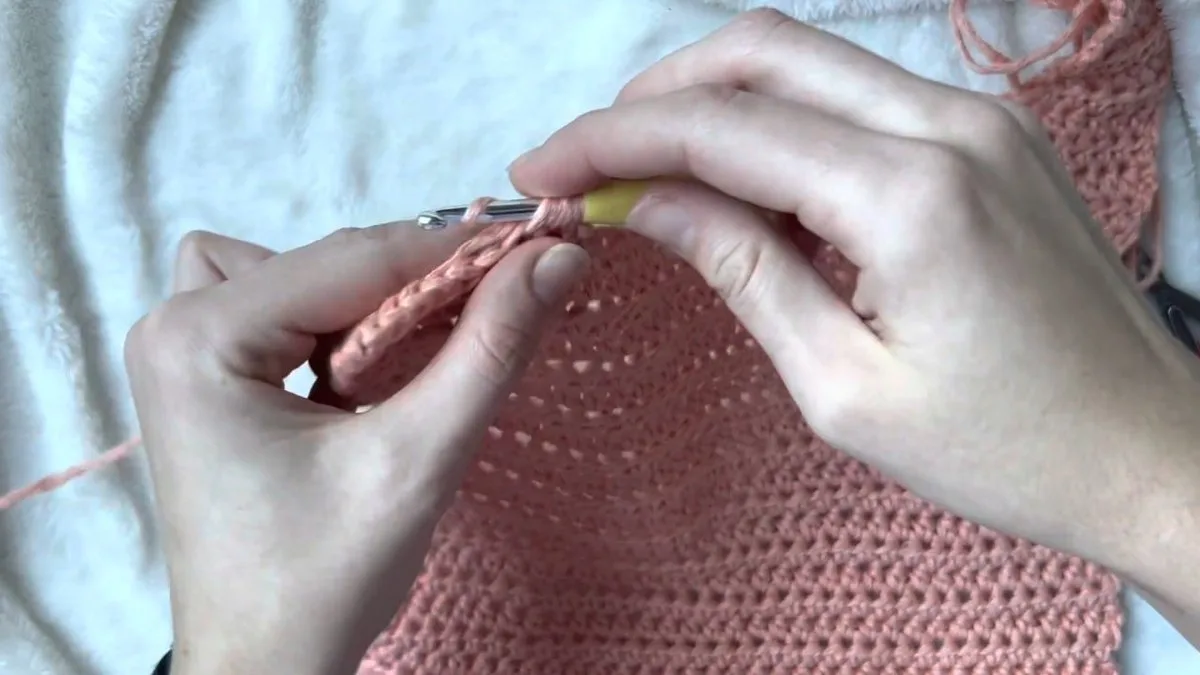
Count nine stitches in from the outer edge, insert the hook and join the yarn from the inside of the panel. Repeat the same sequence as the first strap: two rows with a decrease, then seven plain rows. If you start a row with a chain, the decrease goes into the second stitch, as the designer does here. Match the two straps row for row so the crochet tank top hangs level.
Step 12: Join the Shoulders With a Chain Across the Neckline
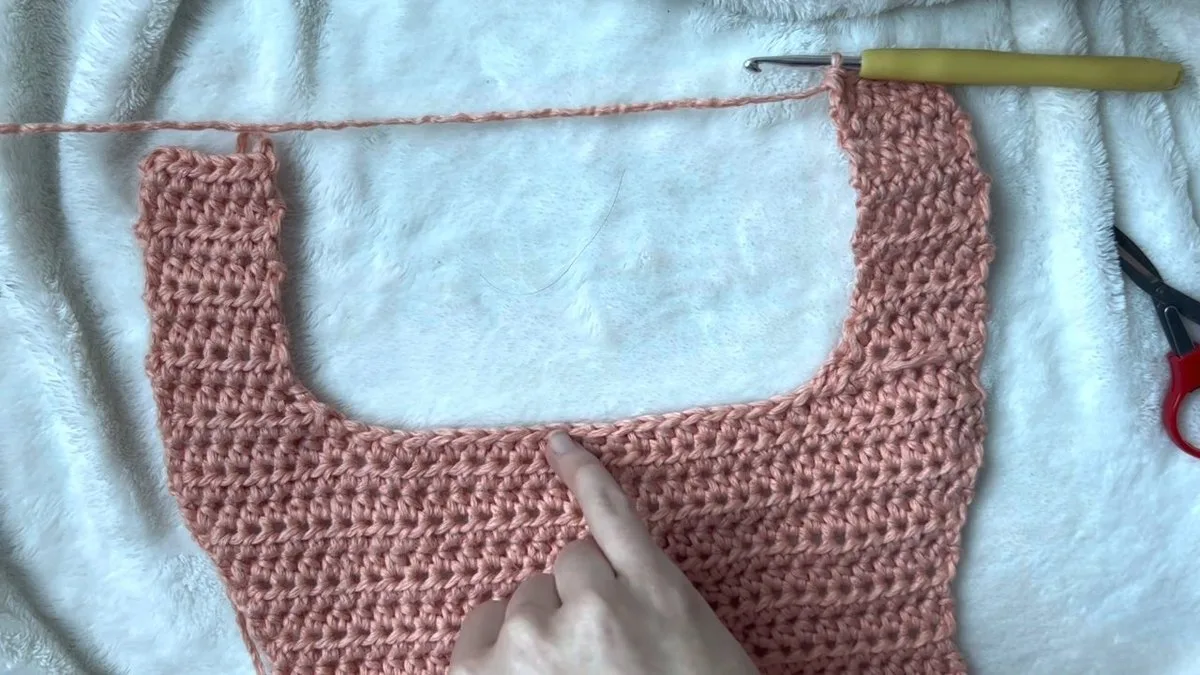
Work one final row across the second strap, then chain across the neckline gap and attach with a half double crochet into the first stitch of the other strap. For the number of chains, count the stitches along the front neckline and chain the same number, which gives the back neckline an even edge. The designer admits this method is not perfect, so check that the chain is not looser or tighter than the front.
Step 13: Work the Back Panel
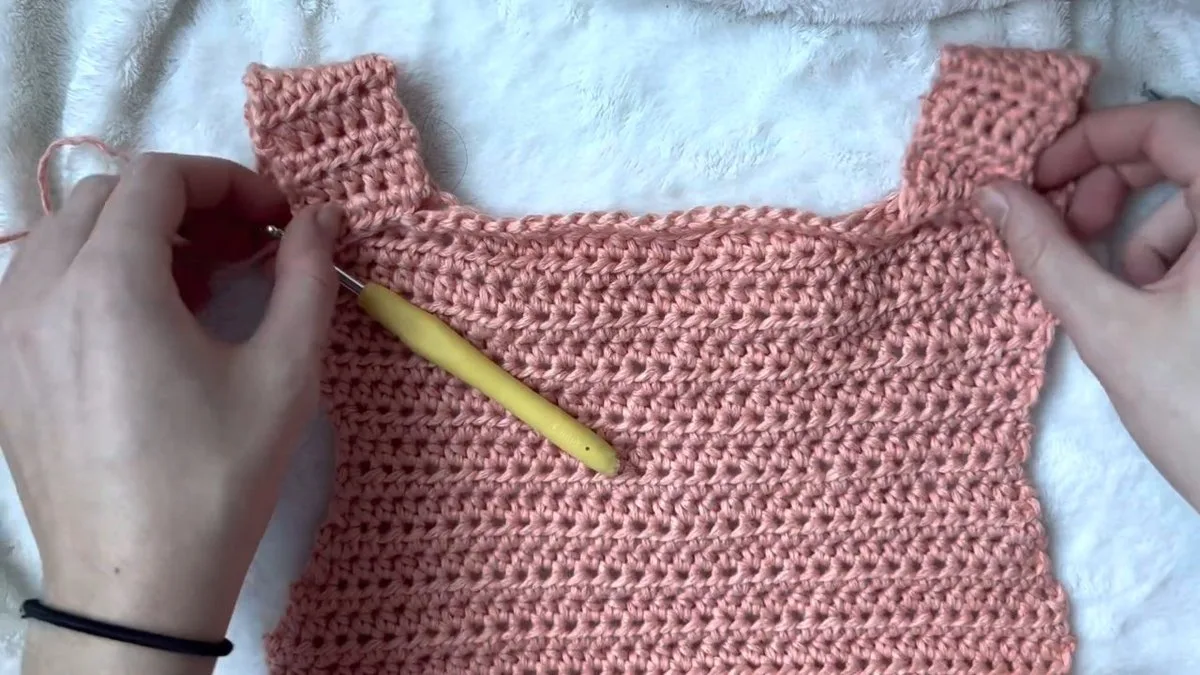
The back panel mirrors the front. Work two rows of half double crochet straight across, then repeat the armhole and bust rows you did on the front, in the same order. Finish the back with plain rows until the length matches the front, and fasten off.
Step 14: Compare the Front and Back Panels
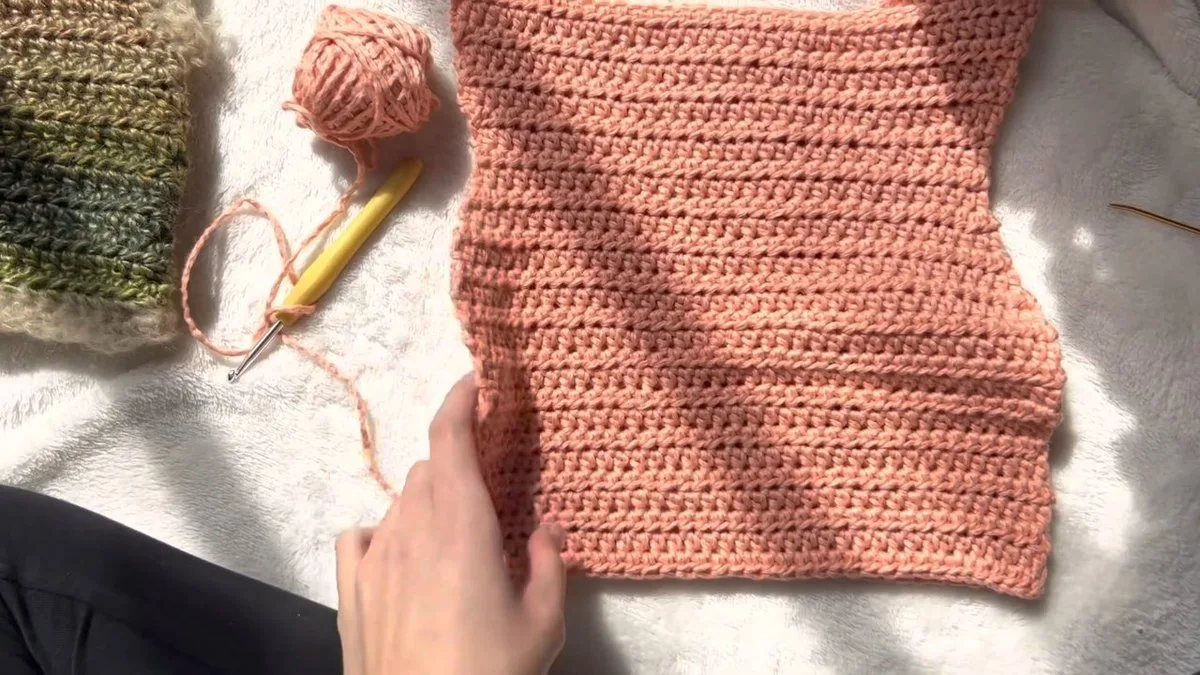
Lay the panels together. They should be identical in height and in the armhole curves, so any difference tells you which rows to fix before the seams. This is the cheapest moment to rip back a row or two.
Step 15: Seam the Sides
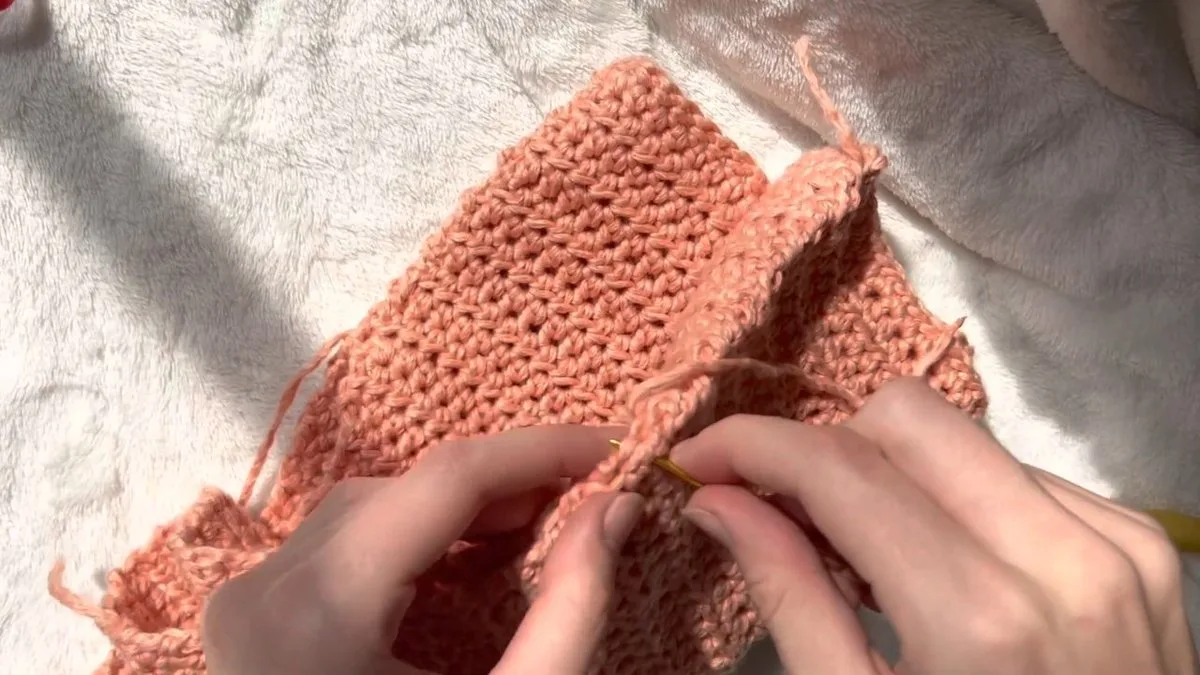
Join the sides however you like: a darning needle and a mattress seam, or a slip stitch seam with the hook. The designer used a needle because it was the easy way. Seam from the underarm down, and match the rows on both sides so the seam sits straight.
Step 16: Border the Armholes

Join the second colour at the armpit seam, using the same weight of yarn and the same hook. Work three rows of single crochet round the armhole. She does not count stitches here and puts a stitch where the edge looks like it needs one: fewer stitches is safer than too many, because too many makes the armhole ruffle, while a little tightness stretches out. For thicker straps, add more rows.
Step 17: Border the Neckline and Finish
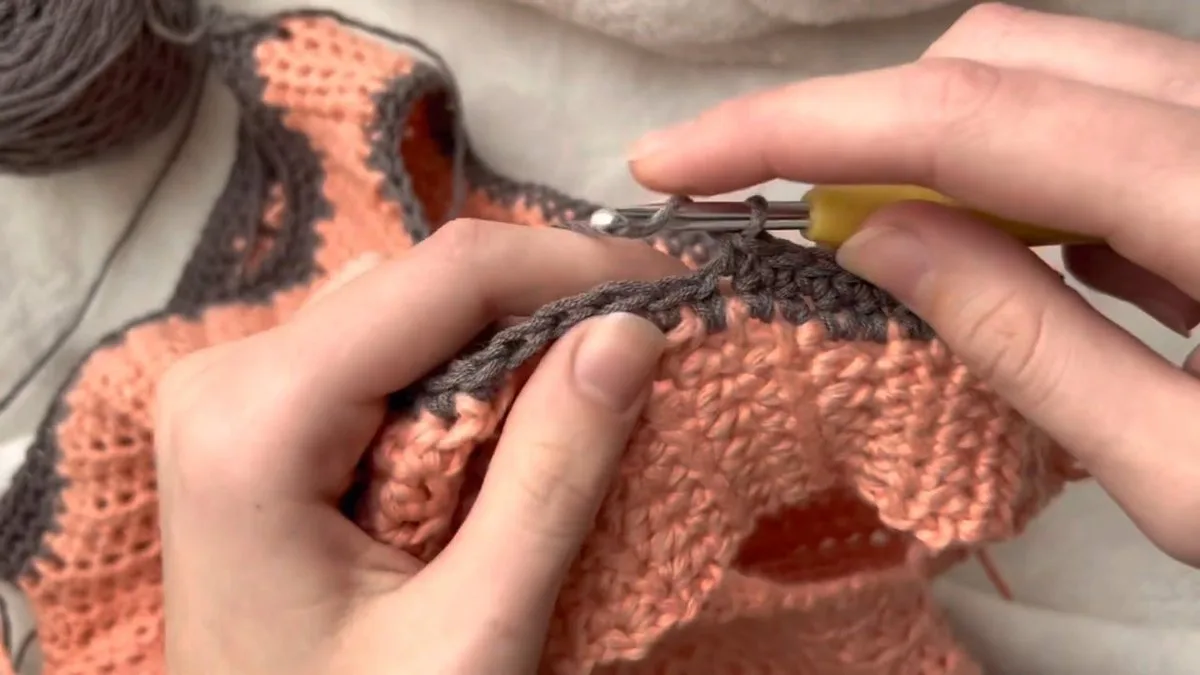
Work the neckline the same way. After the first row, decrease at the corners where the neckline starts to curve, so the edge sits close to the neck instead of gaping. She does this on the second and third rows. The same border goes on the bottom edge and the other armhole, then weave in every end and your crochet tank top is finished.
Where a Crochet Tank Top Goes Wrong
The edges lean because a first stitch was skipped
The designer says it twice: do not skip the first stitch of a plain row. If you do, each row loses a stitch, and the sides of the crochet tank top slope inward instead of staying straight. Count your stitches at the end of every few rows, and only decrease on the rows the shaping calls for.
The back neckline does not match the front
The chain across the neckline is the loosest part of the design, because the number of chains is set by counting the front neckline rather than by a printed figure. Count twice, chain once, and lay the joined piece flat before you start the back panel. If the neckline gapes, you chained too many.
The cotton stretches after the first wash
Cotton has little elasticity, so a crochet tank top made to your exact bust can grow wider and longer after washing and wearing. That is why the designer makes each panel narrower than half the bust. Block the finished top, measure it after blocking and size down a little if you like a close fit.
Crochet Tank Top Fit, Ease and Cotton Care
Ease is the gap between your body and the garment. The Craft Yarn Council body sizing page lists very close fit as 2 to 4 in less than the bust, close fit as zero, classic fit as 2 to 4 in more, loose fit as 4 to 6 in more and oversized as 6 in or more. Because the designer takes half the bust and then subtracts a couple of inches, her crochet tank top sits in the very close or close bands, and the cotton stretches to meet your body.
Lion Brand’s guides to cotton agree on the care side. One page says 100% cotton has little elasticity and does not bounce back to its shape. Another notes that garments can sag after washing, especially across the shoulders or bust of a fitted top, and advises washing cool, skipping the dryer for shaped pieces and blocking to shape. A third suggests measuring the piece after blocking, not before.
The design names no yarn, so follow the care label on your own cotton. As a point of reference, the label of Lion Brand 24/7 Cotton says machine wash at 105 F or 40 C and tumble dry low.
Five More Free Crochet Tank Top Patterns
If you want another full written pattern, these five free tanks are worth a look. For each we list only what the page prints.
| Pattern | Style | Hook | Sizes and yarn |
|---|---|---|---|
| Stitch Club Retro Granny Top (Red Heart) | Granny square motifs | not printed in the page text | Finished bust 29, 32 and 35 in; Red Heart Soft |
| Granny Picot Edged Tank (Red Heart) | Granny squares with a picot edge | not printed in the page text | XS to 4/5XL; Red Heart All in One Granny Square |
| Goldenrod Tank Top (Winding Road Crochet) | Mostly double crochet | 4 mm | S to XL for 35 to 41 in bust; Lion Brand 24/7 Cotton; 8 dc = 2 in |
| Easy Ribbed Crochet Tank Top (Jenny and Teddy) | Two half double crochet panels | 3.5 mm | S-M for 32 to 36 in bust; about 500 yd DK cotton; 13 in long |
| Basic Tank Top (Mama In A Stitch) | Rectangles | 5 mm | Size S takes one 306 yd skein; 24 in around, 11 in long |
What the five pages leave out: the two Red Heart pages print no yardage or gauge in the text we could read, and only two of the five give a yardage at all, so we kept our own width table and hook notes above.
Crochet Tank Top FAQ
Is this crochet tank top easy for beginners?
Yes, if you can work half double crochet. Every row is the same stitch, and the shaping is just a decrease or an increase on alternate rows. The foundation half double crochet and the chain across the neckline are the two places worth a practice swatch.
What size is the crochet tank top?
The design gives no size chart. Make each panel about half your bust minus 2 in; for an M bust of 36 to 38 in that is 16 to 17 in wide. Use the table above for XS to 3X.
What hook is best for a crochet tank top?
The tutorial uses a 4.5 mm hook with cotton it calls medium weight. The Craft Yarn Council lists 5.5 to 6.5 mm for medium yarn, so swatch and go up if the fabric feels stiff.
How much yarn does a crochet tank top need?
The designer estimates 300 to 400 yd for her top. Other free tanks use about 500 yd in a S-M size or one 306 yd skein in size S, so buy by your size and check your label.
Can I make a crochet tank top longer or shorter?
Yes. The body length is not fixed: stop at the underbust for a cropped top, or keep working rows for a longer tank. Match the front and back panels so the armholes start at the same row.
How do I stop a cotton crochet tank top from stretching?
You cannot stop cotton from stretching, but you can plan for it. Make the panels a couple of inches narrower than your bust, block the finished top and follow the care label on your yarn.
Crochet Layers to Wear Over a Tank Top
Once the crochet tank top is done, add a layer on top. The crochet pullover sweater is the cosy option for colder days, the crochet vest pattern sits over a tank in the same way and the granny square cardigan adds colour. Browse every crochet clothes pattern on the site.
Sources
- Yarnspirations, Red Heart Stitch Club Retro Granny Crochet Top
- Yarnspirations, Red Heart Crochet Granny Picot Edged Tank
- Winding Road Crochet, Goldenrod Tank Top
- Jenny and Teddy, Easy Crochet Ribbed Tank Top
- Mama In A Stitch, How to Crochet a Tank Top
- Craft Yarn Council, women’s size chart
- Craft Yarn Council, yarn weight system
- Craft Yarn Council, standard body sizing
- Lion Brand, mercerized cotton yarn
- Lion Brand, understanding fiber properties: cotton
- Lion Brand, cotton yarn uses for crocheters
- Yarn.com, Lion Brand 24/7 Cotton
Pattern credit: this tank top design is by the crochet channel Maggie Keller.