Crochet Cat Amigurumi: Easy Gift to Make in 3 Parts
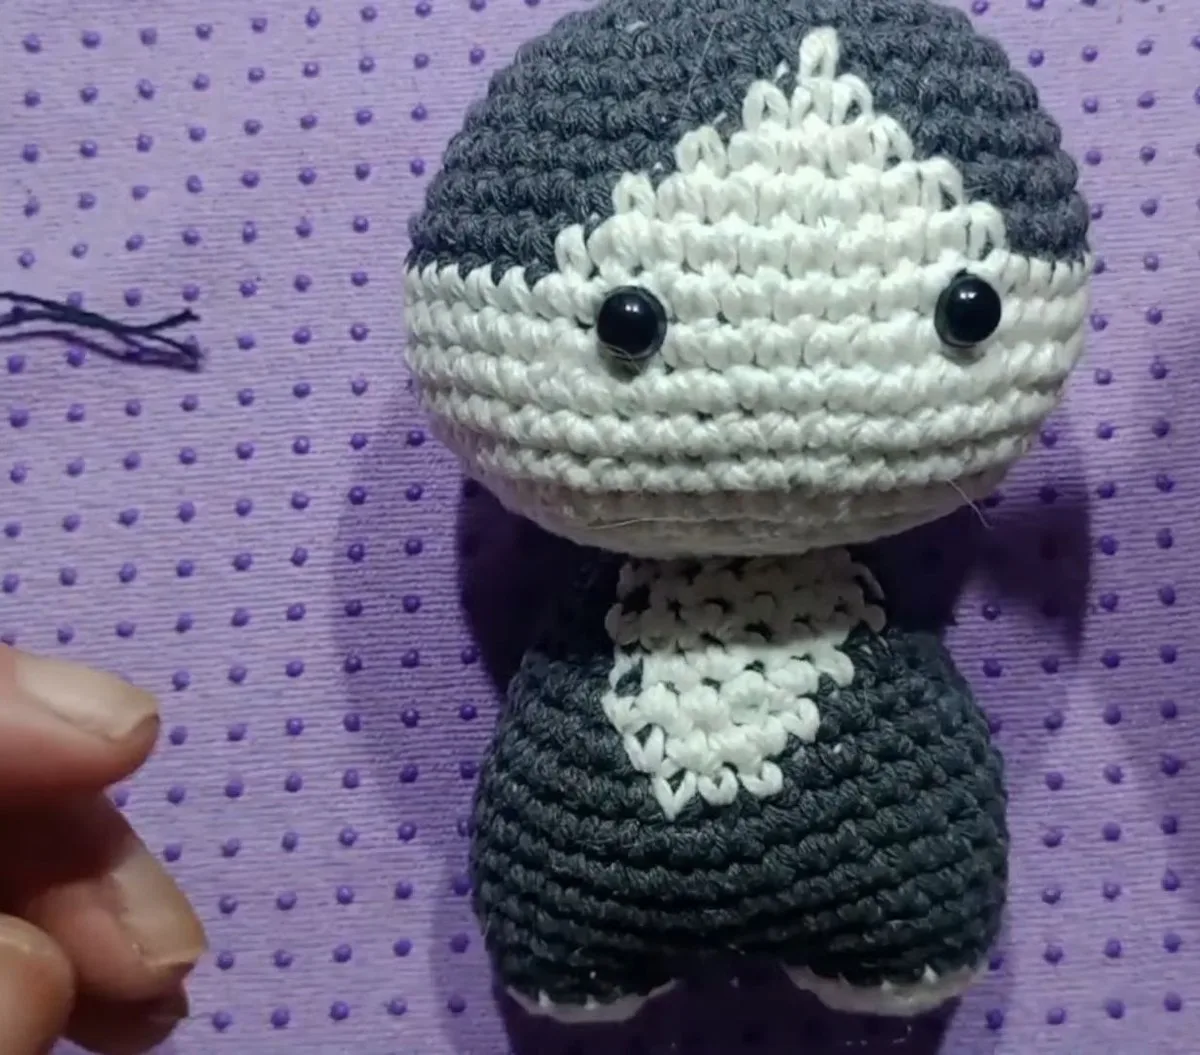
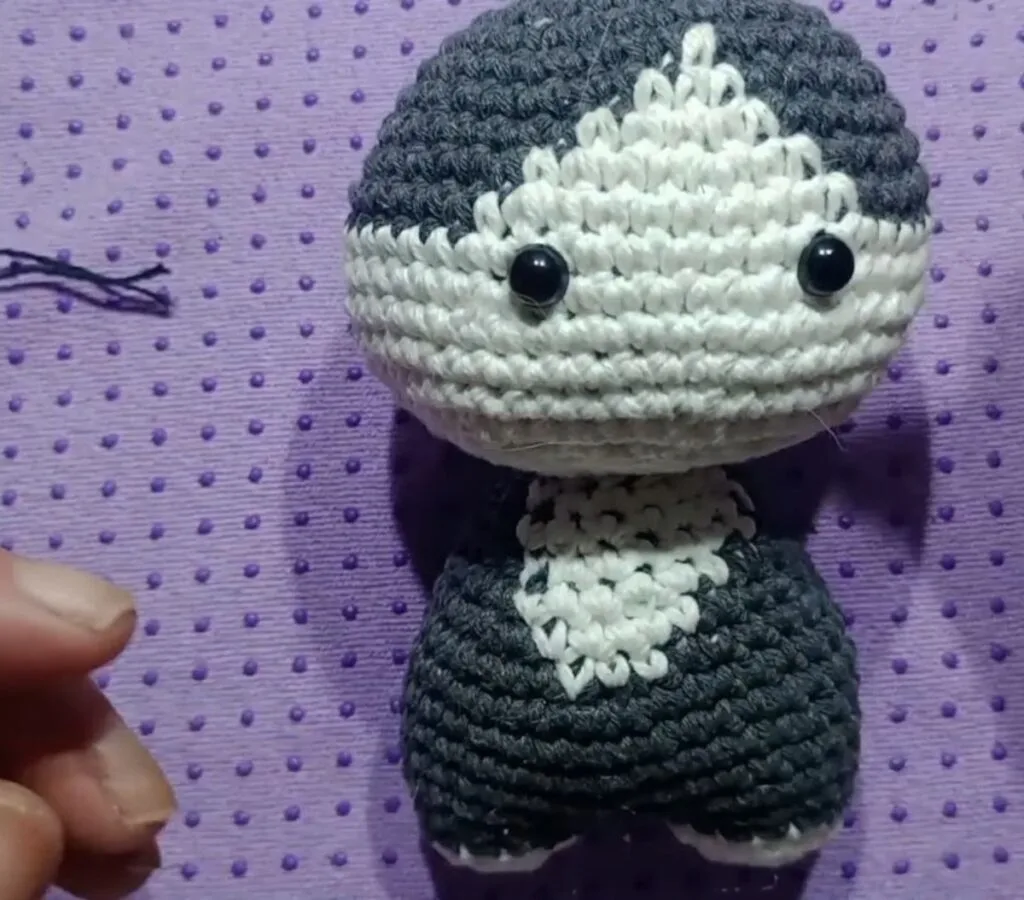
This crochet cat amigurumi is a sitting two-color kitten with a grey cap, a white face, a white belly patch, white paws, two small ears, two arms and a tail. You make it in three parts: the head, the legs and body, and then the arms, tail and sewing. Below you get every round with a photo, the stitch totals that add up, the two rounds that do not close, and the places where a crochet cat amigurumi goes wrong. Made in two colors, it is also an easy gift to make for anyone who loves cats.
The correction up front: the maker never says the hook size, the yarn brand or the finished height, and she does not print a total for the arms or the tail. We only give numbers she says out loud or that we could add up from her stitch groups, and we mark every number that is ours. The arms and tail are shown with round labels but no stitch counts, so for those two pieces we describe what you see and tell you to match the thickness of the leg.
- Crochet Cat Amigurumi at a Glance
- What You Need for This Crochet Cat Amigurumi
- Crochet Cat Amigurumi Round Counts
- Crochet Cat Amigurumi: Step by Step
- Where a Crochet Cat Amigurumi Goes Wrong
- Crochet Cat Amigurumi Safety for Little Ones
- Three More Free Crochet Cat Amigurumi Patterns
- Crochet Cat Amigurumi FAQ
- More Small Toys to Make After Your Cat
Crochet Cat Amigurumi at a Glance
The crochet cat amigurumi is worked in single crochet only, with increases and decreases, in joined rounds for the head and in a spiral for the rest. You change color in the middle of a round, which is the one new skill, and you make five pieces that you sew together at the end.
| Part | How many | What you work |
|---|---|---|
| Head | 1 | Magic ring of 8, grey cap, white face diamond that grows into an all-white lower head, eyes, then decreases to 8 |
| Ears | 2 | Magic ring of 4, grown to 16, then two plain rounds |
| Legs | 2 | White paw tip from a magic ring of 5, grey leg above it, joined with one slip stitch |
| Body | 1 piece | Grows from both legs to 36 stitches, then decreases with a white belly patch |
| Arms | 2 | Eight rounds, white tip and grey above, counts not printed |
| Tail | 1 | Long tube of 16 rounds, white tip and grey above, counts not printed |
What makes it easy: every increase round has a clean stitch multiple. The head grows with (single crochet, increase) groups of 1, 2, 3, 4 and 5 single crochets, always eight times around, so you can check each round by counting the groups instead of every stitch.
What You Need for This Crochet Cat Amigurumi
The maker shows grey and white yarn that looks like fine cotton or acrylic, a small ergonomic hook, a stitch marker, stuffing, a yarn needle, scissors and a pair of safety eyes with snap-on washers. She does not name a size or brand for any of them.
| Item | What to use |
|---|---|
| Yarn | Two colors, grey and white; brand and yardage are not stated |
| Hook | Not stated; pick the size that gives a firm fabric with your yarn |
| Eyes | One pair of safety eyes with snap washers; the size is not stated |
| Tools | Stitch marker, yarn needle, fiberfill, scissors, a few pins for sewing |
| Skill level | Confident beginner: magic ring, single crochet, increase, decrease, changing color |
Hook and yarn: the three free cat patterns we read give little help. The Red Heart Crochet Cat and the Red Heart Katie Cat print no yardage and no gauge, and the Katie page lists a 4.5 mm hook in its tools but a 3.5 mm hook on the kit label. The Small Cat with Joined Legs uses DK cotton with a 3 or 3.5 mm hook for a cat of about 15 cm. For a stuffed toy the hook should be smaller than the yarn label suggests, so that the stuffing cannot show between stitches; swatch one disc first.
The Craft Yarn Council lists 4.5 to 5.5 mm as the usual crochet hook range for light (DK) yarn, so the DK pattern’s 3.5 mm hook is deliberately smaller, for the same reason. How much yarn to buy: no source gives a yardage for a cat this size, so we print none. One small ball of each color is plenty for a toy of this kind, and leftovers work well.
Crochet Cat Amigurumi Round Counts
We checked every round by arithmetic against the stitch groups she says. The table lists each piece and the totals that close. Totals for body rounds 11 to 14 are not spoken: they are our sums of the groups, and each one uses up exactly the stitches of the round before it.
| Part | Round | How it is worked | Total stitches |
|---|---|---|---|
| Head | 1 to 2 | Magic ring of 8 single crochets, then increase in every stitch | 8, 16 |
| Head | 3 to 5 | (Single crochet, increase) x 8; (2 sc, increase) x 8; plain | 24, 32, 32 |
| Head | 6 to 8 | (3 sc, increase) x 8 with the first color changes; two rounds with white patches | 40, 40, 40 |
| Head | 9 to 11 | (4 sc, increase) x 8; patch round; round 11 all white | 48, 48, 48 |
| Head | 12 to 15 | (5 sc, increase) x 8, then three plain rounds | 56, 56, 56, 56 |
| Head | 16 to 19 | (5, 4, 3 then 2 sc, decrease) x 8 | 48, 40, 32, 24 |
| Head | 20 to 21 | (1 sc, decrease) x 8; then 8 decreases | 16, 8 |
| Ear | 1 to 6 | Magic ring of 4; increase every stitch; (sc, inc) x 4; (2 sc, inc) x 4; 2 plain rounds | 4, 8, 12, 16, 16, 16 |
| Leg | 1 to 4 | Magic ring of 5; increase every stitch; (sc, inc) x 5; one plain grey round | 5, 10, 15, 15 |
| Body | 5 | (4 sc, increase) x 6 around both legs | 36 |
| Body | 6 to 10 | Single crochet in every stitch, 5 rounds | 36 each |
| Body | 11 to 14 | Decrease groups with the white belly patch | 33, 30, 27, 24 |
The counted rounds add up to 1,332 stitches: the head is 768, the two ears are 2 x 72 = 144, the two legs are 2 x 45 = 90, and body rounds 5 to 14 are 330. That is our arithmetic from the spoken rounds, not hers, and we have not tested it. Body rounds 15 and 16 and both arms and the tail are not in the total.
The body round that loses a stitch
For body round 15 she says: 2 single crochets, a decrease, 4 single crochets, 4 white single crochets, a decrease, 1 single crochet, 3 single crochets, a decrease and 3 single crochets. Added up, that uses 23 stitches from a round of 24, so one stitch is missing from the instructions. We print the groups as she says them and give no total for rounds 15 and 16: count your stitches against round 14 and spread the last single crochets so the decreases stay evenly spaced.
Crochet Cat Amigurumi: Step by Step
Keep a stitch marker in the first stitch of the body rounds. The head is worked in joined rounds, which means you finish each round with a slip stitch in the first stitch and chain one before starting the next. She explains that this keeps the rounds from spiraling, which makes the color changes much easier.
Part 1: the head of your crochet cat amigurumi
Step 1: Magic ring and 8 single crochets

Make a magic ring and work 8 single crochets into it. Pull the tail until the ring closes completely, and round 1 is done.
Step 2: Round 2, increase in every stitch to 16

Slip stitch in the first stitch, chain 1, then work an increase in every stitch to reach 16. Finish the round with a slip stitch in the chain you made at the start.
Step 3: Rounds 3 and 4, increases every 2 and 3 stitches

Round 3: chain 1, then (single crochet, increase) 8 times, for 24. Round 4: chain 1, then (2 single crochets, increase) 8 times, for 32. Close each round with a slip stitch.
Step 4: Round 5, 32 plain single crochets
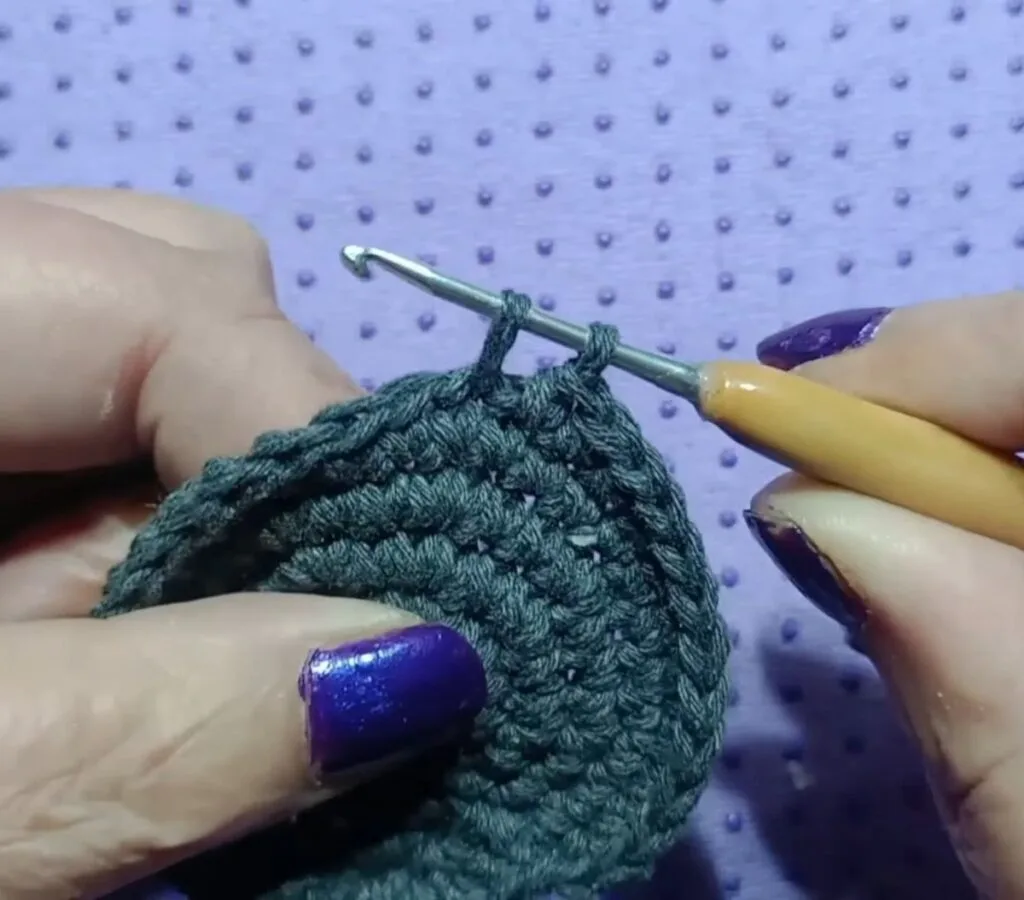
Chain 1 and work one single crochet in each of the 32 stitches with no increases. The cap now stands slightly cupped, which is correct.
Step 5: Round 6 and the first color change
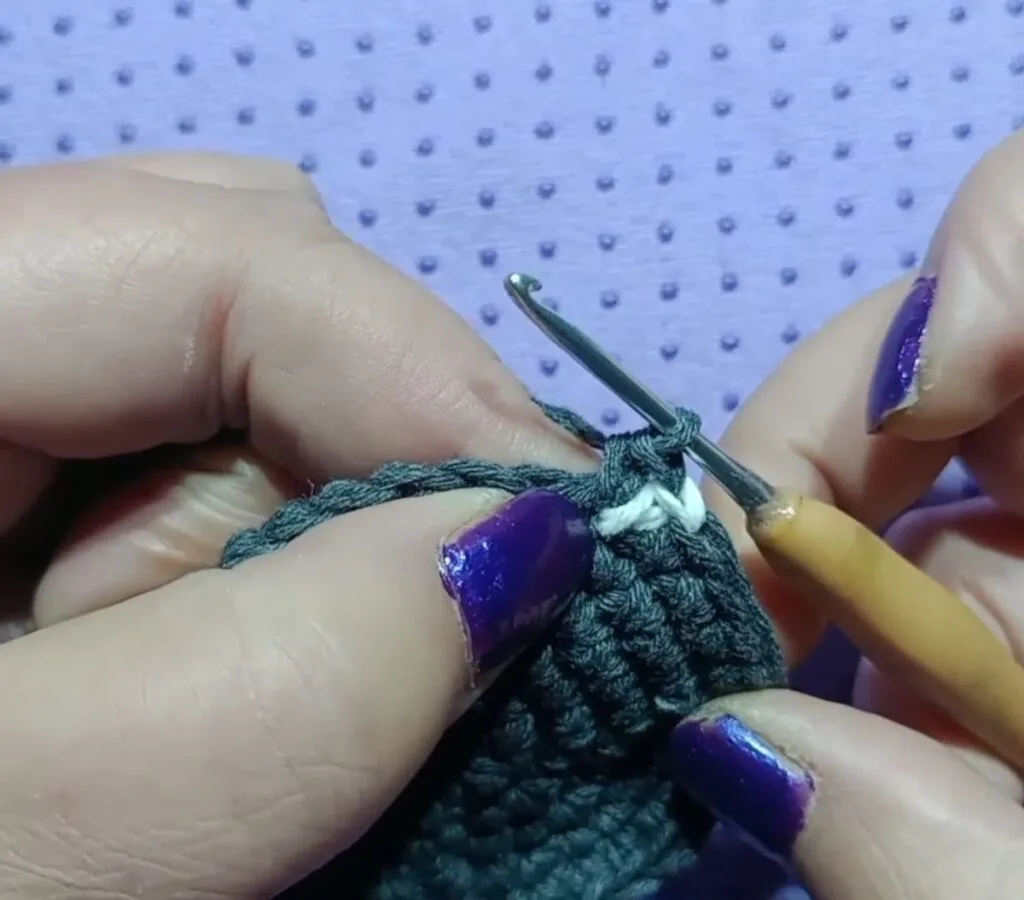
Round 6 is (3 single crochets, increase) 8 times, for 40. At the first group, work 2 single crochets, start the third one but do not finish it. Slide a white strand under the grey, tie a small knot and push the knot against the fabric. Pick up the grey, finish the stitch with white, and the color has changed. The next stitch starts white and closes grey, then the grey carries on.
Step 6: Rounds 7 and 8, the white patches

Round 7 has 40 stitches: 12 grey, 3 white, 17 grey, 3 white and 5 grey, with a color change on the last stitch of each block. Round 8 also has 40: 11 grey, 5 white, 15 grey, 5 white and 4 grey. Each time you change color, cut the old strand and tie a knot, then trim the loose ends so they do not tangle.
Step 7: Rounds 9 and 10, the white diamond takes shape

Round 9 is (4 single crochets, increase) 8 times, for 48, working the white patch with one more white stitch at each edge. Round 10 has 48 plain stitches, again adding one white stitch on each side of the diamond. Always bring the new color from behind and knot it against the fabric.
Step 8: Round 11, all white

Round 11 is all white: 48 single crochets. Tie the white to the chain you made when you closed round 10 and chain 1 in white. From here the head is plain white until the end.
Step 9: Rounds 12 to 15

Round 12 is (5 single crochets, increase) 8 times, for 56. Then work rounds 13, 14 and 15 as plain single crochets, 56 stitches each.
Step 10: Rounds 16 to 19, the decreases

Use the flat decrease: go in from below, take only the outer strand of one stitch, then the outer strand of the next, and close. Round 16 is (5 single crochets, decrease) 8 times, for 48. Round 17 is (4, decrease) x 8 for 40, round 18 is (3, decrease) x 8 for 32, and round 19 is (2, decrease) x 8 for 24.
Step 11: Place the eyes before the head closes
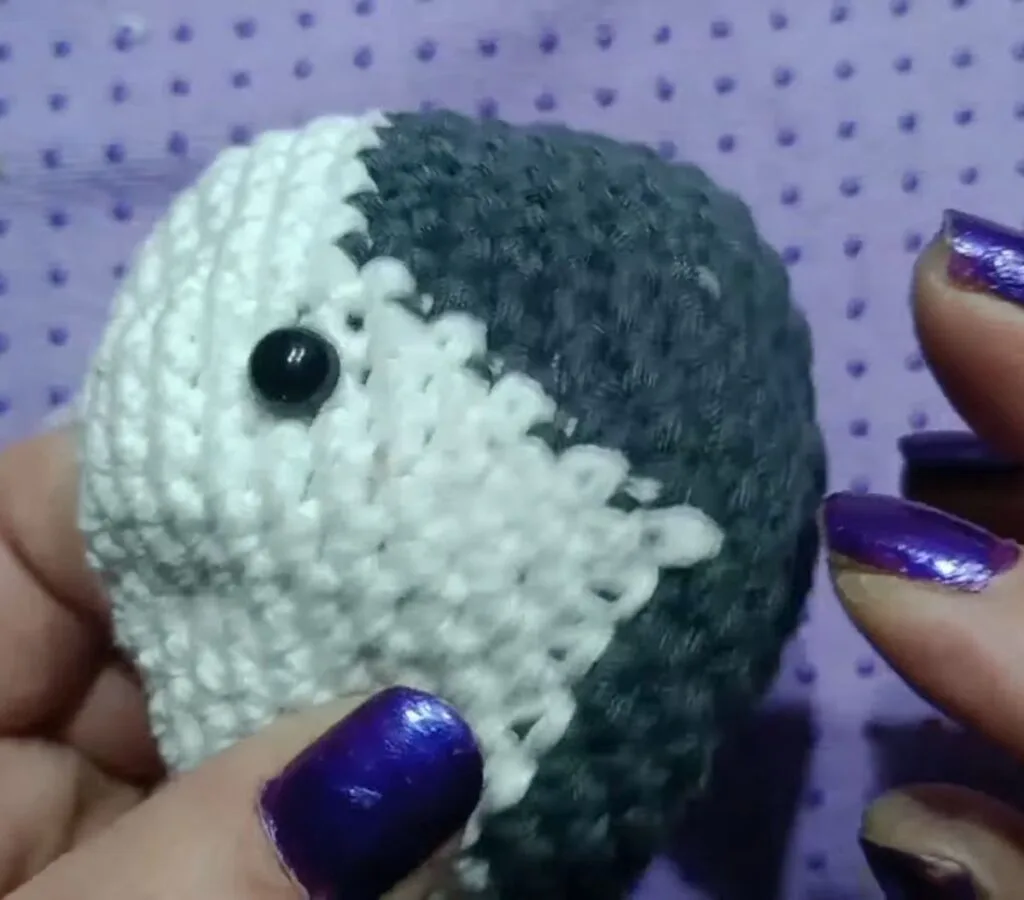
Stop after round 19. Find the front, where the white diamond points up, and set the first eye where the grey round starts, one stitch diagonal from it. Put the second eye on the other side, then move one eye down a round if they look uneven. Stuff the head lightly first, press on the snap washers, and only then stuff firmly.
Step 12: Stuff, then rounds 20 and 21

Stuff the head firmly now, because the opening will soon be too small. Then do round 20, (single crochet, decrease) 8 times, for 16, and round 21, eight decreases in a row, for 8. Insert the hook through the front strands, pull the yarn through and close.

Part 1, continued: the ears of the crochet cat amigurumi (make 2)
Step 13: Work two small ears

Make a magic ring of 4 single crochets. Round 2: increase in every stitch, for 8. Round 3: (single crochet, increase) 4 times, for 12. Round 4: (2 single crochets, increase) 4 times, for 16. Rounds 5 and 6 are plain single crochets, 16 stitches each. Slip stitch in the next stitch and leave a long tail for sewing. Make a second ear exactly the same.
Part 2: the legs and body of the crochet cat amigurumi
Step 14: Start each leg in white

Make a magic ring and work 5 single crochets. Round 2: increase in every stitch, for 10. Round 3: (single crochet, increase) 5 times, for 15, and on the last stitch change from white to grey in the same way as on the head.
Step 15: Round 4, one plain grey round of 15

Work 15 single crochets in grey, then slip stitch in the next stitch and cut the yarn short for the first leg. Make a second leg the same way, but do not cut the yarn when you finish its grey round.
Step 16: Join the two legs
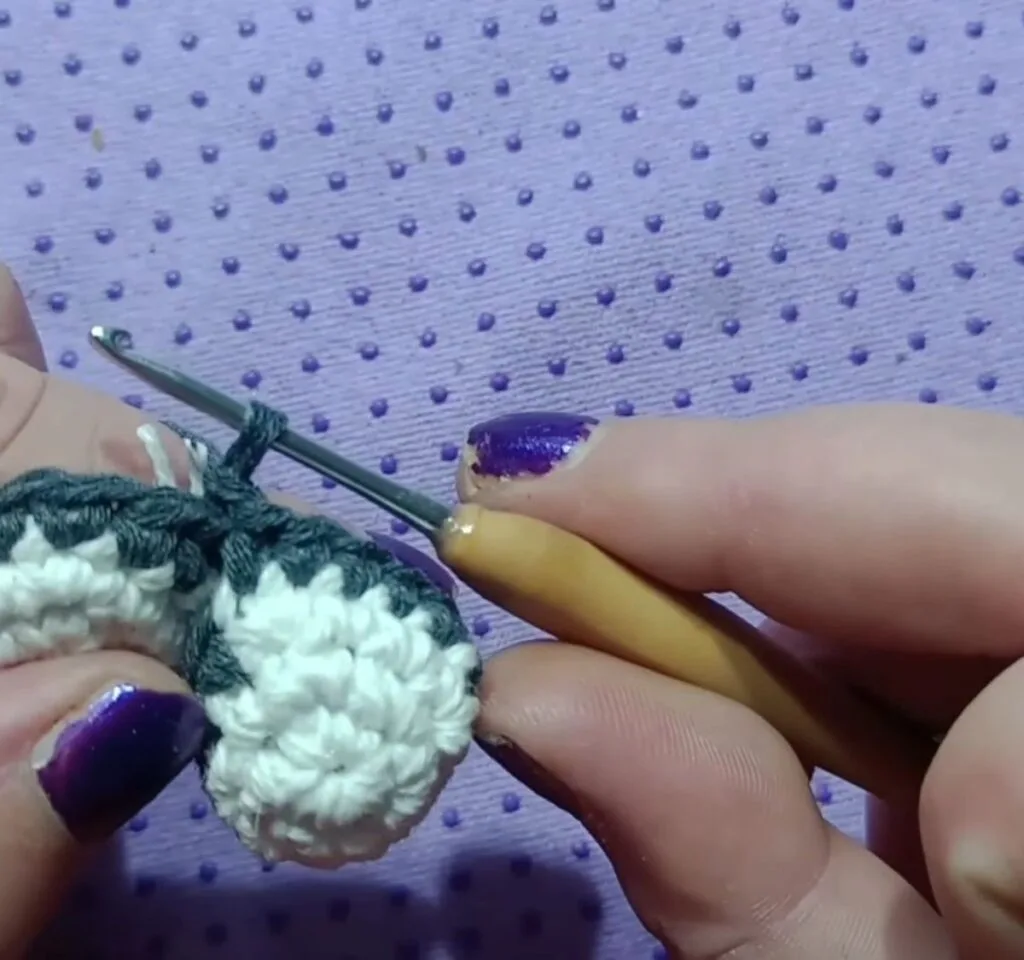
Take the first leg and put the hook through its slip stitch from inside to outside. Pull the yarn through and make a slip stitch, which joins the two legs into one piece. Trim the tails from the color changes so they do not show.
Step 17: Round 5, (4 single crochets, increase) 6 times
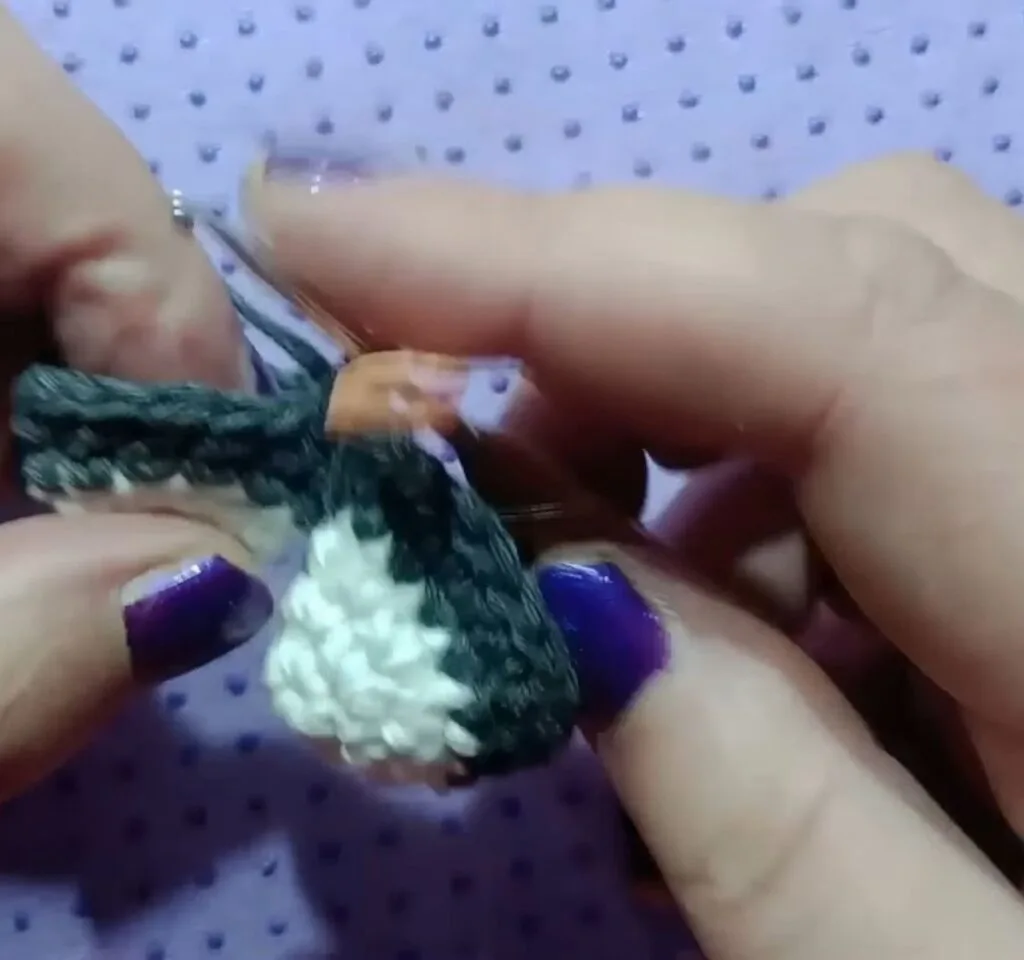
Start next to the joining stitch, mark the first stitch and work (4 single crochets, increase) 6 times around both legs, for 36. Rounds 6 to 10 are plain: 36 single crochets in each of five rounds. Work around one leg, then the other, in one spiral.
Step 18: Rounds 11 to 14, the white belly patch

Round 11: 5 single crochets, decrease, 9 single crochets, then the white patch (1 single crochet, decrease, 1 single crochet), 9 grey, decrease and 5 more, for 33. Round 12 gives 30 with 9 grey, decrease, 3 grey, 5 white, 1 grey, decrease, 9 grey and a final decrease. Round 13 gives 27 and round 14 gives 24. The patch gets smaller as the rounds do, so it looks like a triangle, and she says it should not be perfect, as real cat markings are not.
Step 19: Rounds 15 and 16, then finish the body

Rounds 15 and 16 use the groups described in the section above and continue the decreases around the belly patch. Check your count against round 14 before you go on. At the end of round 16 remove the marker, slip stitch in the next stitch, leave a long tail and cut the grey and white yarn. Stuff the body firmly before you sew the head on.
Part 3: the arms, tail and sewing of the crochet cat amigurumi
Step 20: Make two arms
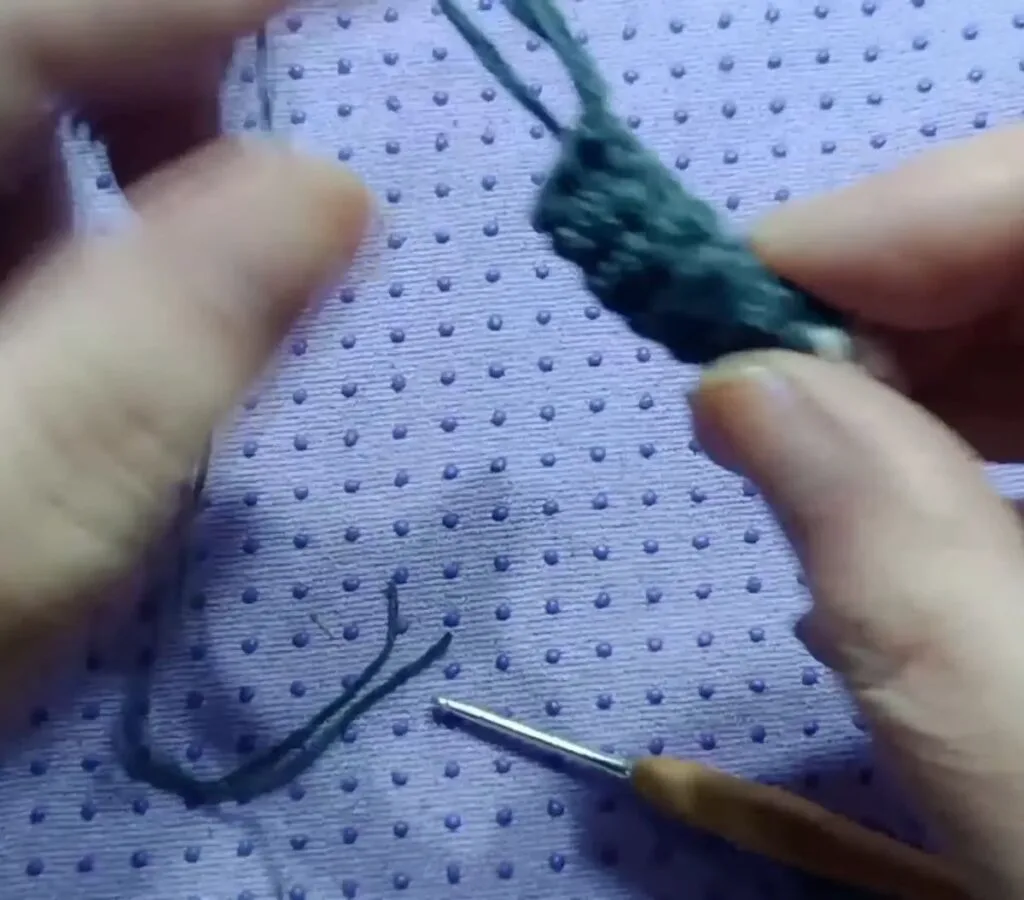
Each arm is labeled round 1, round 2, rounds 3 to 4, then single rounds 5, 6, 7 and 8, so eight rounds in all. It starts with a white tip and continues in grey. The maker does not say the stitch counts, so we do not print any. Make the tube about as thick as one leg of the cat, stuff it lightly if you want a floppy arm, and leave a long tail for sewing.
Step 21: Make the tail
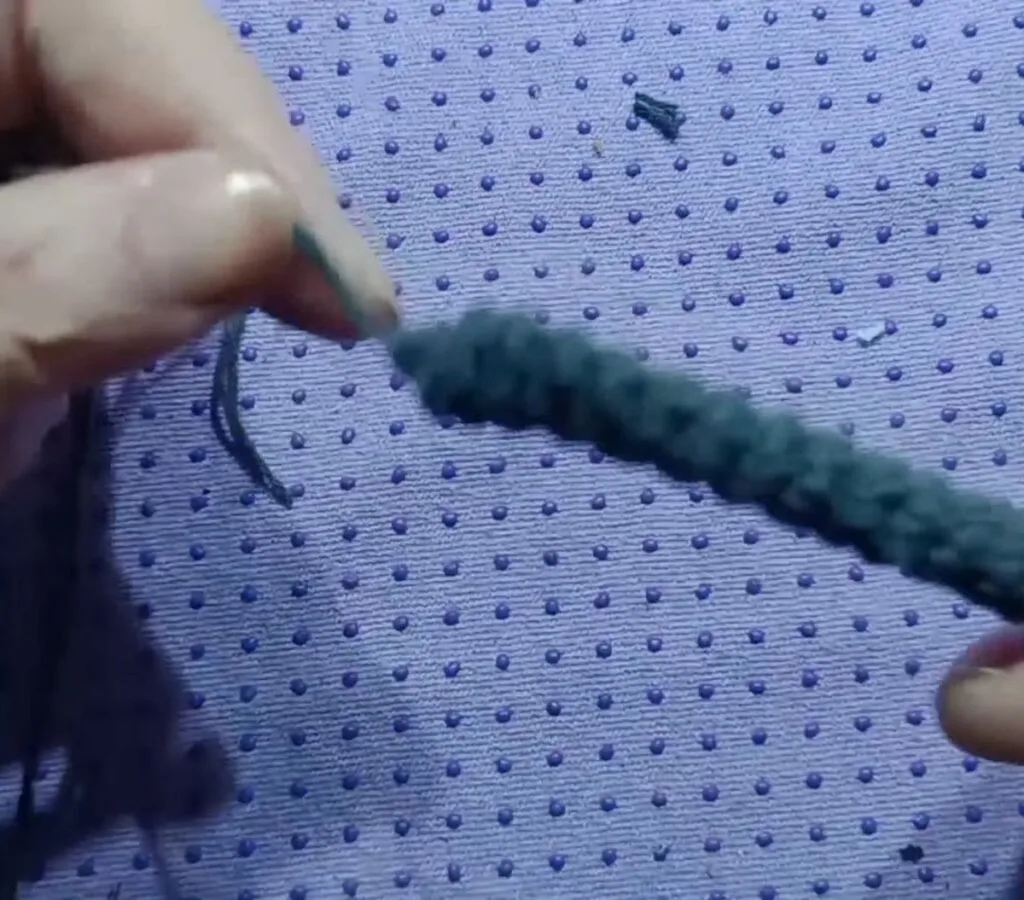
The tail is labeled round 1, round 2 to 4 and round 5 to 16, so it is a long narrow tube of 16 rounds, again with a white tip and grey above it. As with the arms, there are no printed counts: keep it a narrow tube and stop when it looks about as long as the body.
Step 22: Sew the head to the body
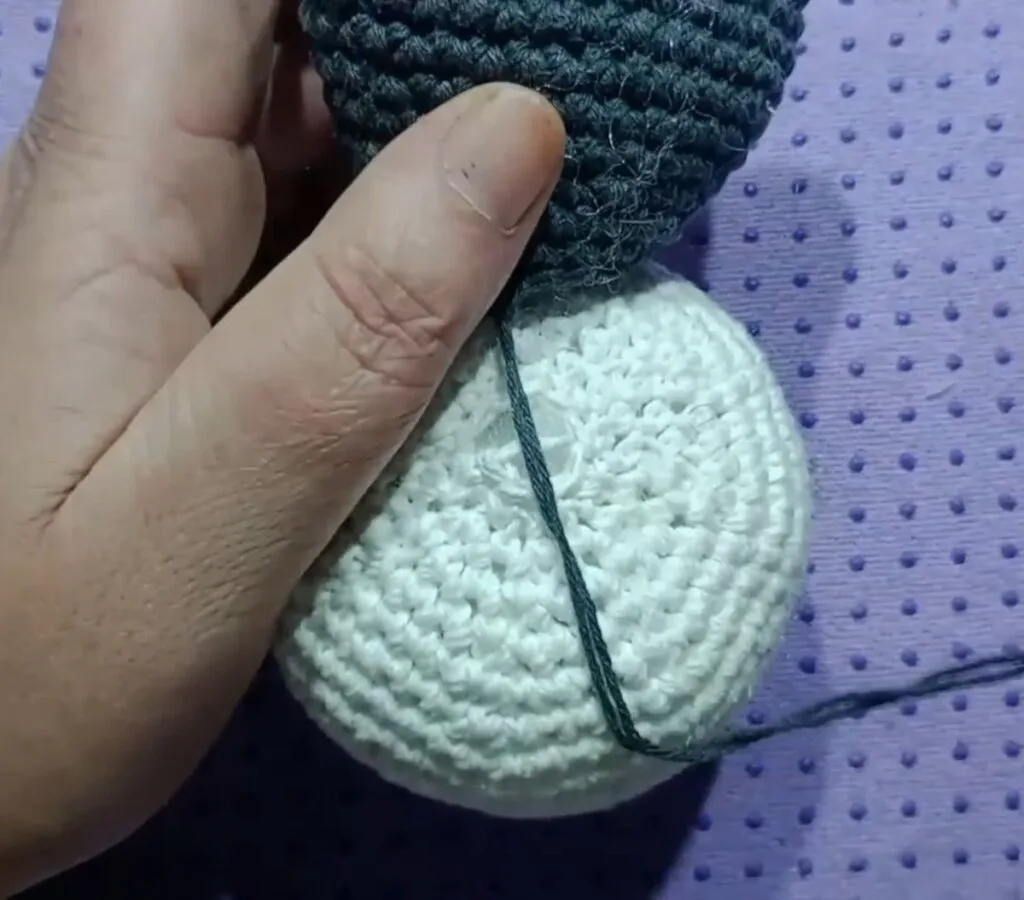
Pin the head so that the face looks forward and the eyes sit above the belly patch. Sew with the long tail of the body, taking small stitches through the neck edge of the body and the base of the head, and go around twice so the head does not tilt.
Step 23: Sew on the arms and tail

Sew an arm to each side of the body just below the neck, with the white tip pointing down, and sew the tail to the back of the body. Look at the cat from the front and the back before you secure the yarn, so both arms are at the same height.
Step 24: Sew the ears on top of the head
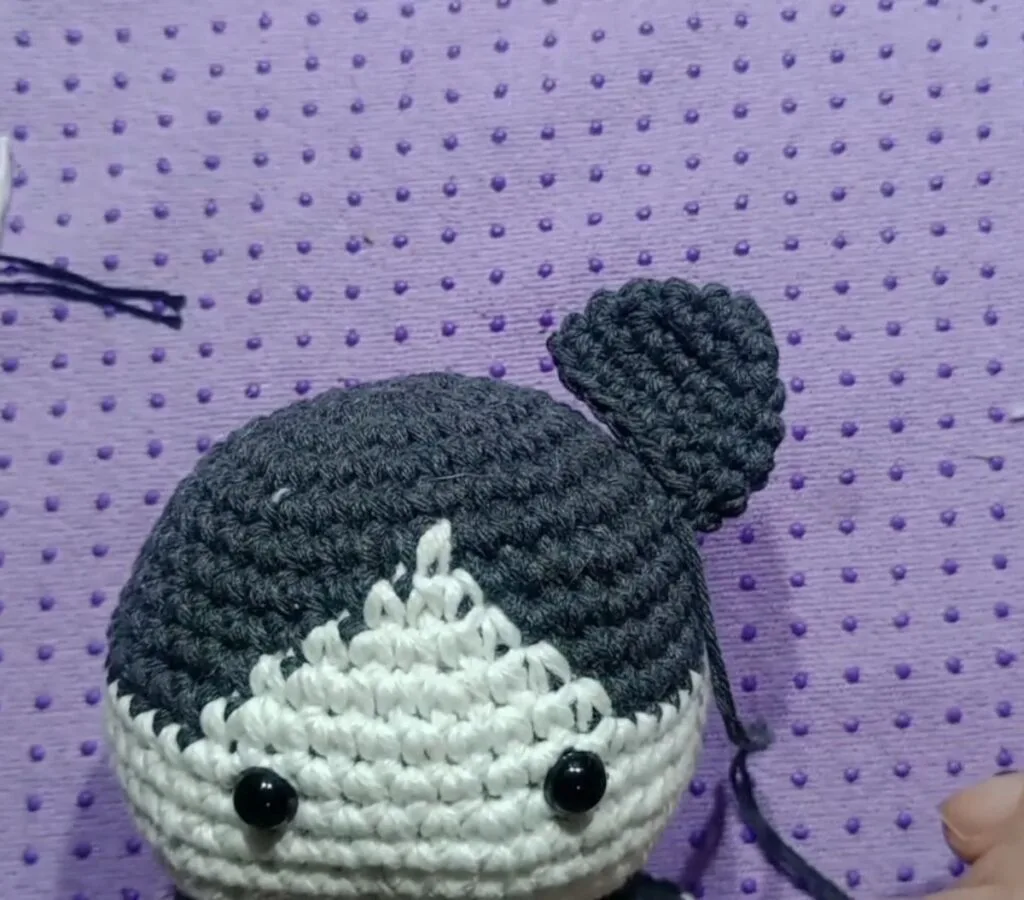
Flatten each ear and sew its base to the crown, on each side of the grey cap, with the point up. Pin both ears first and check them from the front so they are level, and sew with the tail left on each ear. Weave in all ends.
Where a Crochet Cat Amigurumi Goes Wrong
The color change shows a gap
If a hole appears at the change, you tied the knot too far from the fabric. Push the knot right against the stitch before you close it. Knots and ends on the inside are hidden by the stuffing.
The face diamond looks lopsided
The white patch grows one stitch per side, so a miscount in round 8 moves everything. Count each color block against the numbers above before you work the next round.
The head tilts or the eyes sit unevenly
Place the eyes before the head closes and check them from the front. Fill the neck of the body firmly and sew around it twice, because the head is the heaviest part.
Crochet Cat Amigurumi Safety for Little Ones
The Consumer Product Safety Commission says toys for children under three must not have small parts, and that a small part is anything that fits completely into the small-parts cylinder, which approximates the fully expanded throat of a child under three. The cylinder is 1.25 in (3.17 cm) across, according to the 1995 Federal Register notice. The CPSC page itself does not mention stuffed toys or eyes, so we make no claim about them from it.
What we can say is that snap-on safety eyes only stay put if the washer is pressed on until it clicks and the eye does not wiggle, and that this cat uses them. For a baby or toddler, embroider the eyes instead, use firm stuffing and sew every part on twice, and keep the toy out of the crib.
Three More Free Crochet Cat Amigurumi Patterns
Here are three other free cats we read in full, for a different size or style. We list only what each page prints.
| Pattern | Style | Hook | Printed size or yarn |
|---|---|---|---|
| Red Heart Crochet Cat | Small seated cat | Not printed | About 4 in without the ears, Amigurumi Textures yarn |
| Red Heart Katie Cat | Small cat from a craft kit | Page lists two sizes | 5 in (12.5 cm), Super Saver craft kit |
| Small Cat with Joined Legs (lilleliis) | Legs joined to the body | 3 or 3.5 mm | About 15 cm, DK cotton of 50 g per 105 m |
What the three pages leave out: none prints a gauge or a total yardage, so you cannot work out from them how much yarn a small cat takes. That is why we give no yard figure for ours.
Crochet Cat Amigurumi FAQ
Is this crochet cat amigurumi easy for beginners?
It suits a confident beginner. It uses only single crochet, increases and decreases, but you change colors in the middle of rounds and the head takes many small steps.
What hook size is best for a crochet cat amigurumi?
The maker does not say. For DK cotton, one free cat pattern uses 3 or 3.5 mm. Choose a hook small enough that the stuffing does not show between stitches.
How big is this crochet cat amigurumi?
The finished height is not stated. The head alone ends with 56 stitches around, so with fine yarn the whole cat comes out as a small toy, and a thicker yarn makes it bigger.
How much yarn does a crochet cat amigurumi use?
No yardage is given by the maker or by the three free cats we read. One small ball of grey and a little white is a sensible start.
Are crochet cats safe for babies?
Embroider the eyes, use no beads or buttons and sew every part on firmly. The CPSC bans small parts in toys for children under three.
Can I make the crochet cat amigurumi in other colors?
Yes. Any two colors work; the grey and white version here is just one example.
More Small Toys to Make After Your Cat
Once your crochet cat amigurumi is done, try another small make. The crochet baby rattle uses the same single crochet skills, the crochet bat keychain is another small amigurumi, and the crochet cherry keychain is a quick bag charm. Browse every baby toy pattern on the site.
Sources
- Red Heart, Crochet Cat
- Red Heart, Crochet Katie Cat
- lilleliis, Small Cat with Joined Legs
- Craft Yarn Council, yarn weight system
- CPSC, small parts
- Federal Register, small parts cylinder, 1995
Pattern credit: this cat design is by the crochet channel AMIGURUMIS ANTI ESTRÉS.