Crochet Vest Pattern: How to Make an Easy 2-Square Vest
This crochet vest pattern makes a granny square vest from just two giant squares, a pair of straps, a few side rows and a ribbed edge. The guide below walks you through it in 20 steps with a photo for each one, from the first round of the first square to the finished neckline, and then adds the sizing, hook and yarn figures the design leaves out.
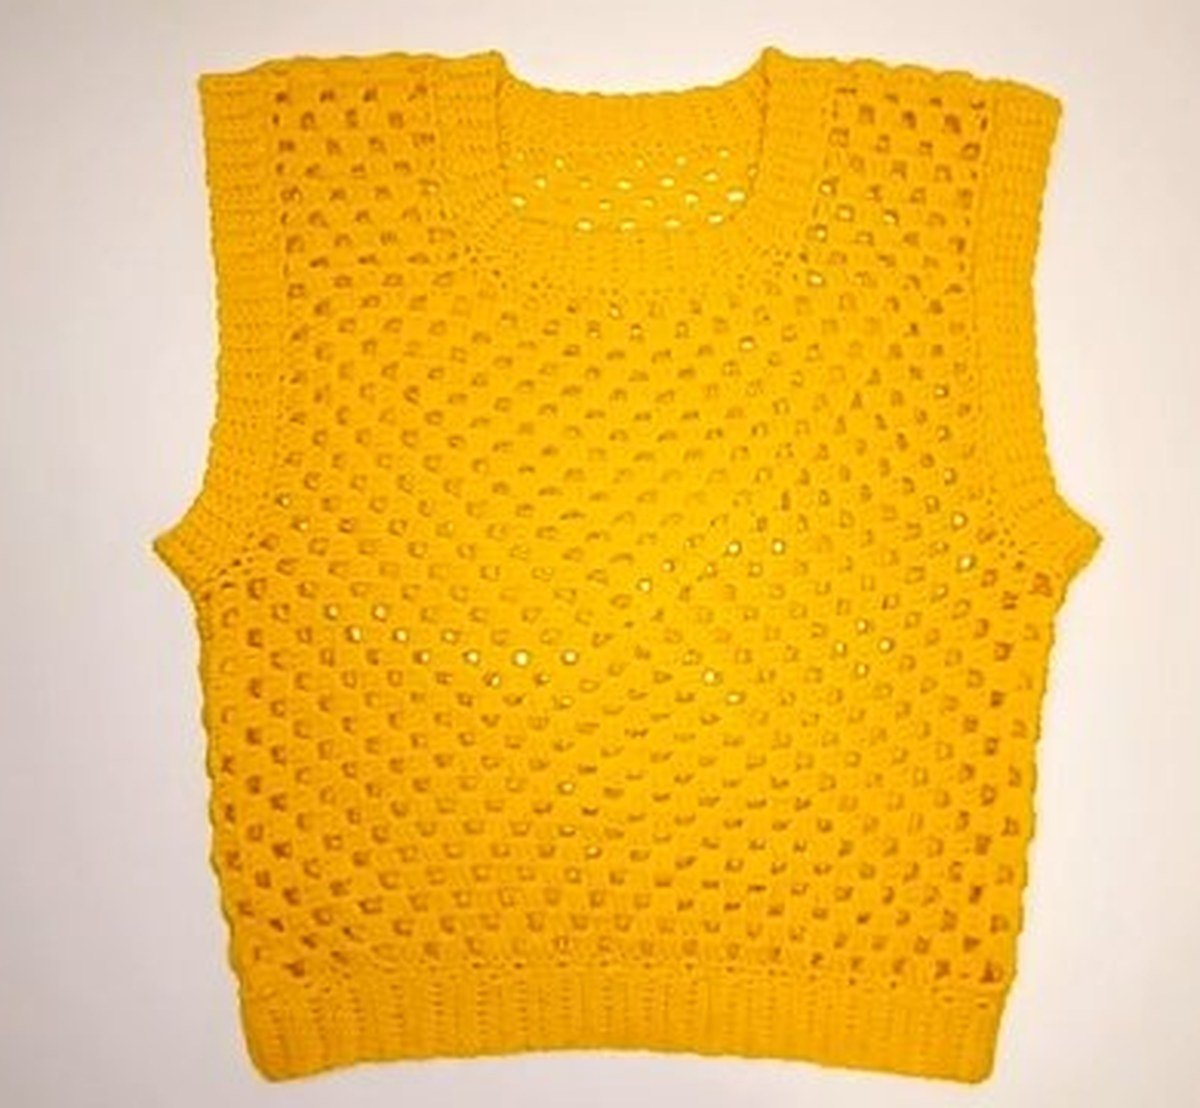
Below the steps you get a sizing table, the places a vest goes wrong, a comparison of five free vest patterns and answers to the questions people ask most. Where the design does not print a number, we say so instead of guessing.
The correction up front: this crochet vest pattern prints a size (Small), a 4.0 mm hook and the measurements of its squares, but no total yarn amount, no finished chest and no gauge. Two squares of about 39 cm are only 78 cm (30.7 in) of body width, which is 3 cm under the 81 cm chest of a Craft Yarn Council size S, so the side rows are what make the vest fit. We show that arithmetic in the sizing section below.
- Crochet Vest Pattern at a Glance
- What You Need for This Crochet Vest Pattern
- Crochet Vest Pattern: Step by Step
- Where a Crochet Vest Pattern Goes Wrong
- Sizing a Crochet Vest Pattern
- Hook and Yarn for a Crochet Vest Pattern
- Five More Free Crochet Vest Patterns
- Crochet Vest Pattern FAQ
- Where to Go Next
- Sources
Crochet Vest Pattern at a Glance
A granny square vest is built flat and sewn up. Every part is a rectangle or a strip, so there is no armhole shaping to calculate, and the only new skill is the ribbed edge worked in the back loops. Here is each part of this crochet vest pattern in one table.
| Part | How it is made | Pieces |
|---|---|---|
| Giant granny square | Worked outward from the centre to about 39 cm on a side in 15 rows, for the front and the back | 2 |
| Straps | Worked from a corner of each square in rows of double crochet clusters, 8 rows for the front strap | 2 |
| Side sections | 3 rows on each side of the front and back panels, with the arm space left unworked | 4 |
| Seams | The two panels are sewn together with a yarn needle | 1 |
| Ribbing | A row of single crochet as a foundation, then ribbing strips worked in the back loop only, for the armholes, the neckline and the bottom | 3 edges |
What this design leaves out: it gives no total yarn amount, no finished chest and no gauge. Rather than invent them, we convert the figures that are printed and set them beside five other free vest patterns.
What You Need for This Crochet Vest Pattern
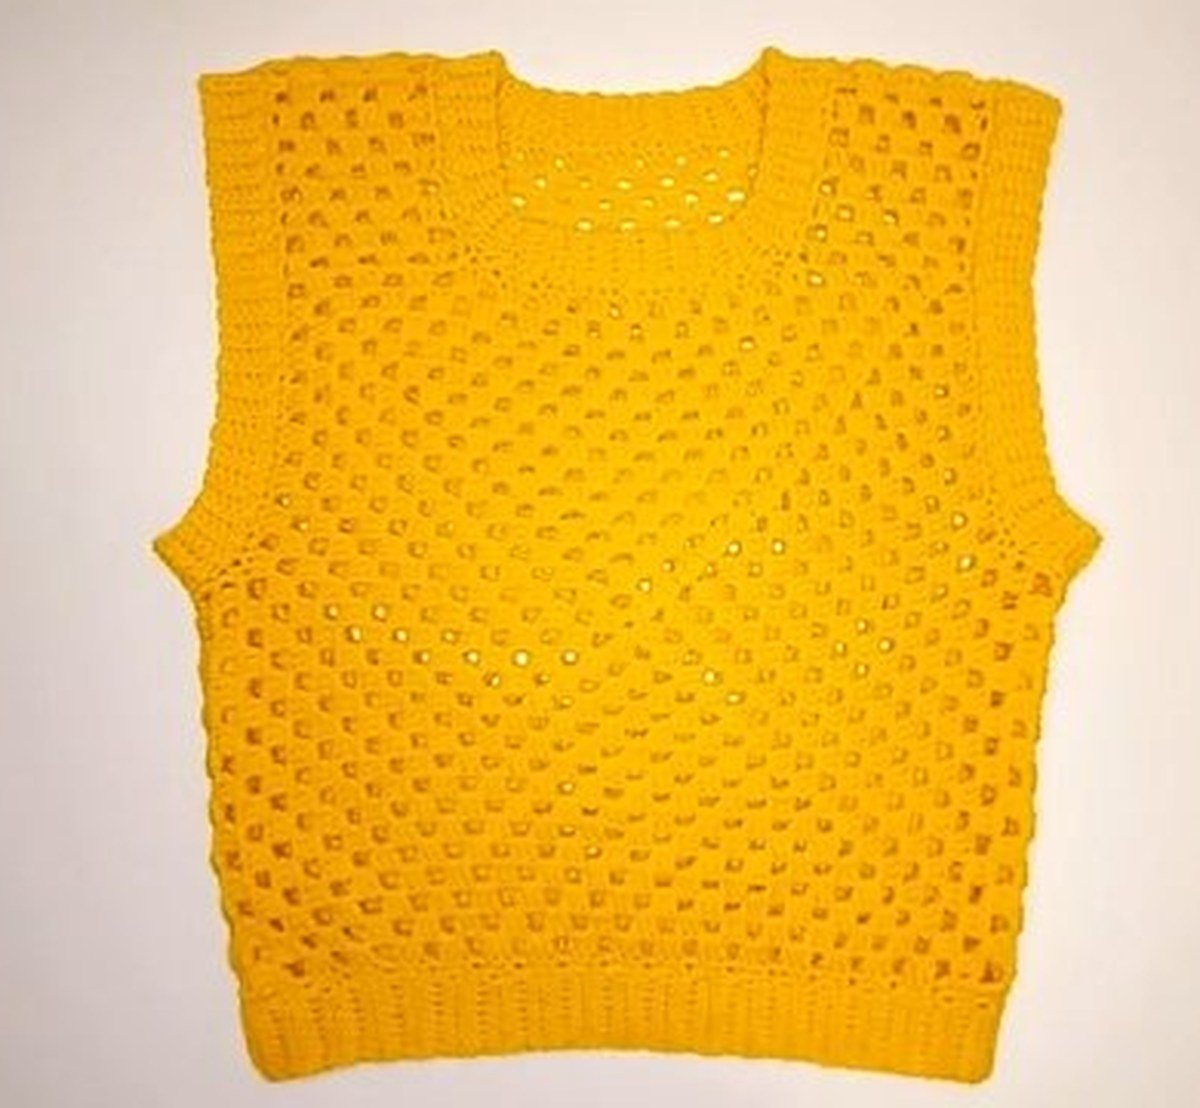
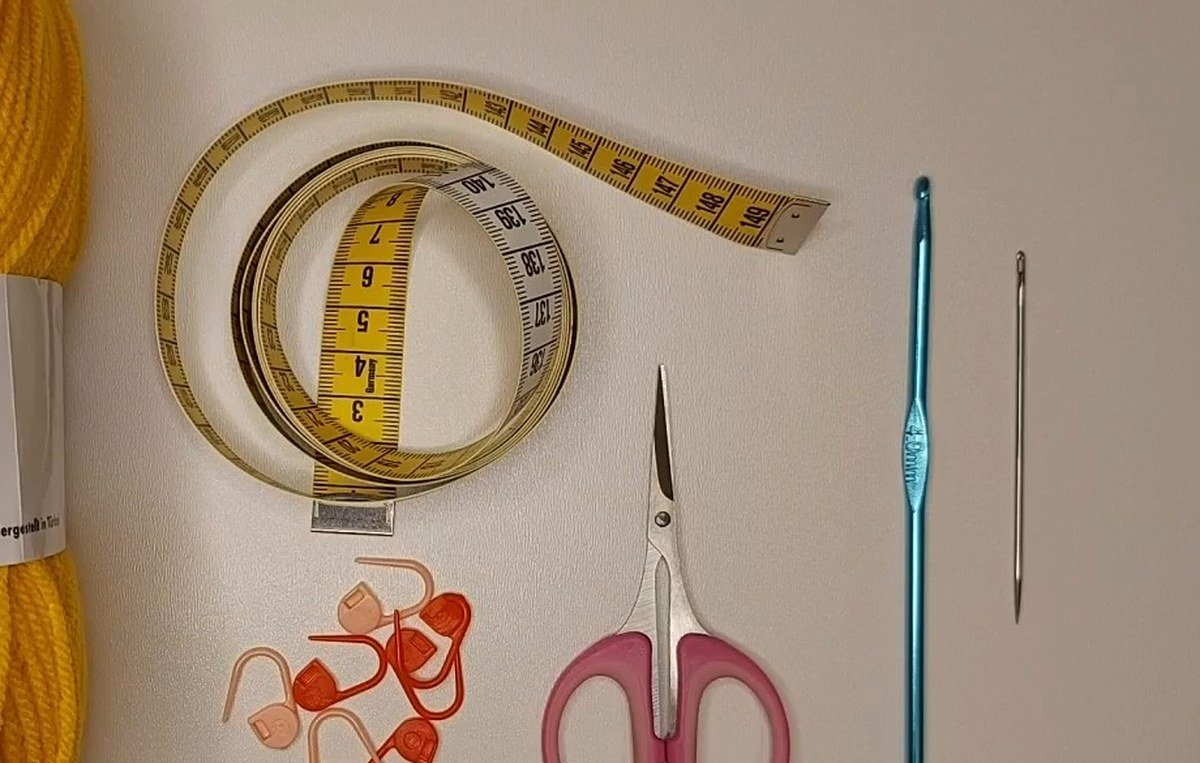
The vest in this crochet vest pattern is worked in a bright yellow acrylic, and the list of tools is short. The yarn label in the photo reads 100% acrylic at about 240 m per 100 g, which is about 262 yd per 100 g.
| Item | What to use |
|---|---|
| Yarn | 100% acrylic, about 240 m (262 yd) per 100 g. The design prints no brand, weight category or total amount |
| Hook | 4.0 mm. This is the size printed for size Small |
| Tools | Scissors, stitch markers, a tape measure and a yarn needle for the seams |
| Size | The design makes size Small; the sizing section below shows how to scale it |
Stitches and abbreviations
Crochet has two naming conventions, so here are both. The design uses only four stitches, plus the chain.
| Abbreviation | Name used here | Other naming convention |
|---|---|---|
| Ch | Chain | Chain |
| Sl st | Slip stitch | Slip stitch |
| Sc | Single crochet | Double crochet |
| Dc | Double crochet | Treble crochet |
A blanket starts from a chain worked to a stitch multiple, but this vest has no such starting chain. The squares grow from the centre, and the strap is worked off the corner spaces. The only repeat to remember is a cluster of 3 double crochet followed by 1 chain, which is 4 stitches, repeated 3 times in each strap row.
Crochet Vest Pattern: Step by Step
Make the squares first, then the straps, then the side rows, then sew the panels together and finish with the ribbing. Keep a tape measure beside you: the design is checked by centimetres as much as by stitches.
Step 1: Start the first giant granny square
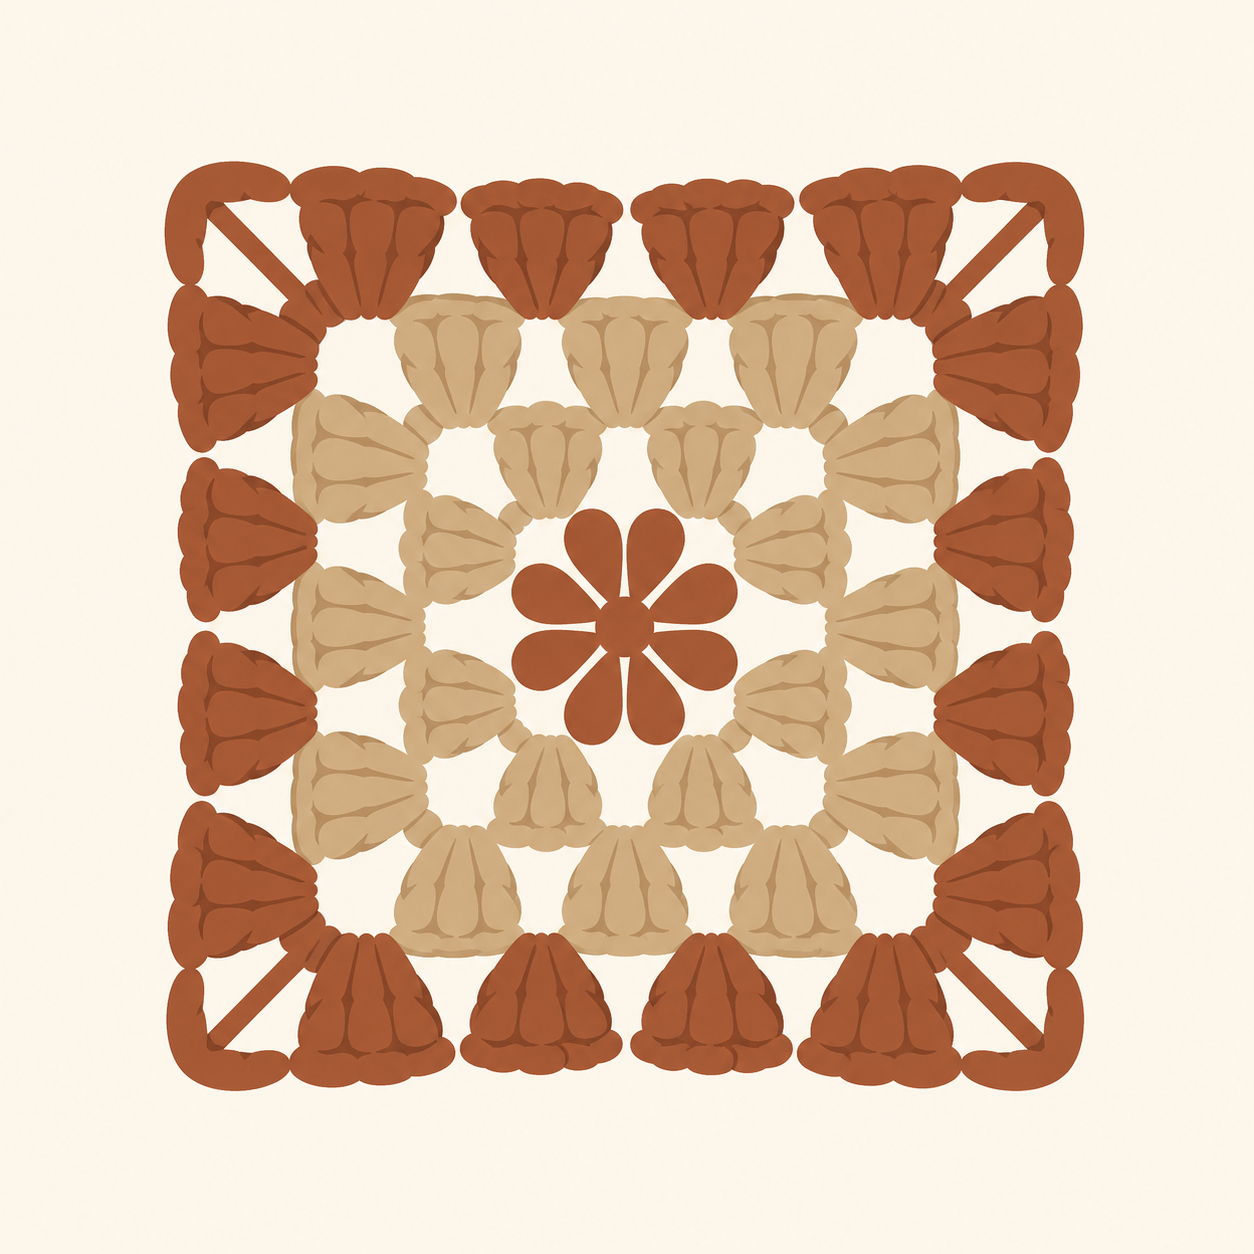
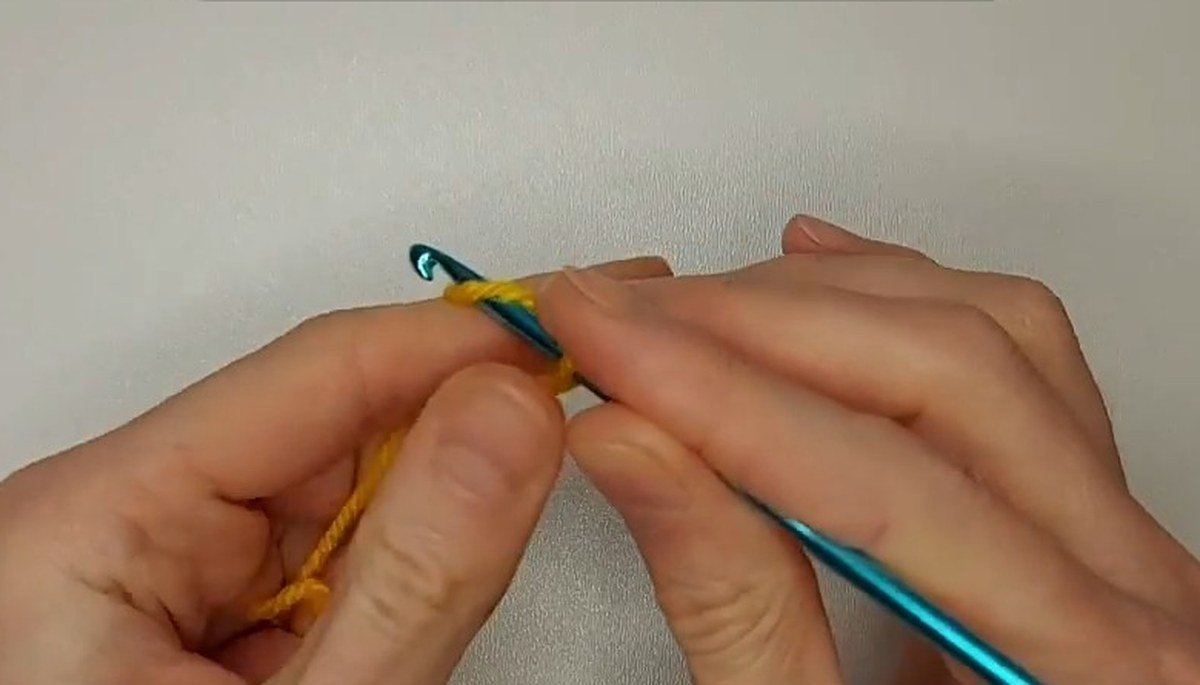
Make two giant granny squares for this vest. They are basic granny squares, and the designer notes that she teaches the basic square on a separate tutorial of her own. Start the first one now and work it outward from the centre.
Step 2: Keep adding rounds
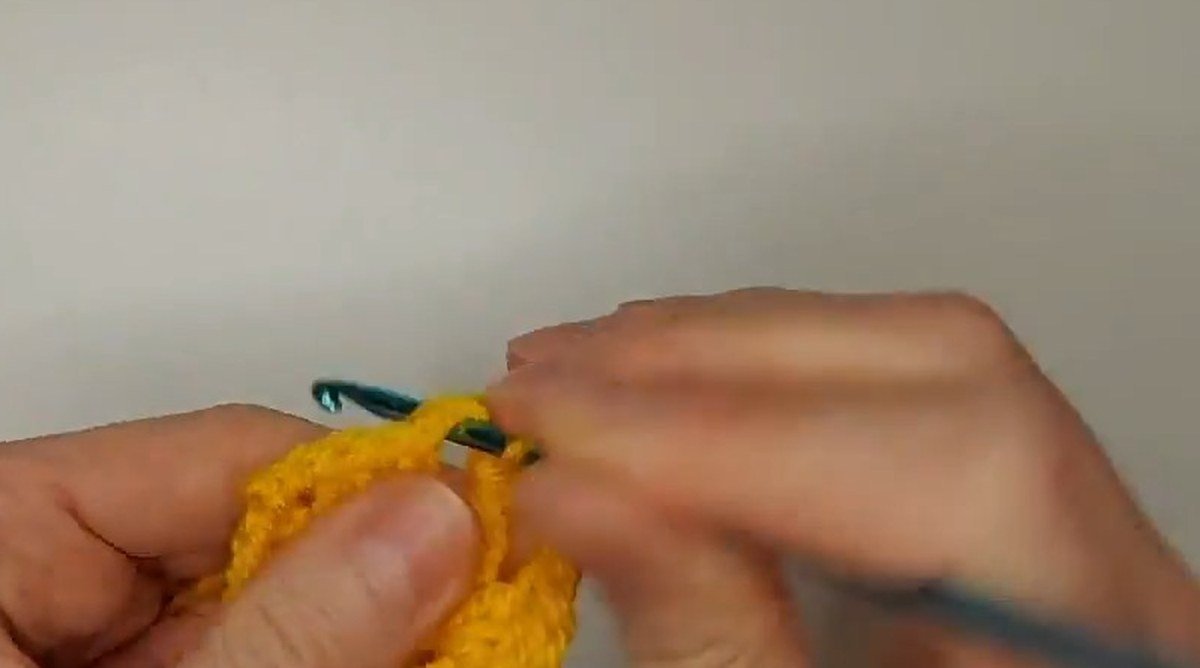
Keep working round after round, with clusters of double crochet and a chain between them. The square grows evenly on all four sides, and the holes stay open: this is a lacy fabric, not a dense one.
Step 3: Finish the square and hold it up
Stop when the square reaches the size in the next step. Hold it up to check that the sides are straight and the corners are sharp; a vest built from two squares looks only as neat as the squares themselves.
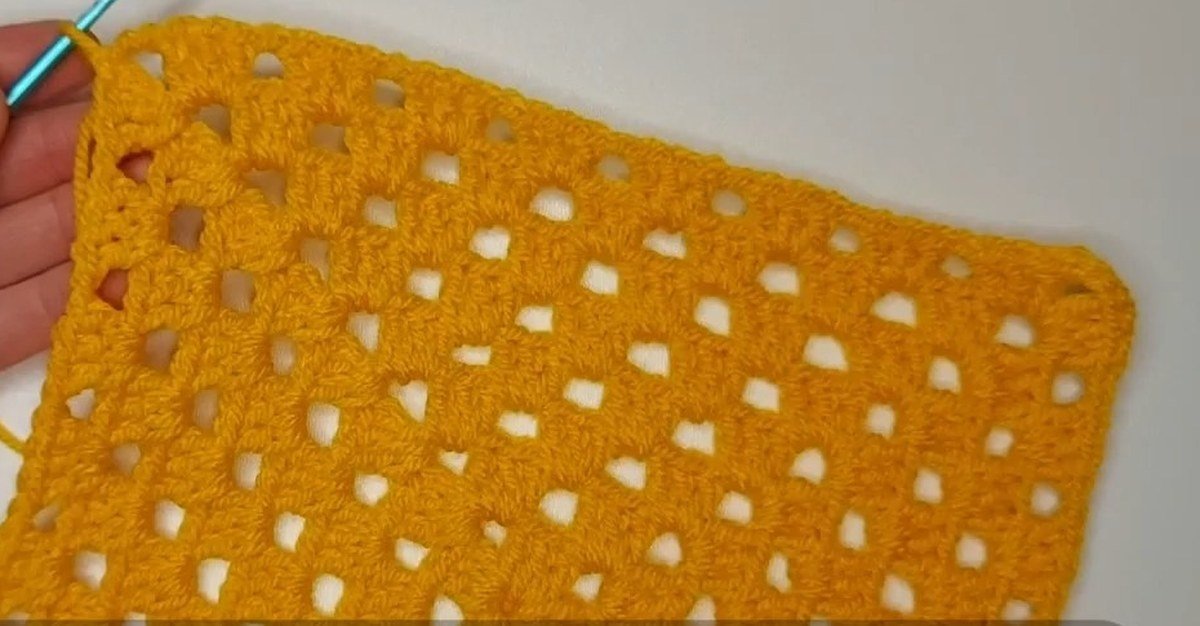
Step 4: Measure: about 39 cm and 15 rows
Each square is about 39 cm on a side and 15 rows in total. At 39 cm over 15 rows, each row is 2.6 cm (1.0 in) tall, which is the number the sizing section uses. Make two pieces that match.
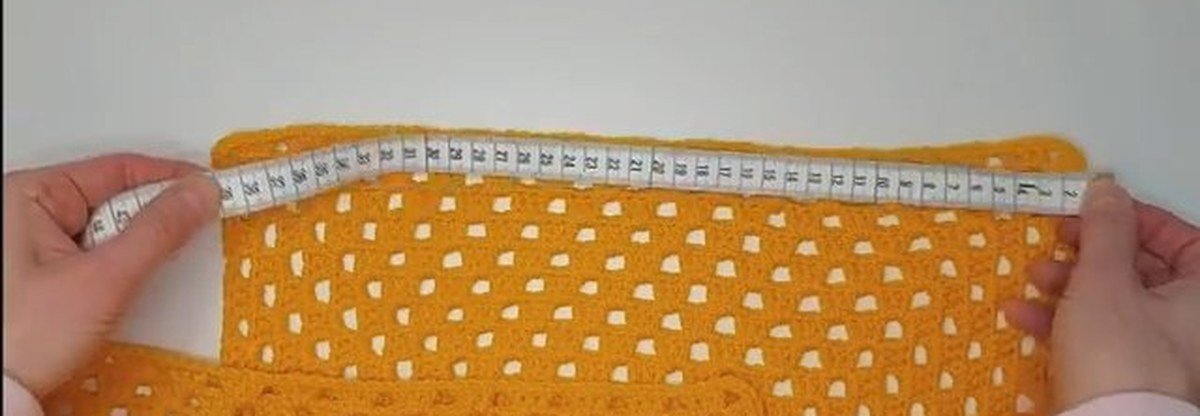
Step 5: Mark the neckline symmetrically
On the front panel, place two markers for the neckline in a symmetrical way, so the neck sits in the middle. The neck opening in the photos is about 21 cm. Check the position with a tape measure before you attach any yarn.
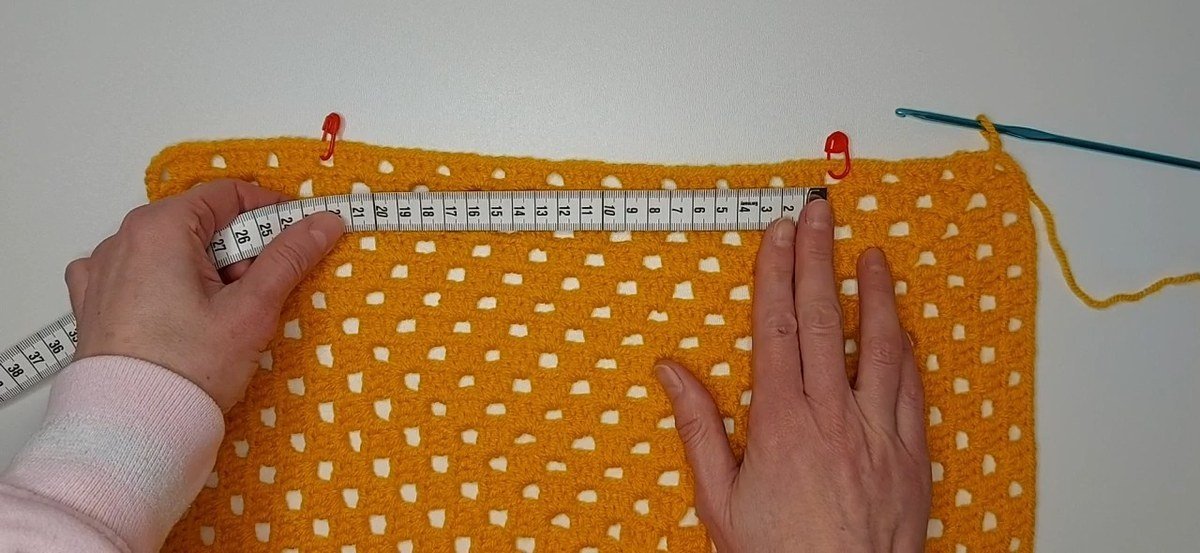
Step 6: Attach the yarn for the strap
For the strap, attach the yarn in a corner of the granny square. The strap is worked from the corner space upward, one for each shoulder.
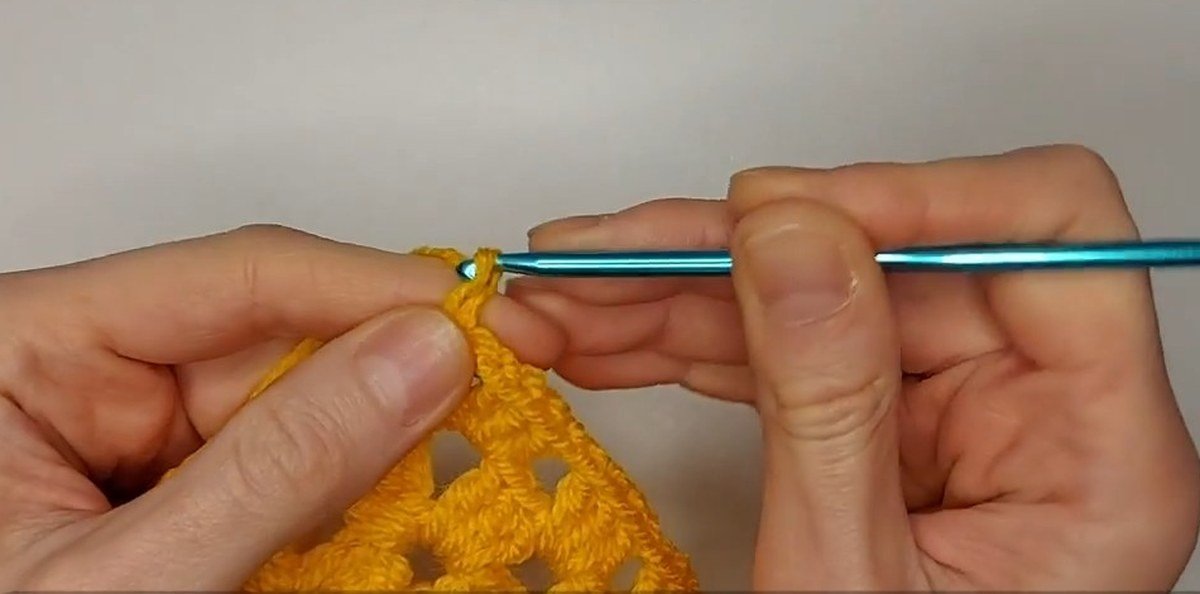
Step 7: Work the first strap row
Chain 3, work 2 double crochet in the same space, then repeat (chain 1, 3 double crochet in the same space) 3 times. Chain 4 and turn. This row sets up the strap.
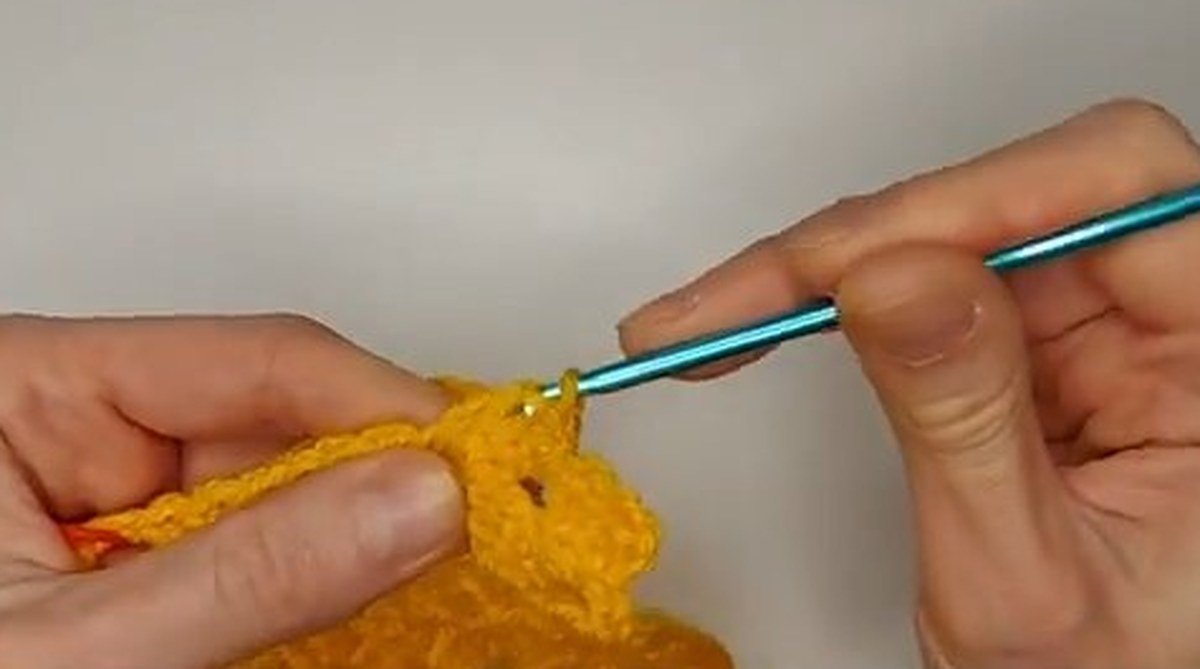
Step 8: Repeat the two strap rows
Now alternate two rows. One row is (3 double crochet in the same space, chain 1) 3 times, 1 double crochet, chain 3, turn. The other row is 2 double crochet in the same space, then (chain 1, 3 double crochet in the same space) 3 times. Keep going and the strap grows upward in neat granny rows.
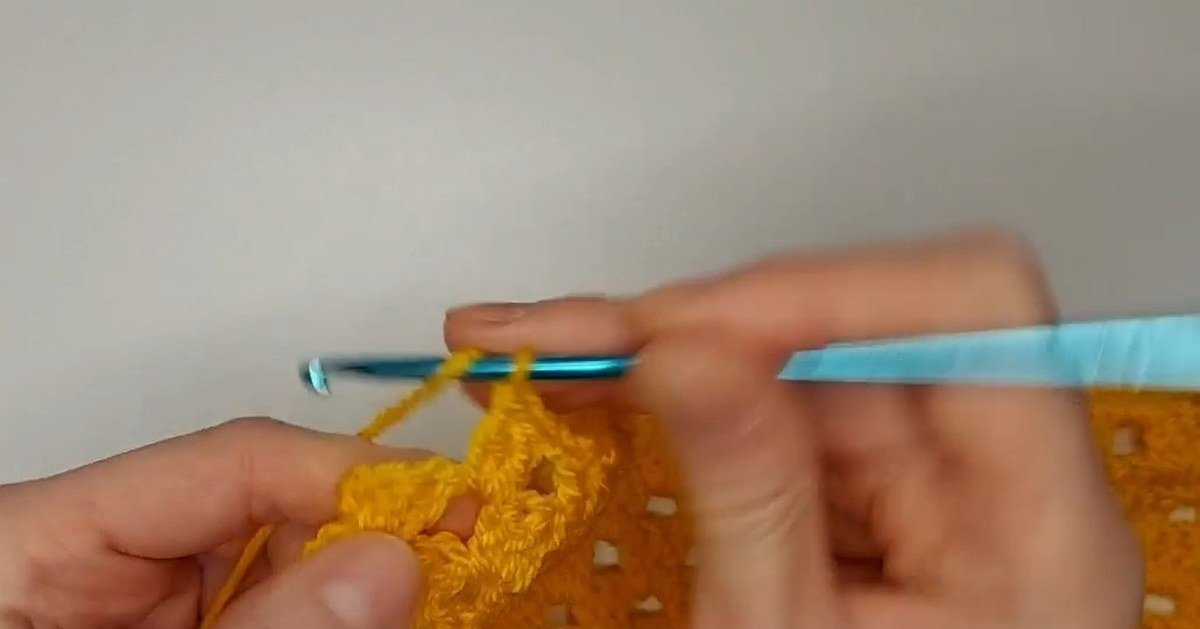
Step 9: Stop at 8 rows
Make 8 rows in total for the front strap. When you finish, the strap stands up from the corner of the square like a small tower, and you can check that its height matches the other strap on your own panel.
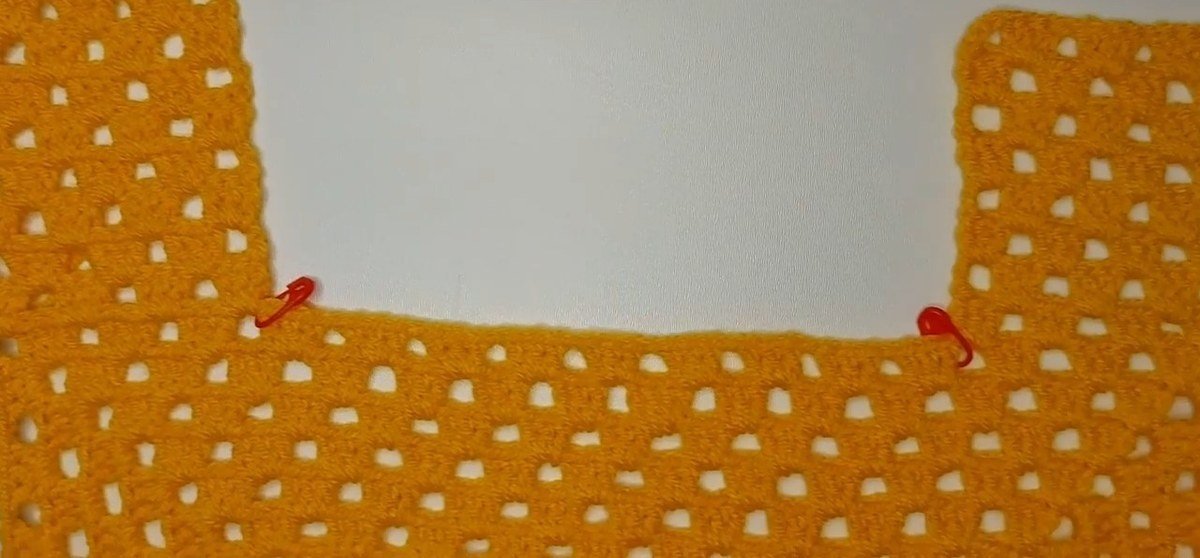
Step 10: Work the back panel with its own counts
The back panel is worked on the second square in the same way, but the counts differ: for the back, make 4 rows corner to corner and 4 rows for the strap. The design does not say how these 4 plus 4 rows relate to the 8 rows of the front strap, so hold your strap against your shoulder as you go.
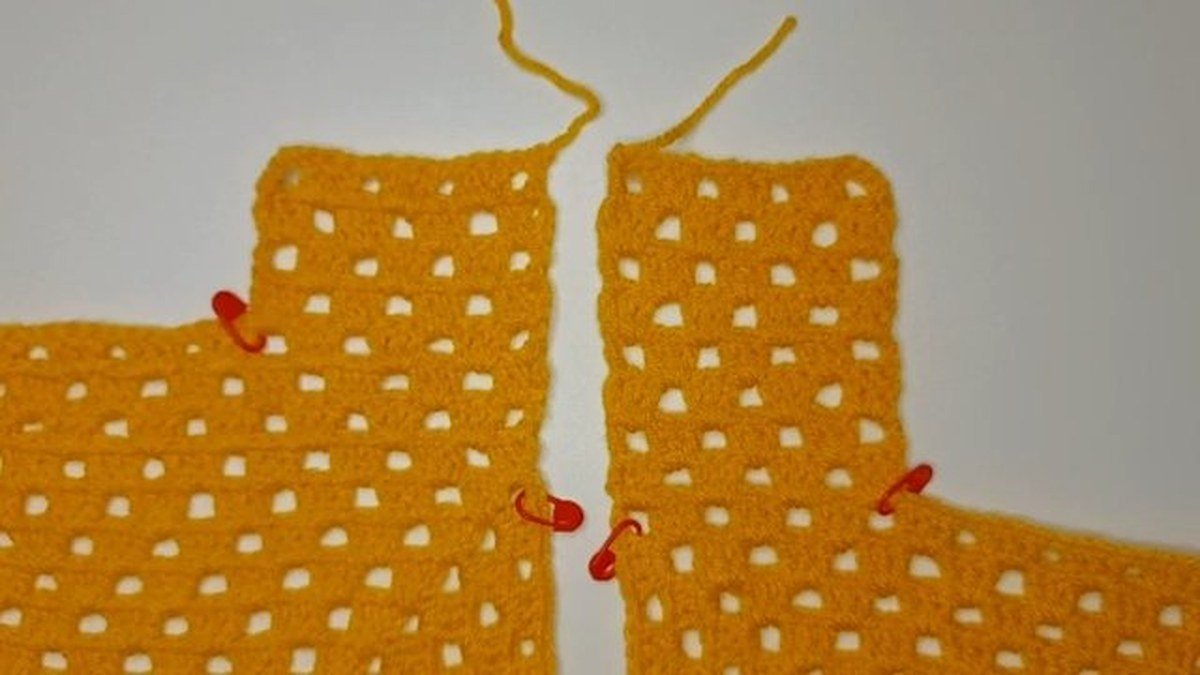
Step 11: Measure and add the side rows
Make 3 rows on each side of the front and back panels, and keep the arm space unworked. Measure with the tape as you go so that each side ends at the same point.
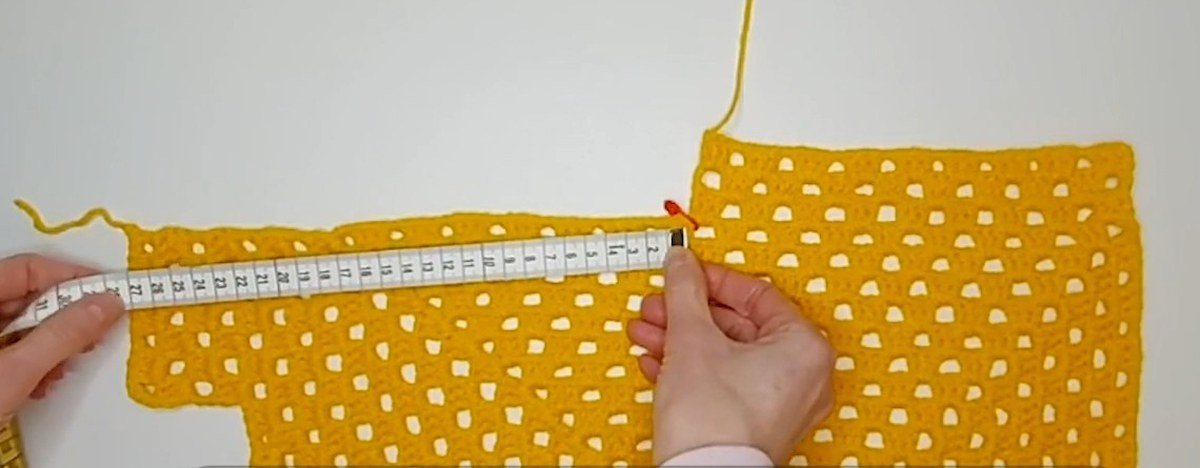
Step 12: Check that both panels match
Make sure that each side has the same amount of stitches and rows. Lay the two panels next to each other: if one side is longer than the other, the vest will hang crooked once it is sewn.
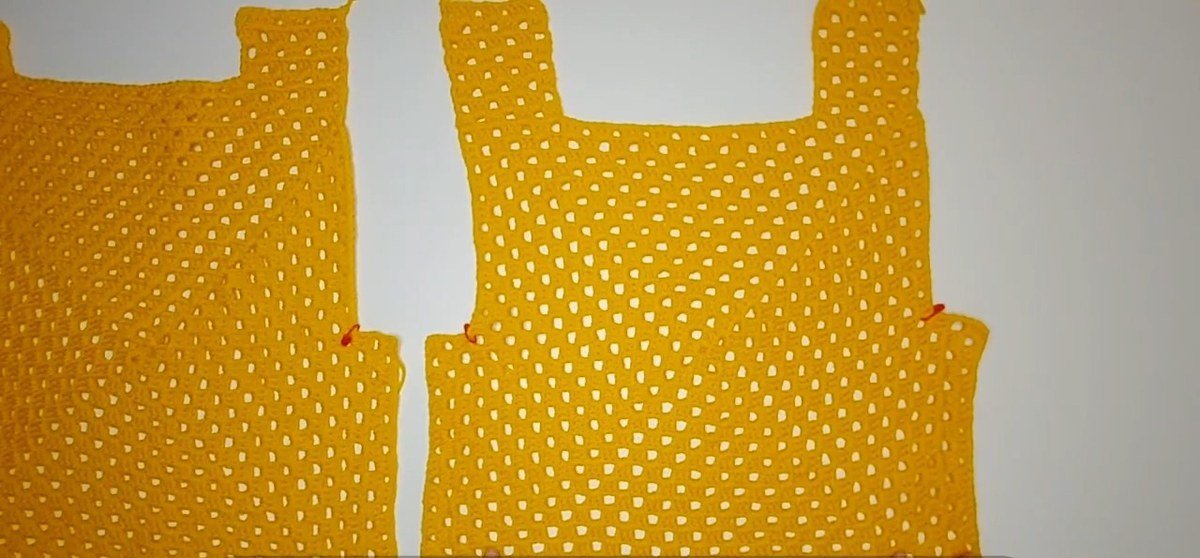
Step 13: Sew the panels together
Sew both panels together with a yarn needle. The photo shows the joined piece standing up with its two straps, ready for the edges.
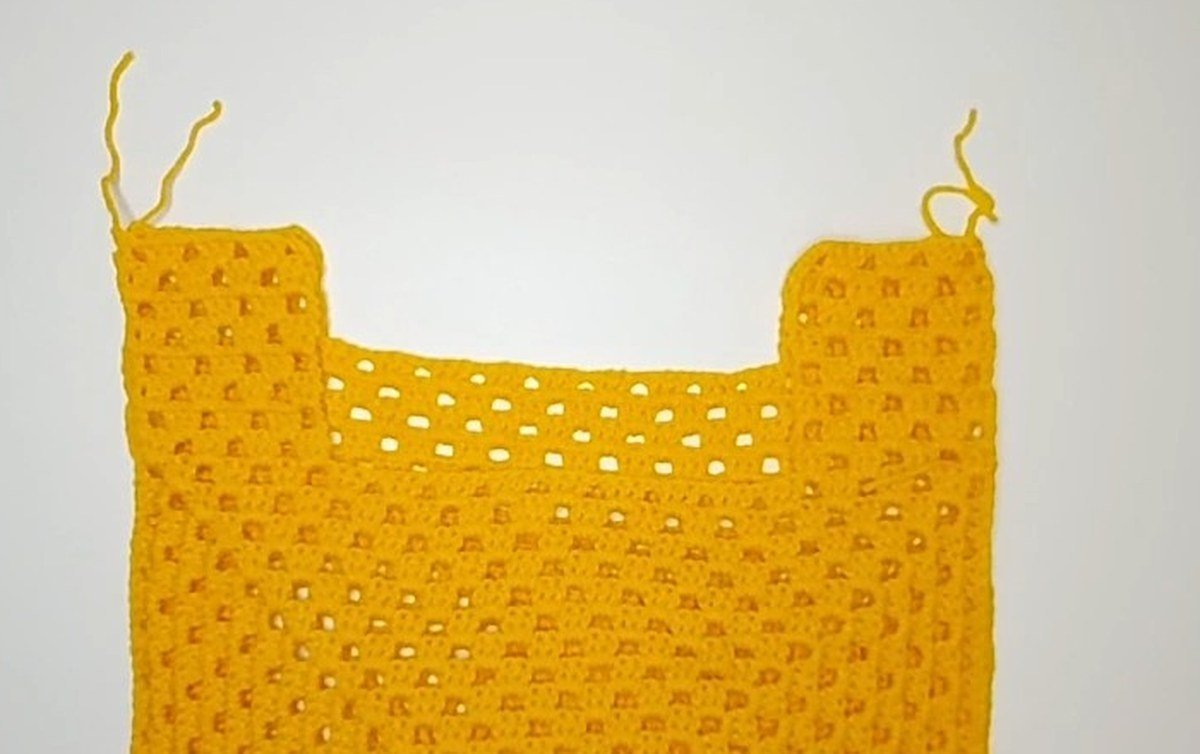
Step 14: Start the ribbing: attach the yarn
Make a slip knot and attach the yarn at the edge you want to rib, starting with an armhole. A neat start here makes the whole ribbed edge look finished.
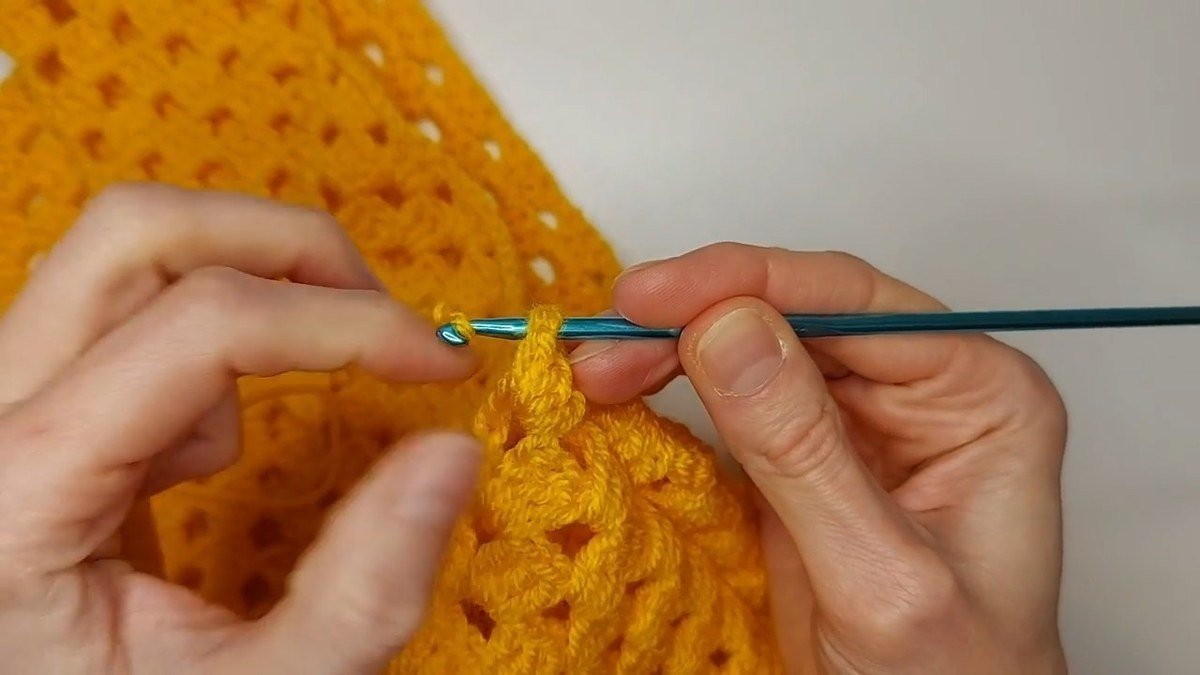
Step 15: Work one row of single crochet as the foundation
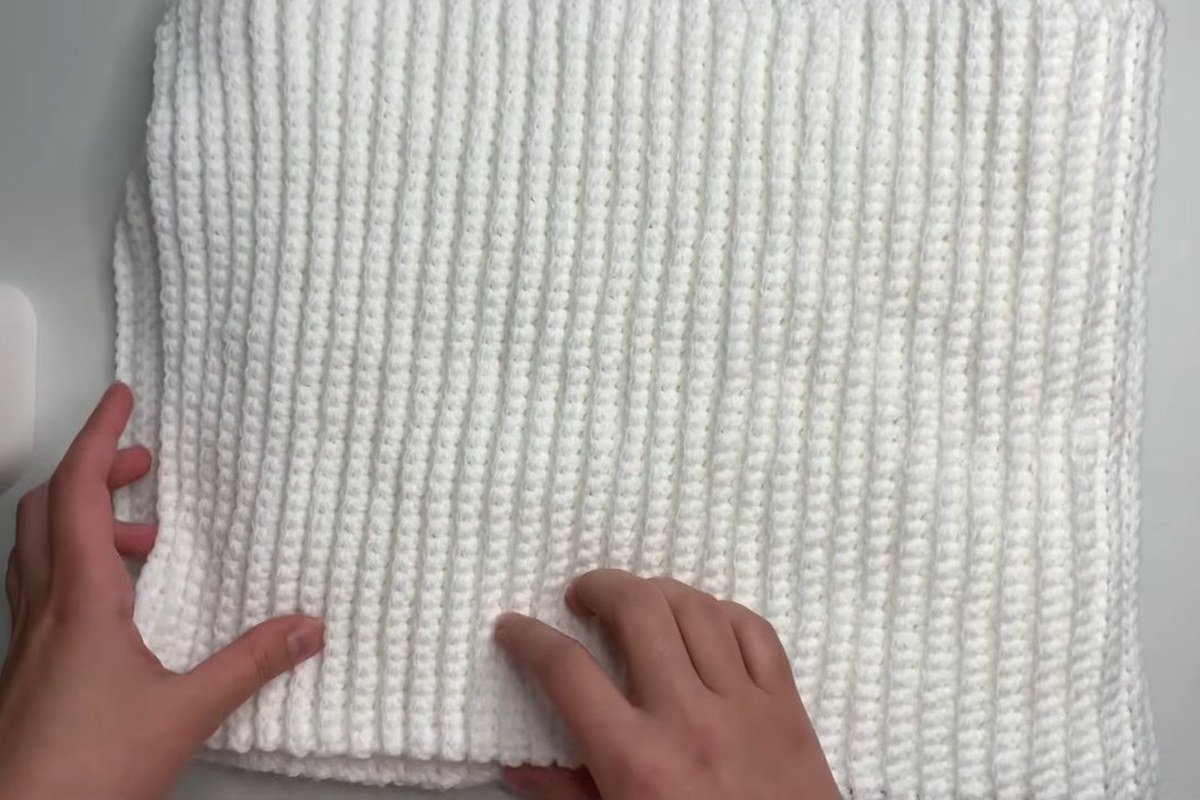
Work 1 row of single crochet stitches to make a nice foundation for the ribbing. This row gives the strips something firm to attach to, and it stops the open granny holes from stretching.
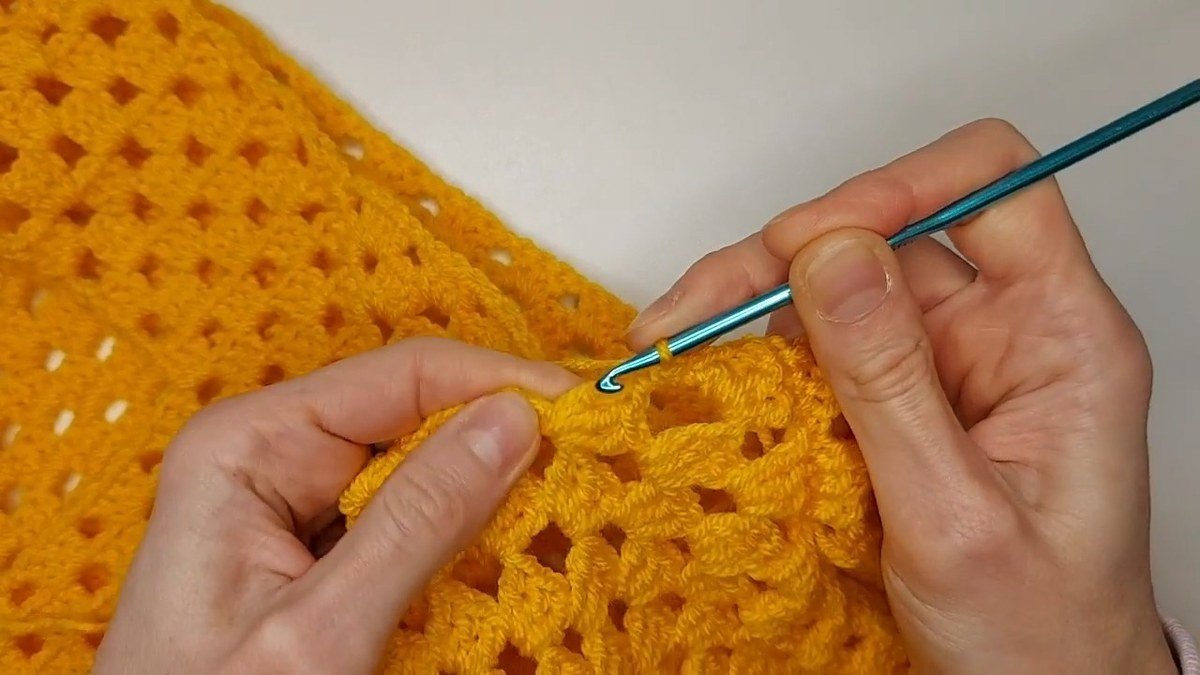
Step 16: Decrease at the corners
At the corners, decrease to make the edge smooth. Then keep doing the single crochet all around the opening until you are back where you started.
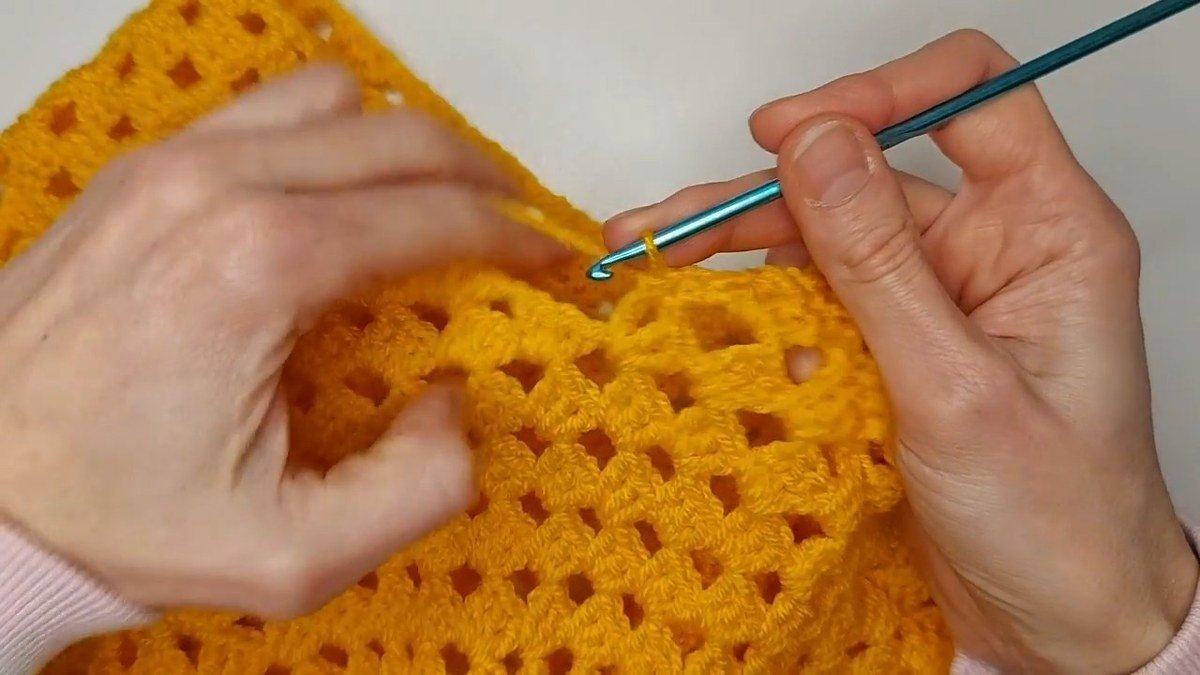
Step 17: Chain 6 to begin the ribbing strip
For the ribbing, chain 6, skip 1 chain, then work 5 single crochet, 2 slip stitches and turn. As in any ribbing worked sideways, the slip stitches are what fasten the strip to the foundation row; the design does not say so, so check this on your own work.
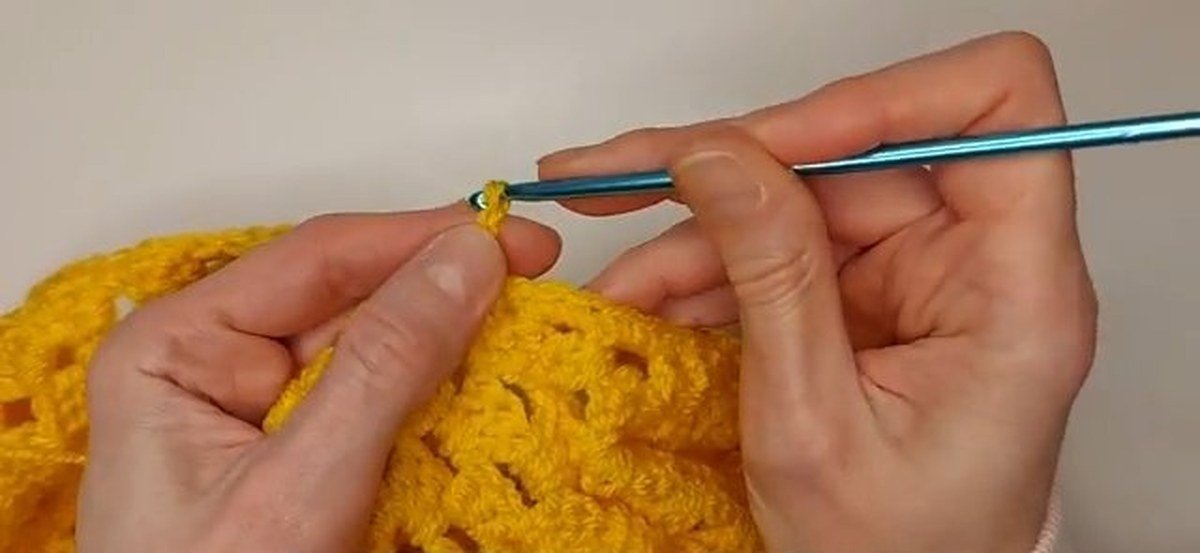
Step 18: Work 5 single crochet in the back loop only
Work 5 single crochet in the back loop only, chain 1 and turn. Working in the back loop only is what gives the ribbing its ridged, stretchy look.
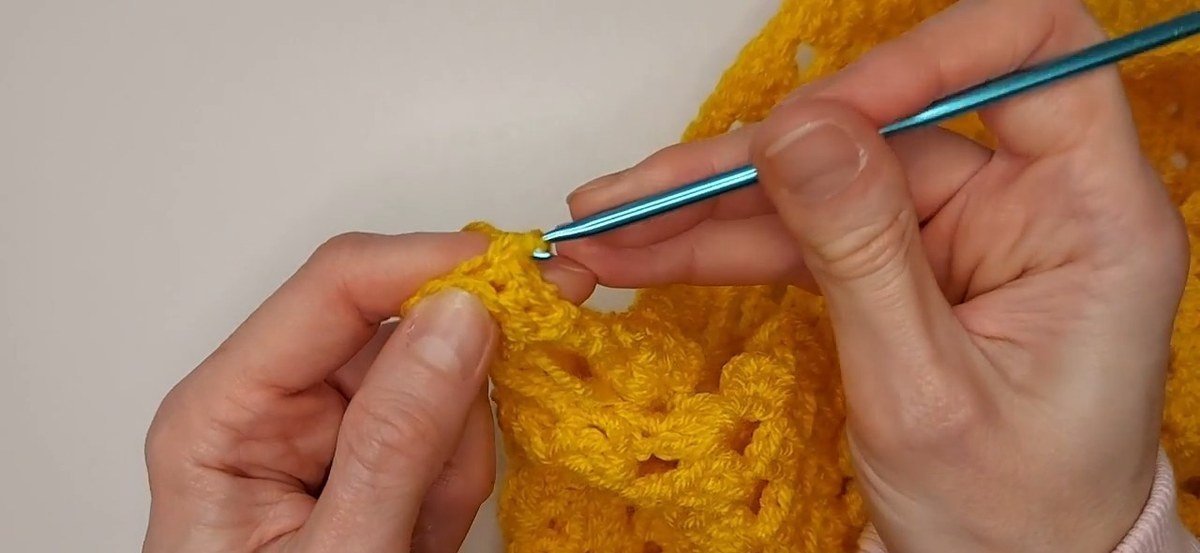
Step 19: Alternate with the slip stitch row
The next ribbing row is the same 5 single crochet in the back loop only, but it ends with 2 slip stitches instead of the chain. Alternate the two rows all the way around, moving along the edge as you go.
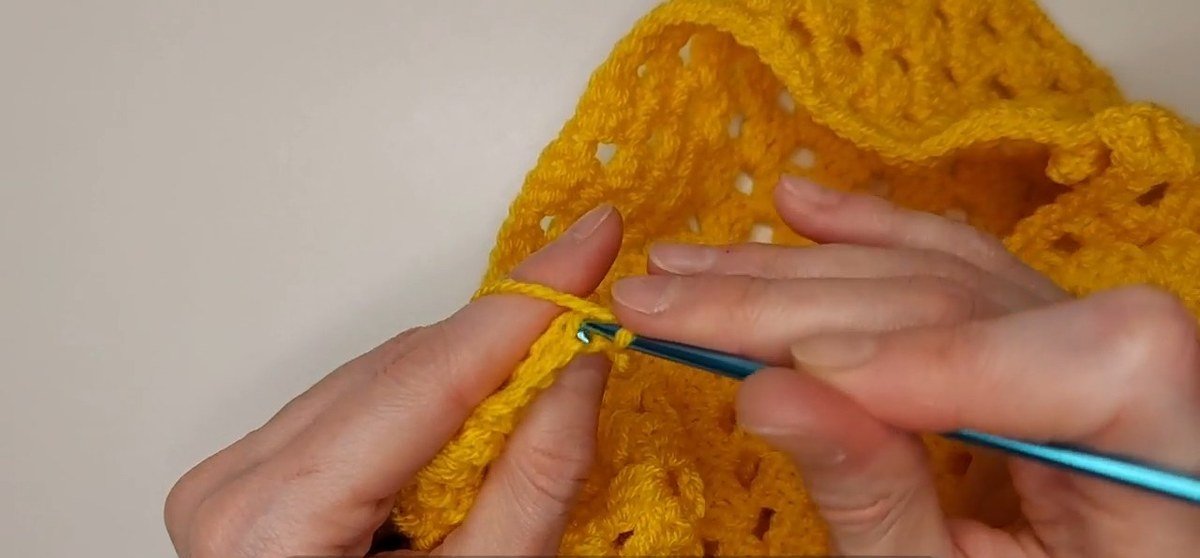
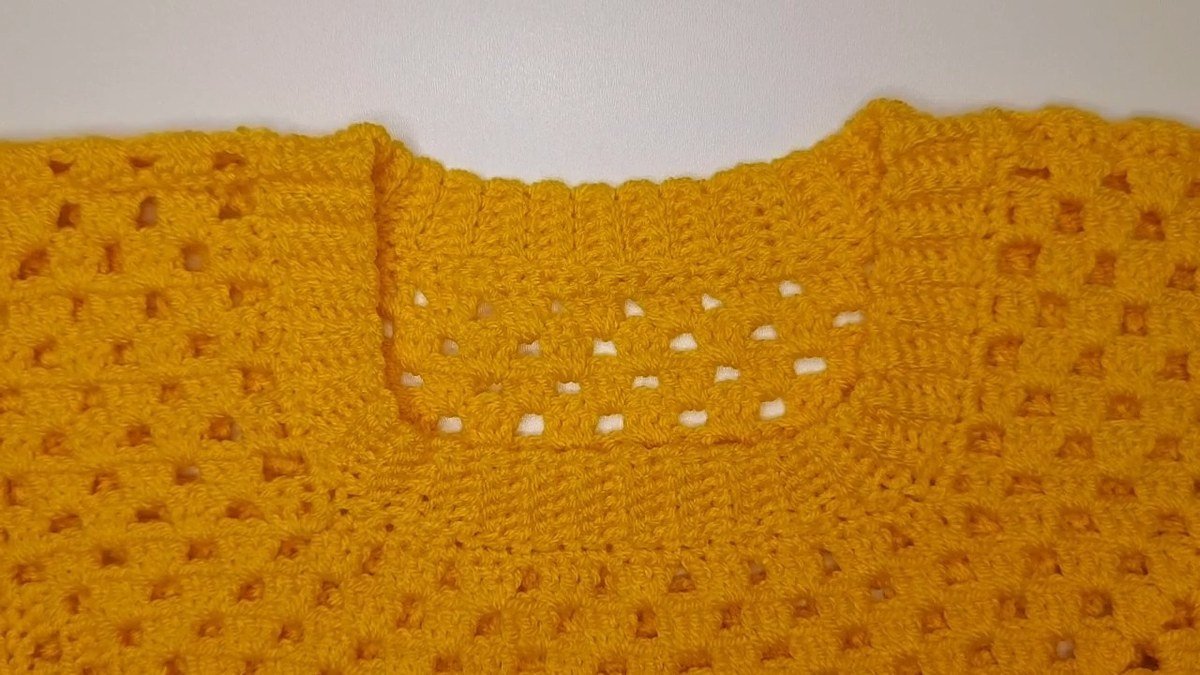
Step 20: Repeat to the end and rib the neckline and bottom
Repeat until the end and finish the ribbing. Then use the same method to make the ribbing for the neckline and the bottom. The finished neckline, in the photo, lies flat and sits neatly against the square.
Where a Crochet Vest Pattern Goes Wrong
Three things go wrong most often in a crochet vest pattern, and each one shows long before you sew up.
The two panels do not match
A vest is only as even as its two squares. Count the rounds of both, and compare their width with the tape: at 2.6 cm per round, a single missing round makes one panel 2.6 cm narrower. The design says to make sure that each side has the same amount of stitches and rows, and it is the most useful sentence in this crochet vest pattern.
The body is narrower than the chest
Two squares of 39 cm give 78 cm of body width, and a Craft Yarn Council size S chest is 81 to 86 cm. The side rows are what close that gap, so do not skip them, and measure the flat panel before you sew it.
The ribbing pulls or ripples
A ribbed edge that is too tight pulls the neckline up, and one that is too loose ripples. The single crochet foundation row and the decreases in the corners are there to prevent both, so keep your tension the same as in the body and ease the corners rather than forcing them.
Sizing a Crochet Vest Pattern
This crochet vest pattern makes one size, Small, with no chest measurement printed. Here are the published body sizes from the Craft Yarn Council women’s chart, so you can pick a target.
| Size | Chest (in) | Chest (cm) |
|---|---|---|
| S | 32 to 34 | 81 to 86 |
| M | 36 to 38 | 91.5 to 96.5 |
| L | 40 to 42 | 101.5 to 106.5 |
| XL | 44 to 46 | 111.5 to 117 |
| 2X | 48 to 50 | 122 to 127 |
| 3X | 52 to 54 | 132 to 137 |
The same body has a fit allowance on top. The Craft Yarn Council fit chart calls 2 to 4 in (5 to 10 cm) more than your chest a classic fit, 4 to 6 in (10 to 15 cm) loose and 6 in or more oversized. It describes these as guidelines, so treat them as a starting point.
From a square width to a round count
Because each round of this vest’s granny square is 2.6 cm tall (39 cm over 15 rows), you can work out how many rounds a wider or narrower square needs. The table uses the square sizes printed by HayHay Crochet for the same two-square design, converted at 2.6 cm per round and rounded to the nearest whole round. It is an estimate: HayHay works on a 5.0 mm hook, this vest on a 4.0 mm hook, so swatch before you commit.
| Size on the HayHay chart | Square width (in) | Square width (cm) | Rounds at 2.6 cm |
|---|---|---|---|
| XS | 12 | 30.5 | 12 |
| S | 13 | 33 | 13 |
| M | 14 | 35.6 | 14 |
| L | 15 | 38.1 | 15 |
| XL | 16 | 40.6 | 16 |
| 2XL | 17 | 43.2 | 17 |
| 3XL | 18 | 45.7 | 18 |
| 4XL | 19 | 48.3 | 19 |
| 5XL | 20 | 50.8 | 20 |
The rule that falls out is one round per inch of square width. The design’s own square, at 39 cm (15.4 in) and 15 rounds, sits between the HayHay M and L widths. Other designers size by squares instead: Vintage Granny Vest starts from 8, 9 or 10 squares for Small, Medium and Large, and Anne Egan says to measure one square, multiply by 12 (14 or 16 for the larger sizes) and add 2 cm for seaming to get the finished bust.
Hook and Yarn for a Crochet Vest Pattern
This crochet vest pattern uses a 4.0 mm hook and prints no yarn weight category. For comparison, the Craft Yarn Council crochet hook ranges are 4.5 to 5.5 mm for light (category 3) and 5.5 to 6.5 mm for medium (category 4), so a 4.0 mm hook is below both. Granny square vests are often worked loosely or tightly on purpose, and the table shows how the five patterns we checked choose.
| Pattern | Hook | Yarn | Structure |
|---|---|---|---|
| This guide’s design | 4.0 mm | 100% acrylic, 240 m per 100 g; no total printed | 2 giant squares, size Small |
| HayHay Crochet 70s vest | 5.0 mm | Worsted, about 178 g of scrap yarn for size S | 2 big squares, 9 sizes |
| Anne Egan vest top | 4 mm (G/6) | Paintbox Cotton DK, 50 g / 155 m per ball, 6 balls for Small | 35 squares plus triangles |
| Vintage Granny Vest | K hook, no mm printed | Worsted, Red Heart With Love 370 yd skeins | 8, 9 or 10 squares |
| Hooded Granny Vest, Mama In A Stitch | 5.25 mm as printed (size I) | Lion Brand Touch of Alpaca, about 417 g for Small | 30 squares plus hood |
| Agnes vest, eharrisgallery | 4.5 mm | Worsted, Simply Wool 193 yd per 100 g, finished weight about 241 g | 25 squares |
Yarn amount: the design prints none, so here is a conversion. The label on the yarn in the photos says about 240 m per 100 g. At that rate, the 178 g that HayHay lists for size S is about 427 m (467 yd), the 241 g finished weight of the Agnes vest is about 578 m (633 yd), and the 417 g that Mama In A Stitch lists for Small is about 1,001 m (1,095 yd). Those metre and yard figures are our conversions, not the designers’, and they show how far apart the same size can be: a lace vest and a hooded vest are different garments.
Gauge: only one of the five pages gives a stitch gauge. Mama In A Stitch prints 12 double crochet and 5.25 rows over 4 in. The others give a square size instead, which is why the table above works from the square width.
Five More Free Crochet Vest Patterns
These are the five free vest patterns we checked, each a different take on the crochet vest pattern. We list only what each page prints.
- EASY 70s Crochet Granny Square Vest by HayHay Crochet: two big squares with straps and sides, 9 sizes from XS to 5XL on a 5.0 mm hook. It prints no chest sizes and no yardage.
- Free granny square crochet vest top by Anne Egan: 35 squares for Small plus triangles, in a DK cotton on a 4 mm hook, with a skirt worked from the bodice. It prints bust sizes of 86, 100 and 114 cm.
- Vintage Granny Crochet Vest from a 1970 booklet: 8, 9 or 10 squares for 32, 36 and 40 in at the bust, with a scalloped border and a rope belt. The yardage appears only in comments.
- Hooded Granny Square Vest by Mama In A Stitch: 30 squares in 5 sizes, with a hood, a collar and optional pockets. It prints a bust of about 36 in for Small.
- Granny Square Vest on eharrisgallery: 25 four-round squares in worsted yarn, with a knitted-style ribbed collar and armholes, so it also needs circular needles.
More wearables on our site: the granny square cardigan, the pullover sweater pattern and the fingerless gloves pattern.
Crochet Vest Pattern FAQ
What is a crochet vest pattern?
A crochet vest pattern is a set of instructions for a sleeveless top. This crochet vest pattern builds it from two giant granny squares, adds straps and side rows, sews the panels together and finishes the edges with ribbing.
How many granny squares does a vest need?
It depends on the crochet vest pattern. This vest uses 2 giant squares of about 39 cm; the other free patterns we checked use 8 to 10 squares (Vintage Granny Vest, Small to Large), 25 (Agnes), 30 (Mama In A Stitch) or 35 for Small (Anne Egan).
What hook size do I need for a crochet vest?
This crochet vest pattern uses 4.0 mm. The other patterns we checked print 4 to 5.25 mm. Whatever you use, swatch one square and measure it, because the round count depends on the size of your square.
How much yarn does a crochet vest take?
This crochet vest pattern does not print a total. The other pages give 178 g, about 241 g and 417 g for Small, which at 240 m per 100 g is about 427 m, 578 m and 1,001 m. Buy toward the high end if your squares are dense.
How do I make a crochet vest pattern bigger or smaller?
Change the number of rounds in the squares: at 2.6 cm per round, 2 more rounds make each square 5.2 cm wider. Mama In A Stitch adds rows to the sides instead, and Anne Egan changes the number of squares.
Is a granny square vest good for beginners?
Yes, if you can already make a granny square. This crochet vest pattern is flat rectangles, a seam and a ribbed edge, and the back loop only ribbing is the one new skill. HayHay Crochet calls her version very easy.
Where to Go Next
Once your first crochet vest pattern is done, try a second in another colour, or make the easy crochet scarf pattern to match. You can also browse the crochet for women patterns or every free pattern on the site.
Sources
- HayHay Crochet, EASY 70’s Crochet Granny Square Vest
- Anne Egan, free granny square crochet vest top pattern
- Yarn Wars, Vintage Granny Crochet Vest Pattern
- Mama In A Stitch, Hooded Granny Square Vest
- eharrisgallery, Free Granny Square Vest Pattern
- Craft Yarn Council, women’s body size chart
- Craft Yarn Council, body sizing and fit
- Craft Yarn Council, yarn weight system
Pattern credit: the granny square vest design in this guide is by Crochet & Yara. Find more of their work on the YouTube channel Crochet & Yara.