Crochet Baby Headband: 17 Easy Puff Rows and a Flower
A crochet baby headband in puff stitch is a one-evening project for a beginner: you chain 10, work 17 rows of soft puffs, sew the two ends together and finish with a little white flower. This guide gives every step with a photo, the stitch counts for each row, a table that turns your baby’s head size into a number of rows, and the safety checks to run before it goes anywhere near a baby.
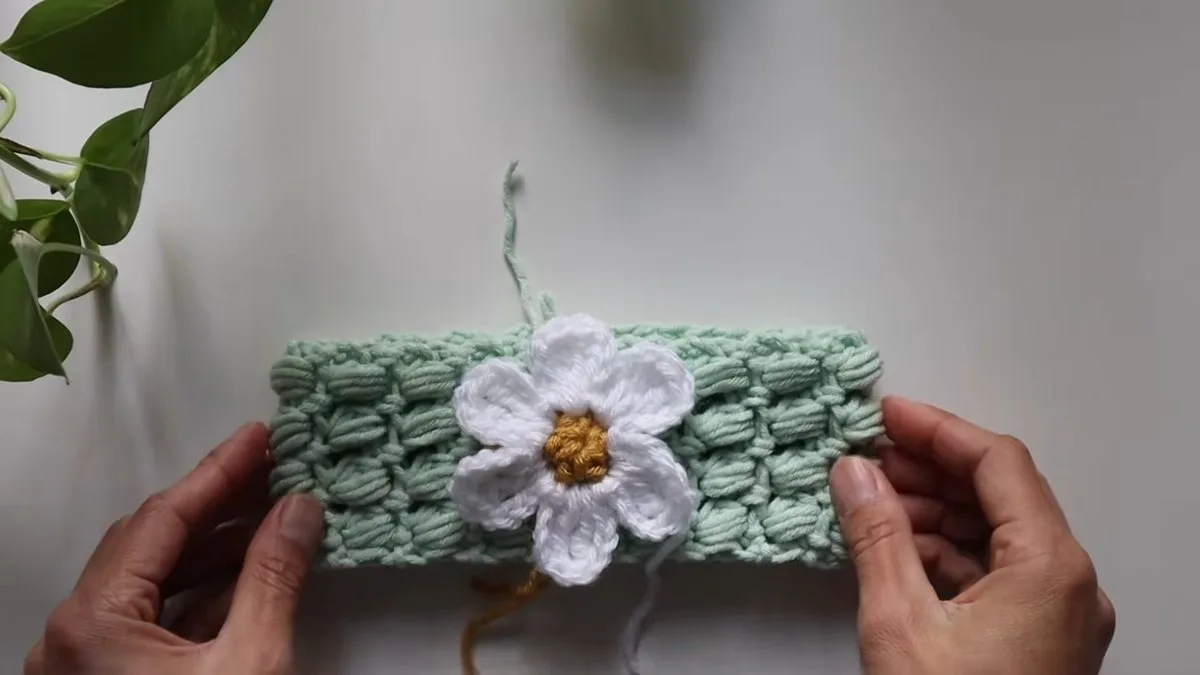
What you are making: a flat strip, worked lengthwise, that is sewn into a ring. Every second row is a row of puff stitches, and the rows between them are single crochet with a chain 1 space. The strip is 4 puffs wide, which is a chain of 10 to start. The headband in the photos is sized for a baby of about five or six months, and the creator says you can make it for an adult or an infant just by changing the length and the starting chain.
The row counts and the flower steps follow the creator’s instructions. The head-size table, the row totals and the comparison with other free patterns are our own work, labelled as ours, because we have not measured them on a baby.
- Crochet Baby Headband at a Glance
- Stitch Names for This Crochet Baby Headband
- Materials for a Crochet Baby Headband
- Sizing a Crochet Baby Headband by Head Circumference
- Crochet Baby Headband: Step by Step
- Where a Crochet Baby Headband Goes Wrong
- Crochet Baby Headband Patterns Compared
- Is a Crochet Baby Headband Safe?
- Crochet Baby Headband FAQ
- More Baby Accessories to Crochet After the Headband
Crochet Baby Headband at a Glance
The whole crochet baby headband is three small techniques: a foundation row, a puff row that you repeat, and a single crochet row that goes between puff rows. The flower is a separate small piece that is sewn on at the end. Here is the short version.
| Part | What you work | Count in the sample |
|---|---|---|
| Foundation chain | Chain 10, then 1 single crochet in the 2nd chain from the hook | 10 chains, then a row of 5 single crochet with 4 chain 1 spaces |
| Puff row (even rows) | Chain 2, then a puff in each chain 1 space, chain 1 between puffs, a half double crochet in the last stitch | 4 puffs, each with 9 loops on the hook |
| Single crochet row (odd rows) | Chain 1, single crochet, chain 1, single crochet in each chain 1 space, single crochet in the top of the turning chain | 5 single crochet, 4 chain 1 spaces |
| Length of the strip | 17 puff rows and 18 single crochet rows, ending on a single crochet row | 35 rows, 68 puffs in all (our count) |
| Flower | Magic ring, 5 half double crochet, then 6 petals of chain 4, 2 triple crochet, chain 4 | 6 petals; 7 or 8 petals use 6 or 7 half double crochet |
Stitch multiple: the strip works on a stitch multiple of 2. You chain a multiple of 2, add 1 for the first single crochet and 1 more for the turning chain, so 8 + 1 + 1 = 10 for 4 puffs. For a wider band, chain 12 for 5 puffs or 14 for 6 puffs, and keep the same row pattern. The creator says you can make the starting chain wider for a thicker headband, which is how you would size this crochet baby headband for an older child or an adult.
Stitch Names for This Crochet Baby Headband
The creator uses one of the two naming conventions for stitches, in which the short stitch with no yarn over is a single crochet and the one with a single yarn over is a half double crochet. The other convention gives these stitches different names, so check which one your pattern uses before you compare it with this one.
| In this guide | What you do | Where it is used |
|---|---|---|
| Single crochet | Insert the hook, pull up a loop, yarn over and pull through both loops | Foundation row, odd rows |
| Half double crochet | Yarn over, insert the hook, pull up a loop, yarn over and pull through all 3 loops | The edge stitch of puff rows and the flower centre |
| Puff stitch | Yarn over, insert the hook, pull up a loop, 4 times in the same space, until there are 9 loops on the hook, then yarn over and pull through all of them | Even rows |
| Triple crochet | Yarn over twice, insert the hook, pull up a loop, then yarn over and pull through 2 loops three times | Flower petals |
| Slip stitch | Insert the hook, pull the yarn through the stitch and the loop on the hook in one move | Closing each petal and the flower centre |
| Magic ring | A loop you work into and then pull tight | Flower centre |
Materials for a Crochet Baby Headband
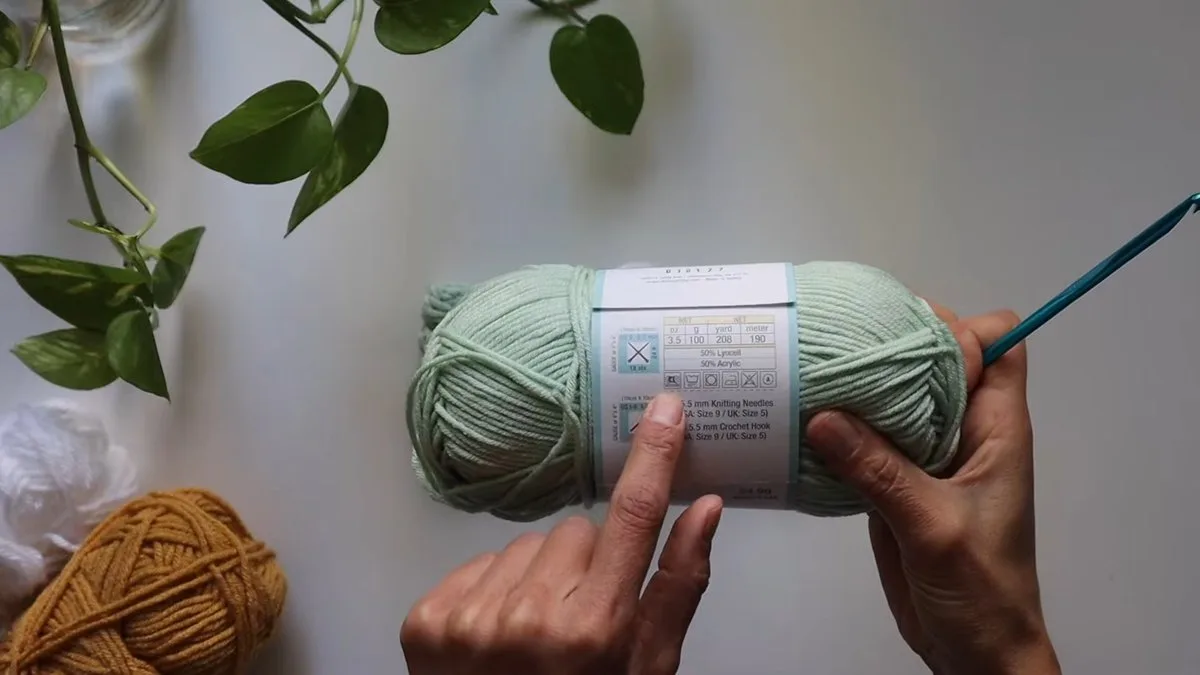
You need very little for a crochet baby headband: one ball of a soft yarn for the band, scraps of two colours for the flower, a hook, a tapestry needle and scissors. The creator uses a mint green yarn for the band, yellow for the centre of the flower and white for the petals.
| Item | What the sample uses |
|---|---|
| Band yarn | Mint green, 50% lyocell and 50% acrylic, 100 g, 208 yd (190 m) per ball, as printed on the label |
| Flower yarn | Scraps of yellow for the centre and white for the petals |
| Hook | 5 mm; the label recommends 5.5 mm, and the creator says to use whichever size you have |
| Tools | Tapestry needle, small scissors |
| Skill level | Beginner: chain, single crochet, half double crochet, one new stitch (puff) |
Hook note: the creator says the yarn is a 4 medium. The Craft Yarn Council lists 5.5 to 6.5 mm for medium weight yarn and 4.5 to 5.5 mm for light, so her 5 mm hook is slightly under the label’s 5.5 mm. A slightly smaller hook gives a firmer band, which is useful in a headband that has to stay put. Swatch a few rows before you commit to a size.
Yarn amount: the creator does not say how much yarn the band takes, and neither do most free patterns. Mama In A Stitch uses about 42 g of a 120 yd skein for a 15 in band, which is our arithmetic for roughly 100 yd. One 208 yd ball is more than enough for the band, and the flower takes only scraps.
Sizing a Crochet Baby Headband by Head Circumference
A baby headband should be shorter than the head it goes on, so that it stretches a little and stays up. The Craft Yarn Council head chart gives 14 to 16 in (35.5 to 40.5 cm) for the baby category, which is a wide range and has no month rows. For month-by-month sizes we used the Oombawka size chart, a designer’s page and not an official standard.
| Baby age | Head circumference (in) | Finished band (in) |
|---|---|---|
| Preemie | 12 | 10 |
| Newborn | 14 | 12 |
| 0 to 3 months | 15 | 13 |
| 3 to 6 months | 16 | 14 |
| 6 to 12 months | 17 | 15 |
| 12 to 24 months | 18 | 16 |
Source note: that chart takes about 2 in off the head size, and Daisy Farm Crafts says to make a band 2.5 or 3 in smaller than the head. Both are designers’ advice, not a rule. The creator stops at about 12 in for a baby of five or six months, while the chart gives 14 in for a 3 to 6 month head of 16 in. Puff stitch is stretchy, so a band that is a little shorter works too, but measure the baby’s head with a soft tape before you pick a length.
Rows for each length: the creator’s 17 puff rows make roughly 12 in, which we read from her words and have not measured, so we use 17 puff rows per 12 in, about 1.42 puff rows for each inch. Work six puff rows, measure, and adjust the table below if your band comes out longer or shorter. This is our arithmetic, not a tested pattern.
| Finished length | Puff rows | Puffs in all (4 per row) | Rows in all, ending on single crochet |
|---|---|---|---|
| 10 in | 14 | 56 | 29 |
| 11 in | 16 | 64 | 33 |
| 12 in | 17 | 68 | 35 |
| 13 in | 18 | 72 | 37 |
| 14 in | 20 | 80 | 41 |
| 15 in | 21 | 84 | 43 |
After the band is sewn into a ring it will look shorter and rounder than the flat strip, so measure the flat strip against the finished size, not the ring. For other baby accessories, see our crochet baby hat and the crochet ear warmer, which use the same head-measure idea.
Crochet Baby Headband: Step by Step
Work every step with the band yarn unless it says otherwise. Steps 1 to 3 start the strip, steps 4 to 9 teach the puff rows and single crochet rows, steps 10 and 11 end the strip and sew it up, and steps 12 to 17 make and attach the flower.
Step 1: Make a slip knot

Lay the tail towards you, wrap the yarn over three fingers to make an X, and pull the working yarn through with the hook, going under the first strand and over the top one. Pull both tails to tighten the knot on the hook. The creator has a beginner playlist if this is your first time.
Step 2: Chain 10
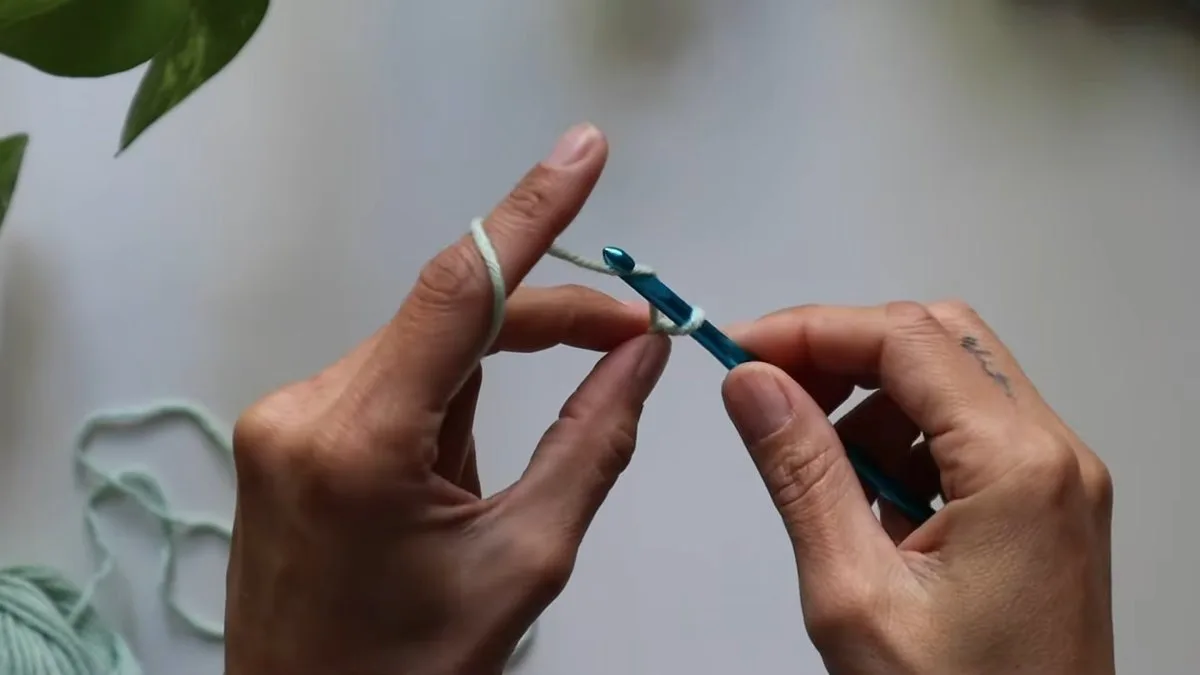
Keep the yarn taut with your index finger, yarn over, and pull through for each chain. Make 10 chains. The chain is a multiple of 2 plus 1 plus 1 more for the turning chain, which is 8 + 1 + 1, and it gives you 4 puffs across.
Step 3: Work the first row of single crochet
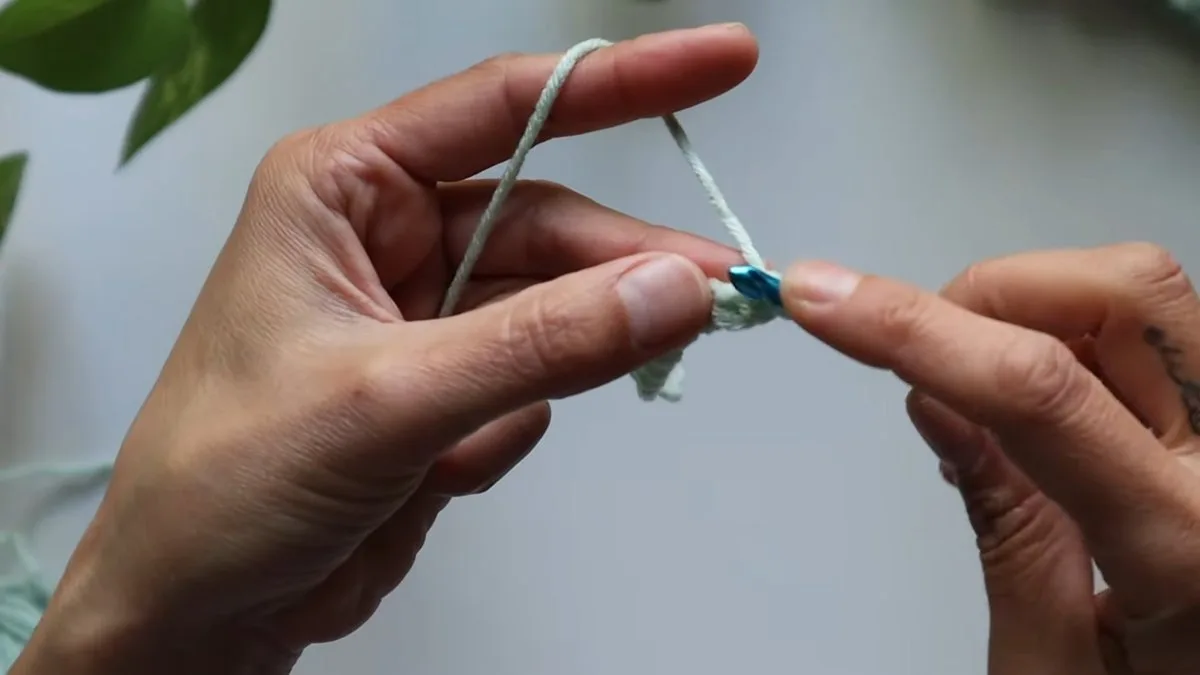
Skip the loop on the hook, which does not count, and make a single crochet in the 2nd chain from the hook. Then chain 1, skip 1 chain, and single crochet in the next chain. Repeat to the end of the chain. By our count that is 5 single crochet with 4 chain 1 spaces between them.
Step 4: Chain 2 and turn to start the first puff row
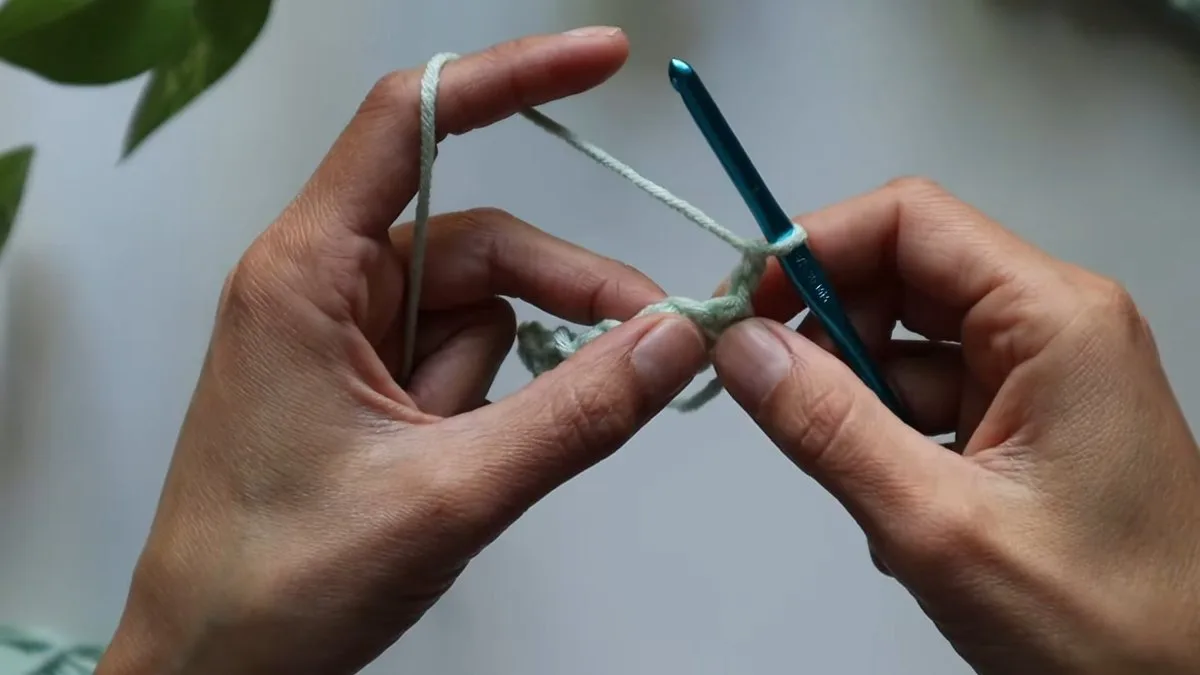
At the end of row 1, chain 2 instead of chain 1 and turn your work. This chain 2 stands in for the first half double crochet of the puff row. The first stitch of row 1 is skipped, because you work into the chain 1 spaces, not into the stitches, and those look like small round holes when you stretch the fabric.
Step 5: Make the first puff stitch
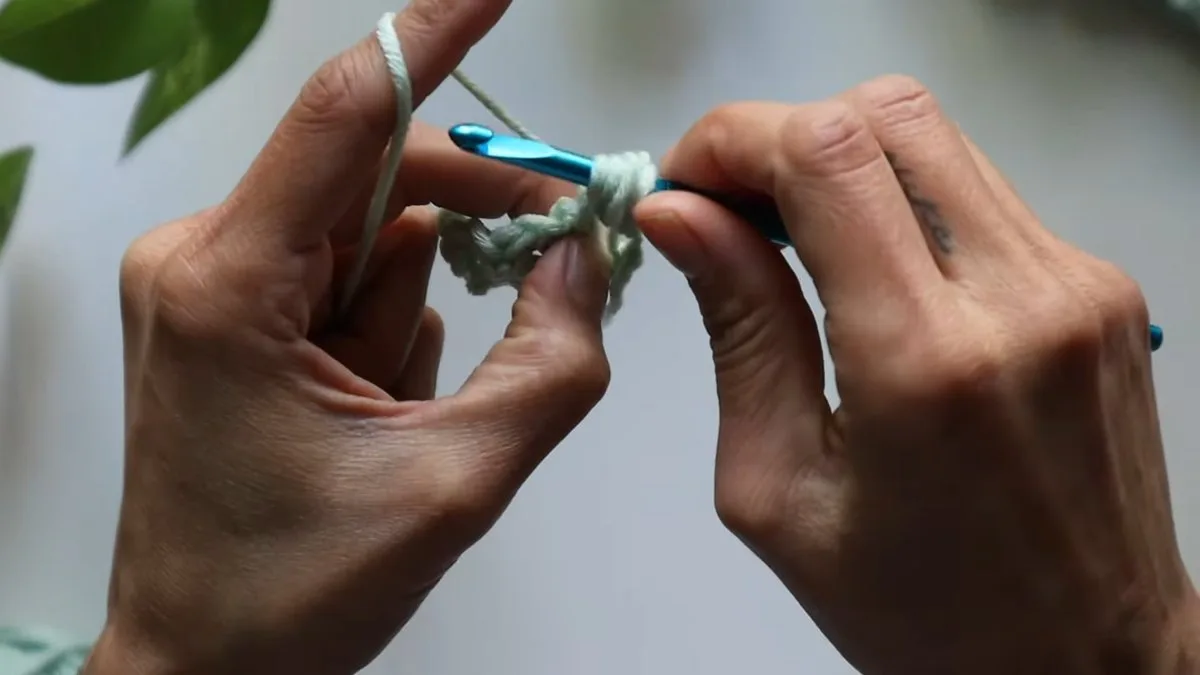
Yarn over, insert the hook into the first chain 1 space, and pull up a loop. Do this 4 times in the same space and keep every loop loose and long. When there are 9 loops on the hook, yarn over and pull through all 9 gently, then chain 1 to close the puff.
Step 6: Finish the first puff row
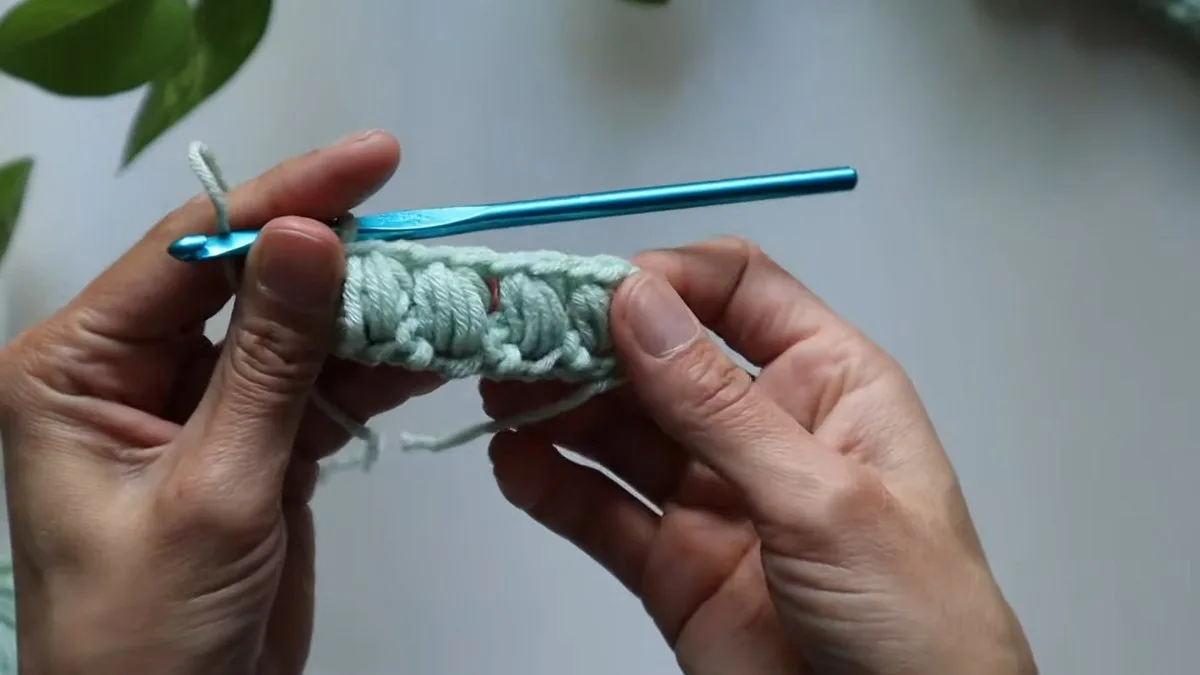
Make a puff in each of the next three chain 1 spaces, with chain 1 after each. After the 4th puff, do not chain 1. Turn the work so you can see the top of the edge stitch, and make a half double crochet in it. That closes the row with 4 puffs, which is a small band for a small baby.
Step 7: Work a single crochet row

Chain 1 and turn. Make a single crochet in the first stitch, then chain 1, skip the puff, and single crochet in the chain 1 space between puffs. Repeat across, and finish with a single crochet in the 2nd chain of the previous row, which is the turning chain that stood in for a half double crochet. If the last stitch is hard to see, put the hook into the side of the edge.
Step 8: Stack the next puff row
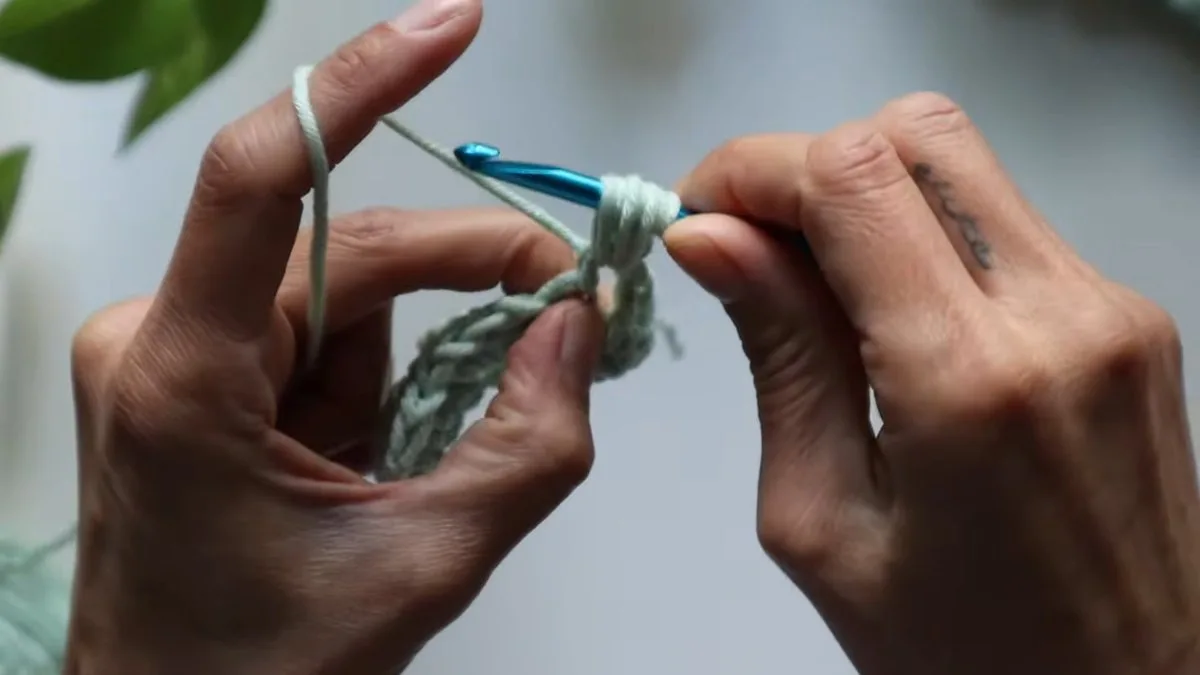
Chain 2 and turn, skip the first stitch, and work 4 puffs into the chain 1 spaces, with chain 1 after each, exactly as in steps 5 and 6. This is called stacking, because each puff lands above the one in the row below. The last puff has no chain 1, and the row ends with a half double crochet in the edge stitch.
Step 9: Repeat until you have 17 puff rows

Keep going: every odd row is chain 1 and single crochet, and every even row is chain 2 and puffs. The creator says the edge can twist and look confusing at first, and that it straightens out as the strip grows. She worked 17 puff rows for the baby in her photos. Use the table in the sizing section to pick the number for your baby.
Step 10: End on a row of single crochet

On your last puff row, pull through the puffs with the loops angled downwards, and work the half double crochet into both loops of the edge. Then chain 1, turn, and work one more single crochet row. At the end, chain 1, cut the yarn, and leave a long tail of about 12 to 15 in for sewing.
Step 11: Sew the ends together
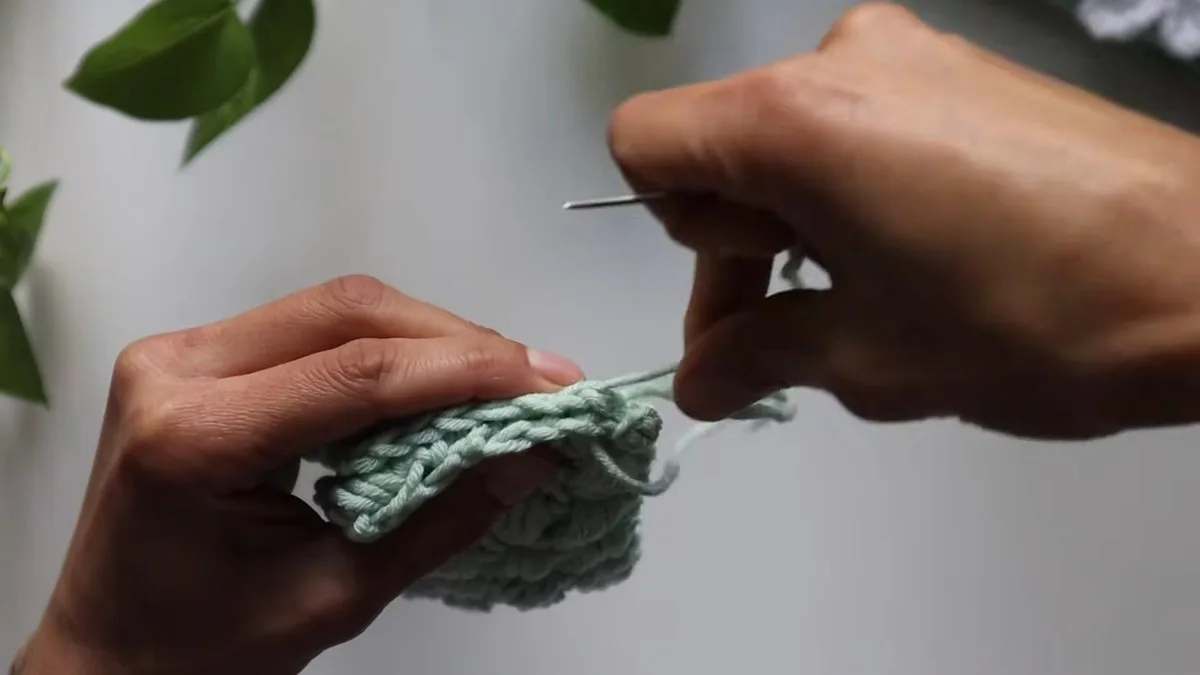
Thread the tail on a tapestry needle. Hold the two short ends side by side with the public side facing out, and whip stitch them together, going into one stitch on each side. The starting chain meets a single crochet on the other side, so match them up by eye and be easy on yourself. Take the stitches to the very edge so the scallops of the two ends meet, then knot the tail at the base and tuck it in.
Step 12: Start the flower with a magic ring

Switch to the yellow yarn and make a magic ring. Chain 1, then work 5 half double crochet into the ring. The creator finds it easier to go into the ring when it is a little small. Pull the tail to close the ring.
Step 13: Join the centre and leave a tail
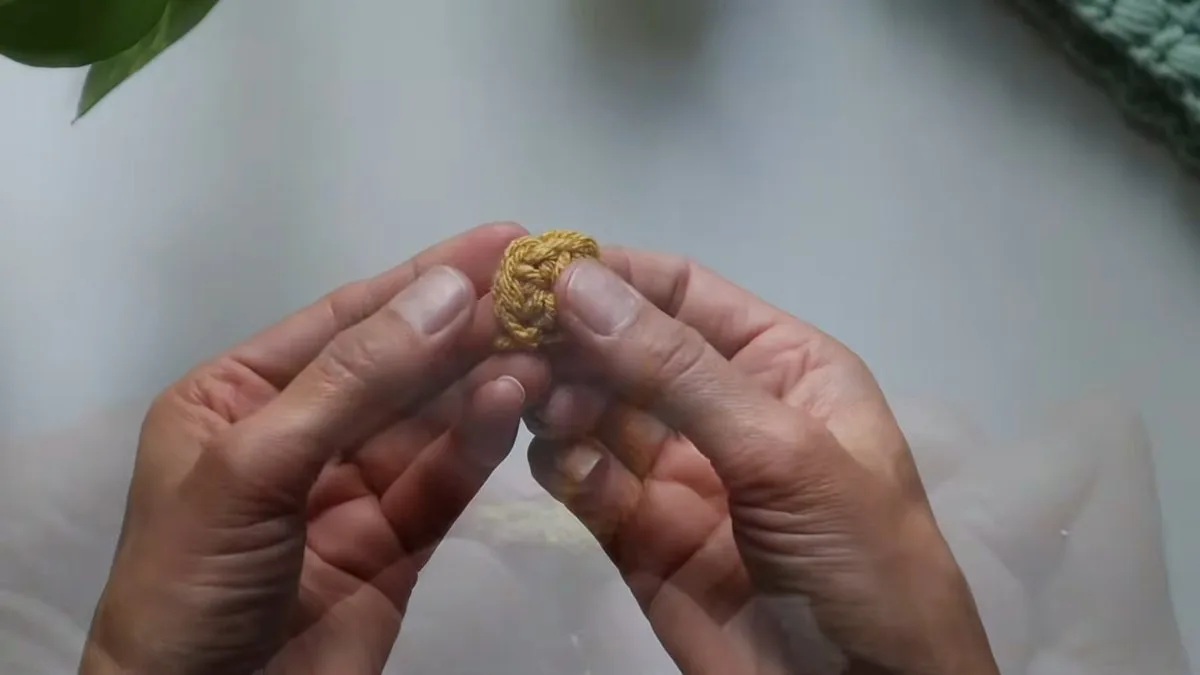
Slip stitch into the first half double crochet to close the round, chain 1, and cut the yarn, leaving a tail of about 4 in. This small circle is the flower centre. The knot where you finished sits between two spaces, and the five stitches give you the remaining spaces for the petals.
Step 14: Join the white yarn and make a petal
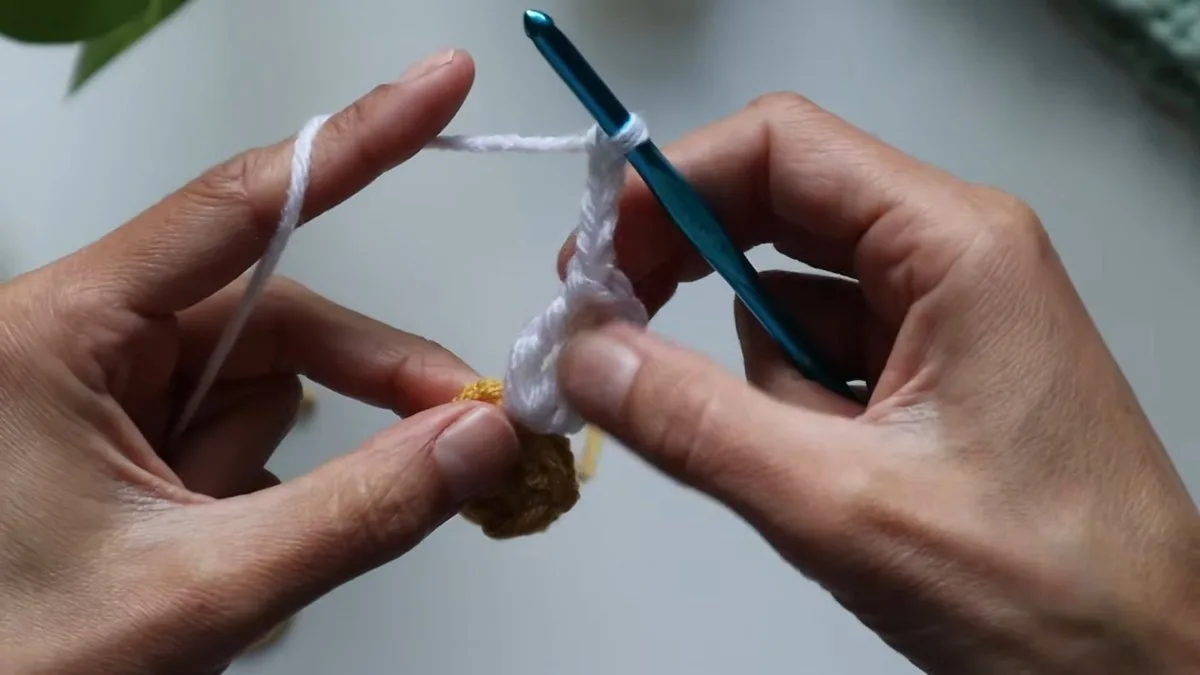
Attach the white yarn to the space next to the knot with a double knot, leaving a tail. For each petal chain 4, make 2 triple crochet in the same space, chain 4, and slip stitch into the space to close it. Then slip stitch into the next space and start again. The creator says she invented this curly petal.
Step 15: Finish the six petals
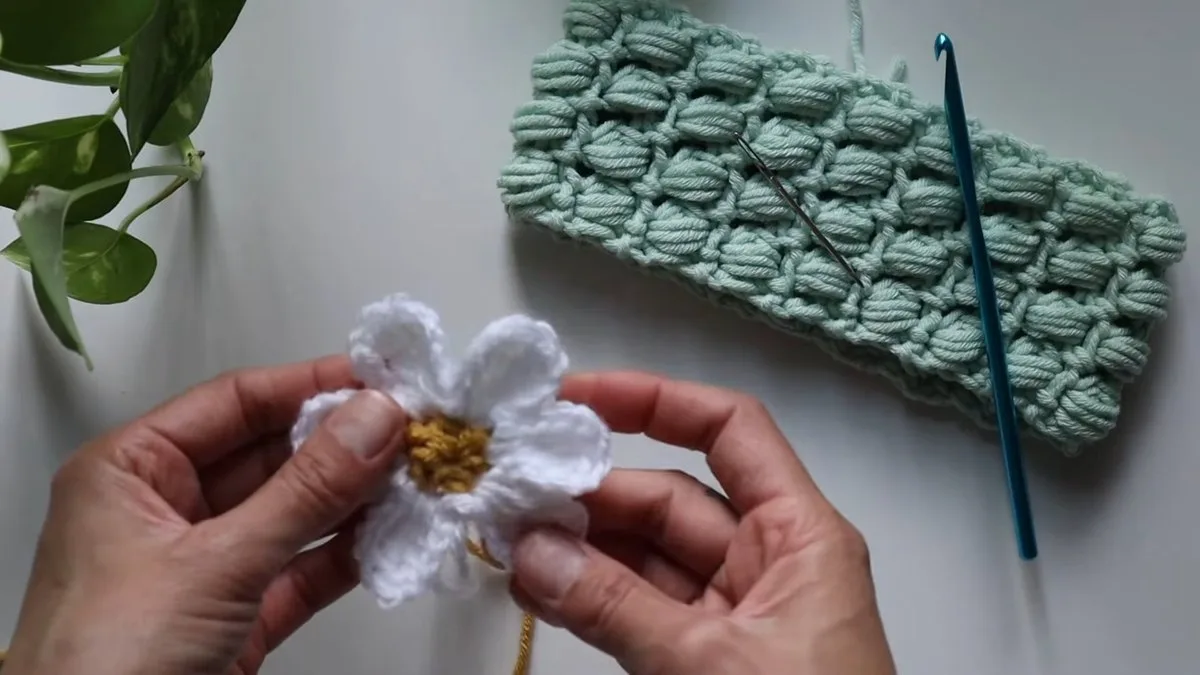
Repeat for 6 petals in all, two next to the knot and four more in the stitches around. Then slip stitch into the first petal space, chain 1, trim, and tighten. The 5 half double crochet in the ring give 6 petals, 6 give 7 and 7 give 8, so you can change the flower to taste. Six lies flatter, and eight curls up more.
Step 16: Sew the flower onto the band
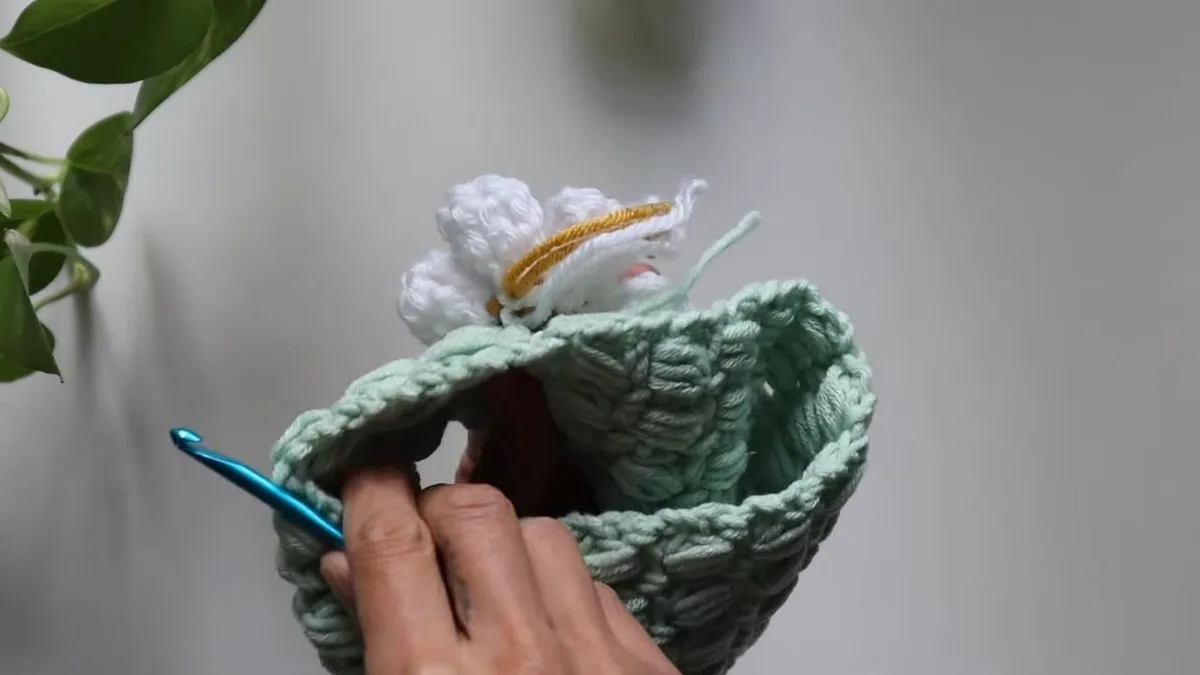
Knot the tails at the back of the flower, which also helps to hold it together. Place the flower over the seam, where it hides the join. Use the hook to pull the tails through the band, work from the inside, tie them with a double knot, and lace them with a tapestry needle going in two directions so the flower is anchored from several sides.
Step 17: Tuck in the ends and check the fit
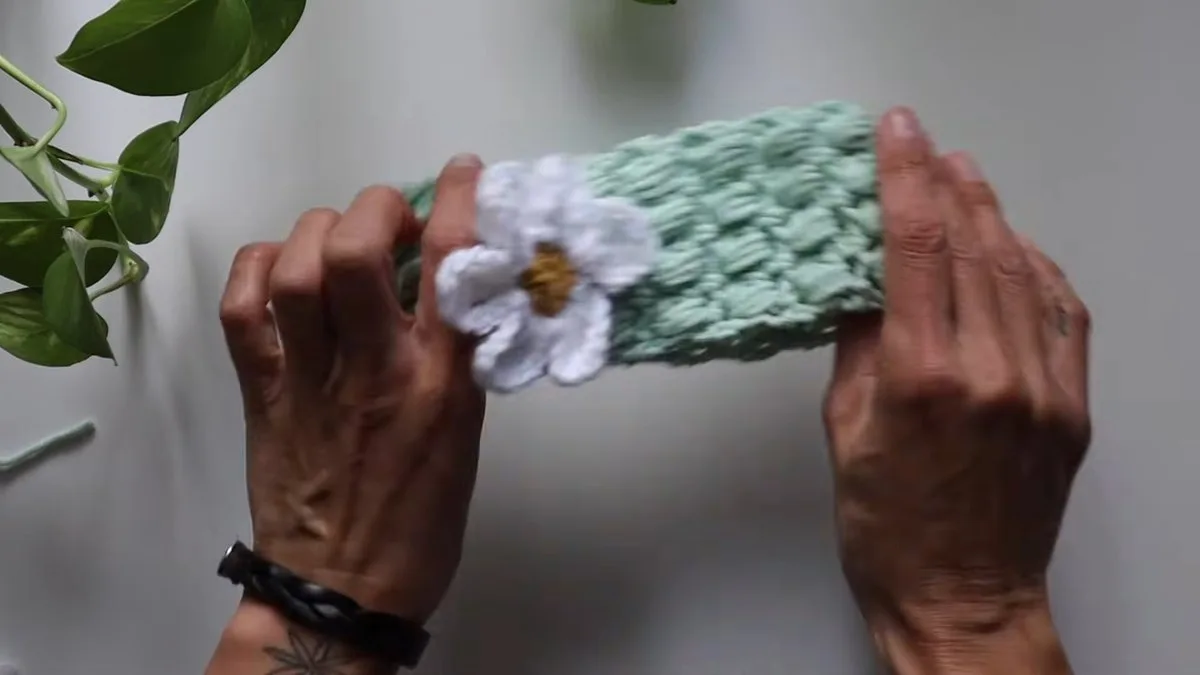
Tuck the short tails through the same stitches and trim them. The inside may look a little busy, which does not matter because it will not show. Flip the band over, adjust the flower, and check the fit before it goes on a baby.
Where a Crochet Baby Headband Goes Wrong
Puffs that are tight or uneven
The most common problem is a puff that is hard to pull through. Keep each loop long and loose, count 9 loops on the hook before you pull, and yarn over and pull through all of them gently. The creator also says to stay nice and loose as you begin and that you get better as you go.
Rows that lean or a count that drifts
If a puff row has 3 puffs one time and 4 the next, you have probably missed the half double crochet in the edge stitch, or worked the puff into the stitch and not into the chain 1 space. Count your chain 1 spaces at the end of every odd row: there should be 4.
A band that is too long or too loose
A band that is the same size as the head will slip. Our table takes 2 in off the head size, in line with the designers we read. If the finished band is loose, you can add a small elastic or tie ends, but only if they stay away from the baby’s neck and face.
A flower that comes loose
A flower that is only tacked on can come off in a few days of wear. Tie the tails with a double knot and lace them through the band in two directions, as in step 16, then pull on the flower to test it before the headband is used.
Crochet Baby Headband Patterns Compared
The puff stitch band is one of many ways to make a crochet baby headband. This table puts it beside five patterns from designers and brands, and shows only what each page prints. A dash means the page prints nothing, not that we guess.
| Pattern | Yarn and hook | Size printed | Source |
|---|---|---|---|
| Puff stitch band (this guide) | Medium weight, 5 mm | About 12 in for a 5 to 6 month baby | The creator |
| Fun Fringe Baby Headband | Bernat Bundle Up, 5.5 mm | Chain 50, about 12 in, for a 15 in head | Daisy Farm Crafts |
| Velvet Twist Headbands | Bernat Baby Velvet, 5 mm | Chain 25 for baby or child; work to 3 in shorter than the head | Daisy Farm Crafts |
| Faux-Bow Headband | Lion Brand Chainette, 5.25 mm | Baby 6 to 12 months, 15 in | Mama In A Stitch |
| 20 Minutes or Less Headband | Bernat Handicrafter Cotton, 4 mm | Elastic 12.5 in for 0 to 3 months | Oombawka Design Crochet |
| Bloomin’ Baby Headband | Red Heart Soft Baby Steps, hook in the PDF | Baby, preemie and toddler sizes | Yarnspirations |
What the sources leave out: none of the five pages prints the yardage for a baby band, and none of them says how many rows make an inch. The Red Heart page keeps its measurements in a PDF, which we did not read. That is why we give our own rows-per-inch figure above and ask you to check it after six puff rows.
Is a Crochet Baby Headband Safe?
A crochet baby headband is a small, soft item, but a baby cannot take it off and cannot tell you if it slips. Three checks are worth doing before it is worn.
Take it off before sleep
The AAP page we read says that soft objects and loose bedding raise the risk of entrapment, suffocation or strangulation, and that a baby should not wear a hat indoors once home from the hospital. It does not mention headbands, so removing the band before a nap is our own advice, based on that page and the CPSC safe sleep page, which says a crib should hold only a fitted sheet.
Check the flower for small parts
The CPSC small parts page describes the cylinder test used for toys for children under 3: a piece is too small if it fits fully inside a cylinder 1.25 in wide and 2.25 in long. That page is an archived 2011 post and says it is outdated, and a headband is not a toy, so we use it only as a rule of thumb. If any part of your flower could slip into a tube of that size, sew it on more firmly or leave it off. Do not add buttons or beads to the centre of a band for a baby.
Check the fit and the seam
Press a finger under the band: it should lie flat on the forehead, with no tight line left on the skin, and the seam should not be thick or scratchy. Wash the band before the first wear, using the care label of your yarn.
Crochet Baby Headband FAQ
How do you crochet a baby headband for beginners?
Chain 10, work a row of single crochet with chain 1 spaces, then alternate puff rows and single crochet rows for 17 puff rows. Sew the two ends together and add a flower. The whole crochet baby headband uses only chain, single crochet, half double crochet and the puff stitch.
What size chain do I need for a crochet baby headband?
The sample chain is 10, which is a multiple of 2 plus 1 plus 1 for the turning chain, and gives a band 4 puffs wide. For a wider band, chain 12 for 5 puffs or 14 for 6 puffs. The length depends on the number of rows, not on the chain.
How long should a crochet baby headband be?
Most designers make it shorter than the head. The size chart we used takes about 2 in off the head size, and the creator stops at about 12 in for a baby of five or six months. Measure your baby’s head, subtract about 2 in, and check the fit against the strip.
How many rows is a puff stitch headband?
The creator worked 17 puff rows, with a single crochet row between them and a closing single crochet row, which is 35 rows in all. Our table gives other lengths, based on the assumption that 17 puff rows make about 12 in.
What yarn is best for a crochet baby headband?
Pick a soft, washable yarn in a medium or light weight, with some stretch if you can. The sample uses a blend of lyocell and acrylic, and the designers we read use acrylic, cotton and polyester yarns. Avoid anything scratchy near a baby’s skin.
How do you attach a crochet flower to a headband?
Tie the tails of the flower together at the back, place the flower over the seam, pull the tails through the band with a hook, and tie them on the inside. Then lace the tails through the band with a tapestry needle in two directions, and tuck in the ends.
More Baby Accessories to Crochet After the Headband
Once the band is done, a matching hat is the natural next step: our crochet baby hat uses the same head measure. For colder days, the crochet ear warmer is a bigger band worked in rows, and the crochet leg warmers use the same rib idea in a tube. Browse all baby toys and accessories on the site.
Sources
- Oombawka Design Crochet, Crochet Headband Size Chart
- Oombawka Design Crochet, Mom’s Favorite 20 Minutes or Less Headband
- Daisy Farm Crafts, Crochet Fun Fringe Baby Headband
- Daisy Farm Crafts, Colorful Crochet Velvet Twist Headbands
- Mama In A Stitch, Faux-Bow Easy Crochet Headband
- Yarnspirations, Red Heart Bloomin’ Baby Headband
- Craft Yarn Council, head circumference chart
- Craft Yarn Council, yarn weight system
- HealthyChildren.org, A Parent’s Guide to Safe Sleep
- CPSC, Safe Sleep
- CPSC, Small Parts: What Parents Need to Know
Pattern credit: this puff stitch headband and flower design is by the crochet channel String Into a Thing.