Herringbone Crochet Stitch: Easy Gift Pattern in 17 Photos
The herringbone crochet stitch is the diagonal, arrow-shaped fabric you see on cowls, hats and blankets, and it is made from nothing but single crochet worked in a new way. This guide shows every step of the herringbone crochet stitch with a photo, explains the forward row and the reverse row, gives you a chain table for three blanket widths, and lists the mistakes that spoil the diagonals. Worked in a soft yarn, the finished swatch also makes an easy gift scarf or cowl for a friend.
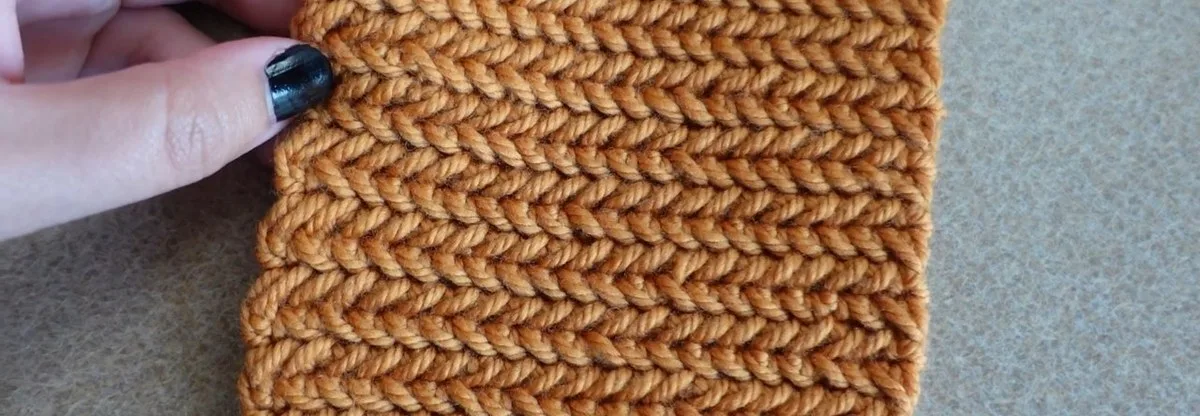
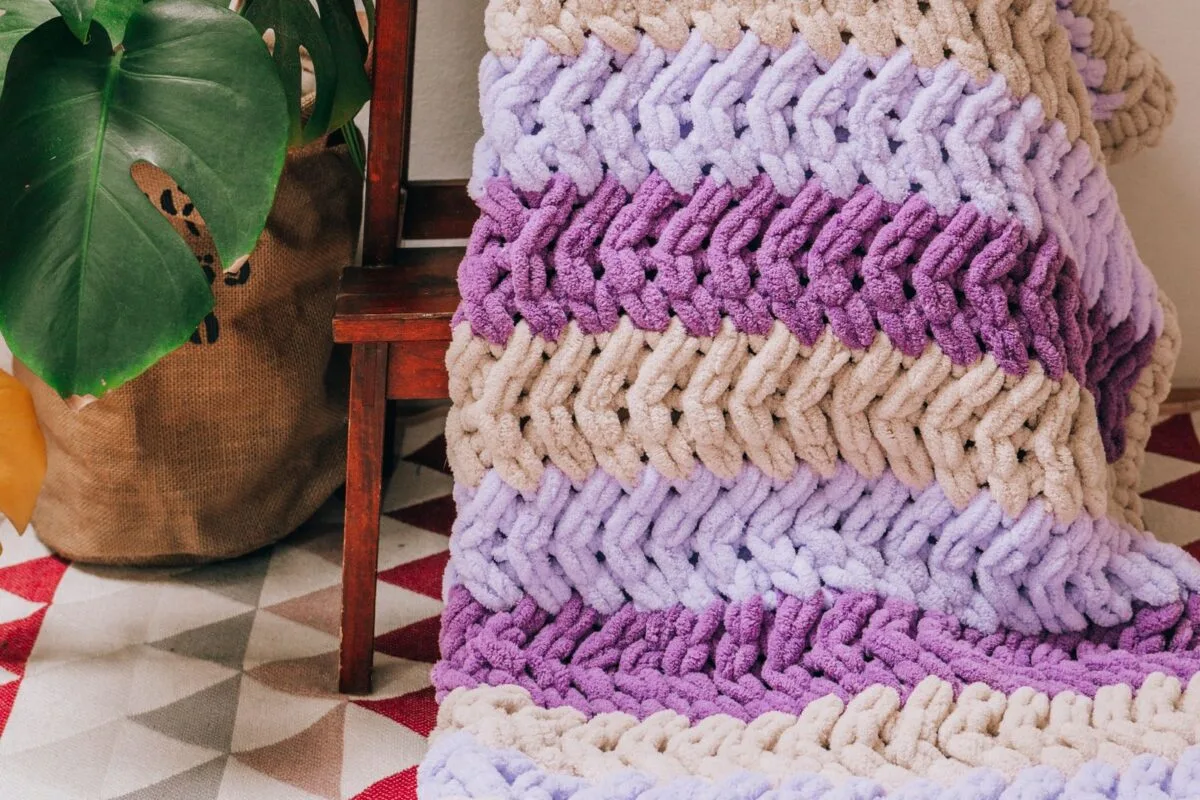
What makes it herringbone: the pattern is a two-row repeat. The forward row leans one way and the reverse row leans the other, and together they draw the arrows. The creator is clear that this is a one-sided fabric: the front is handsome, the back is plain, so keep that in mind before you pick a project. The sample swatch is blocked, and the creator was surprised how much drape it had, because while working it felt stiffer.
Which variant this is: this guide teaches the herringbone single crochet. It is not the herringbone half double crochet, which has a different loop count (more on that below). Our chain table, the yarn estimate and the best-uses list are our own, labelled as such, because we have not made a blanket from them.
- Herringbone Crochet Stitch at a Glance
- Forward, Reverse and Crab: The Names
- What You Need for the Herringbone Crochet Stitch
- Herringbone Crochet Stitch: From Swatch to Blanket
- Herringbone Crochet Stitch: Step by Step
- Where the Herringbone Crochet Stitch Goes Wrong
- Best Uses for the Herringbone Crochet Stitch
- Free Herringbone Crochet Stitch Patterns to Try
- Herringbone Crochet Stitch FAQ
- More Textured Stitches to Try Next
Herringbone Crochet Stitch at a Glance
The herringbone crochet stitch has no stitches you do not already know: single crochet, a chain and a turn. What changes is where the hook goes. You work through the left-most leg of the stitch you just made and then through all three loops of the next stitch.
| Part | What you work | Count |
|---|---|---|
| Foundation | Chain any number of stitches, then one extra chain | any number + 1 |
| Turn | Chain 1 and turn at the end of every row | 1 chain |
| First stitch of a forward row | A plain single crochet in the first stitch | 1 stitch |
| Forward herringbone stitch | Hook through the left-most leg, then into the next stitch under all 3 loops, pull up a tall loop, yarn over, pull through all 3 | 3 loops on the hook |
| Reverse single crochet | Insert the hook from back to front under all 3 loops, yarn over, pull through, yarn over and pull through 2 | 2 loops on the hook |
| Reverse herringbone stitch | Hook through the leg closest to the next stitch, then back to front into the next stitch under all 3 loops, pull through all 3 | 3 loops on the hook |
| Last stitch of a row | Only 2 loops exist, so work under those 2 | 2 loops |
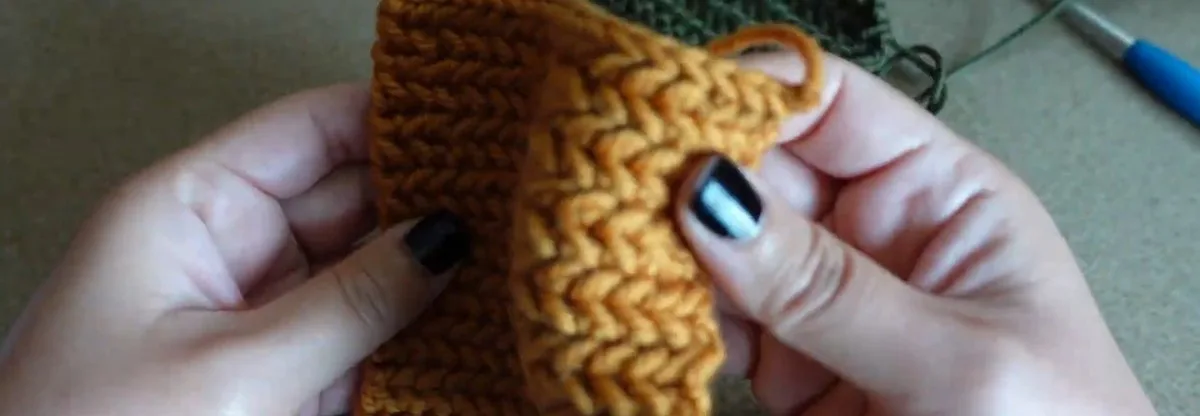
Stitch multiple: the stitch multiple is 1, plus 1 chain. The Sarah Maker cowl chains 73 for 72 stitches, and the For The Frills tutorial says any number of stitches plus 1. The creator does not show the foundation chain in this lesson, she starts from a swatch that already has rows, so the foundation rule here comes from those designers, not from her.
Forward, Reverse and Crab: The Names
The creator calls the stitches of the first row the forward herringbone stitch and the stitches of the second row the reverse herringbone stitch, and says she likes “reverse” better than “backwards”. Other designers use other words, so a quick table saves confusion when you read a second pattern for the herringbone crochet stitch.
| In this guide | What it is | Also called |
|---|---|---|
| Forward herringbone stitch | Odd row, hook through the left-most leg and the next stitch, left-leaning | Herringbone single crochet (hsc) |
| Reverse herringbone stitch | Even row, worked back to front, right-leaning | Reverse herringbone single crochet (rhsc), or “inverse” hsc |
| Reverse single crochet | A plain single crochet worked left to right, used once to start a reverse row | Crab stitch |
| Third loop | The extra loop you get when the hook holds 3 loops | Same |
Why three loops matter: a single crochet has two loops on the hook, but the herringbone stitch has three, which is the same loop count as a half double crochet. The creator points this out because it changes how you work: you go under all three loops of every stitch for the cleanest herringbone crochet stitch. At the very end of a row the last stitch is the first stitch of the previous row, a plain single crochet, so it has only two loops, and you simply work under those two. The A Crocheted Simplicity stitch page says the same, and adds that herringbone single crochet comes out slightly thicker than plain single crochet.
Do not mix it up with the half double version. The herringbone half double crochet is a different stitch: Moogly shows two loops left on the hook for it, while the single crochet version in this guide keeps three. If a pattern says herringbone half double crochet, it is not this stitch. The reverse single crochet itself is called the crab stitch; DMC gives the crab stitch both of its names, one for each naming convention, on a single page.
What You Need for the Herringbone Crochet Stitch
The kit for the herringbone crochet stitch is as short as for any crochet swatch: smooth yarn, a hook, scissors and a yarn needle. The sample is worked in a smooth, medium-looking green yarn with a blue ergonomic hook, and the creator names neither the hook size nor the yarn weight. We therefore give ranges from designers who print them.
| Item | What to use |
|---|---|
| Yarn | Smooth, plied yarn shows the diagonals best; the sample is a smooth solid colour, and we are not told the brand or weight |
| Hook | Not stated for the sample. The three designers we read use 5 mm, 7 mm and 8 mm, depending on the yarn |
| Tools | Yarn needle, scissors, a stitch marker for the first stitch if you lose it |
| Skill level | Confident beginner: chain, single crochet, turning, working into one specific leg of a stitch |
Hook note: the Craft Yarn Council lists 5.5 to 6.5 mm for medium (worsted) yarn and 4.5 to 5.5 mm for light (DK). The GoodKnit Kisses square uses a 5 mm hook with a medium yarn, which is below that range, and the ripple blanket uses 7 mm with a medium yarn, above it. Both are deliberate: the first gives a dense fabric, the second a looser one. Swatch a few rows and pick the hook that gives you diagonals you like. Pull each loop up high; the creator says she pulls it up “sky high” so the left leg has room to lean.
For the yarn, Lion Brand Pound of Love is what the ripple blanket uses and Caron One Pound is the yarn of the square. Both are smooth acrylic, which is a good choice for learning the herringbone crochet stitch because the legs of each stitch are easy to see.
Herringbone Crochet Stitch: From Swatch to Blanket
The creator shows a swatch, not a blanket, so she gives no size, no gauge and no yardage. We worked those out ourselves from three designers who print them: the Sarah Maker cowl gives 12 stitches over 4 in, the ripple blanket gives 12 stitches over 3.5 in and the GoodKnit Kisses square gives 16.5 stitches over 4 in. That is 3, 3.43 and 4.1 stitches per inch, with hooks of 8, 7 and 5 mm.
| Blanket width | 3 stitches per inch | 3.5 stitches per inch | 4 stitches per inch |
|---|---|---|---|
| 24 in (61 cm) | 72 stitches, chain 73 | 84 stitches, chain 85 | 96 stitches, chain 97 |
| 36 in (91 cm) | 108 stitches, chain 109 | 126 stitches, chain 127 | 144 stitches, chain 145 |
| 45 in (114 cm) | 135 stitches, chain 136 | 158 stitches, chain 159 | 180 stitches, chain 181 |
How we got these: width in inches times stitches per inch gives the stitches, and the foundation chain is one more. A 36 in blanket at 3.5 stitches per inch is 126 stitches, so chain 127. Make a swatch of 8 rows, measure how many stitches fit in an inch, and read your own column. It is our arithmetic, not a tested pattern, and the width should be adjusted if the edges are not straight.
The sizes in the yarn table come from Lion Brand, which prints a 24 x 36 in baby blanket, and a 36 x 40 in lap and a 45 x 55 in throw on another Lion Brand pattern. Our guide on how big a baby blanket should be covers more sizes.
| Blanket | Area | Yarn estimate |
|---|---|---|
| Baby 24 x 36 in | 864 sq in | about 847 yd |
| Lap 36 x 40 in | 1,440 sq in | about 1,411 yd |
| Throw 45 x 55 in | 2,475 sq in | about 2,426 yd |
Where the yarn figure comes from: only one of the pages we read prints both a size and a total yardage: the ripple blanket, 2,040 yd (two balls of 1,020 yd) for 40 x 52 in, which is 0.98 yd per square inch. Our table multiplies the blanket area by 0.98. It is a single data point on a shaped blanket with an edging, so treat the figure as a starting point and buy a spare ball. The other two patterns say they use less than one skein for a cowl, and print no yardage for the square, so we add nothing from them.
Herringbone Crochet Stitch: Step by Step
Steps 1 to 3 set up the base, steps 4 to 10 build one forward row, and steps 11 to 17 build the reverse row. Pull every loop up higher than you normally would and go under all three loops of each stitch.
Step 1: Make a foundation chain and a base row of single crochet
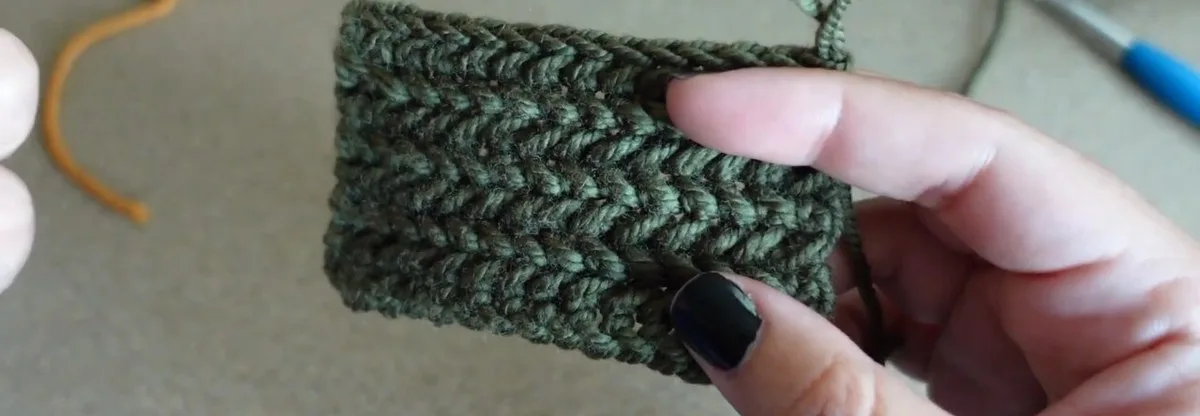
Chain any number of stitches plus 1 and work a row of single crochet into it. The creator starts the lesson with a swatch that has a finished reverse row, so you will not see this step in her demonstration, but every herringbone swatch needs a first row, and the designers use a plain single crochet row. Keep an even tension, because the herringbone rows lean on it.
Step 2: Chain 1 and turn
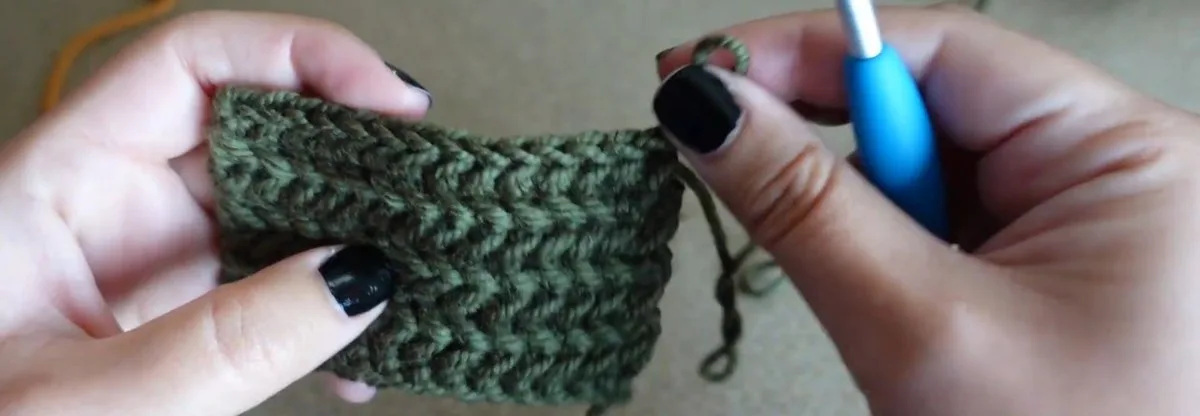
At the end of a row, chain 1 and turn your work. On the creator’s swatch the row before has just been finished as a reverse row, so the chain 1 turns you back to the front side, ready for a forward row. The chain 1 does not count as a stitch.
Step 3: Work the first stitch as a plain single crochet
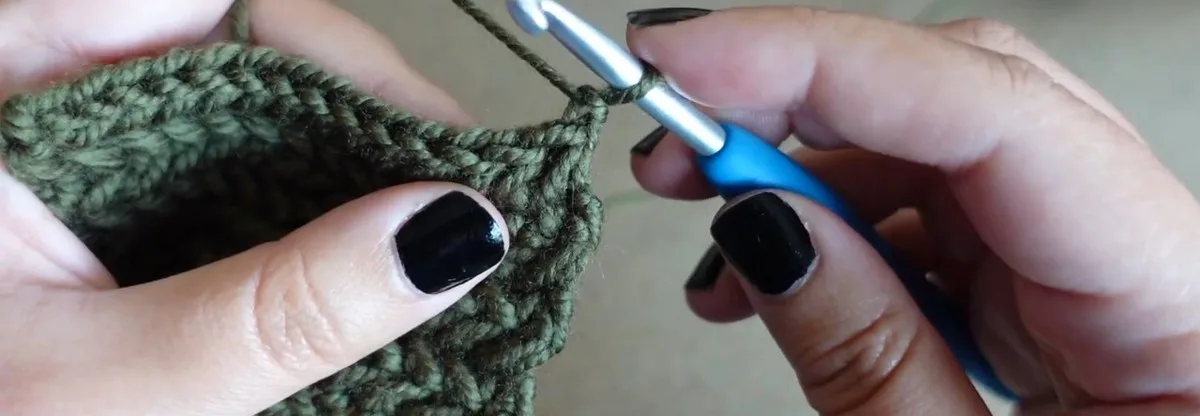
The first stitch of a forward row is an ordinary single crochet: insert the hook into the first stitch, yarn over, pull up a loop, yarn over and pull through both loops. A plain single crochet has only two loops, which is why this stitch sits at the edge and the herringbone stitches that follow can reach back to its tall left leg.
Step 4: Find the left-most leg of the stitch
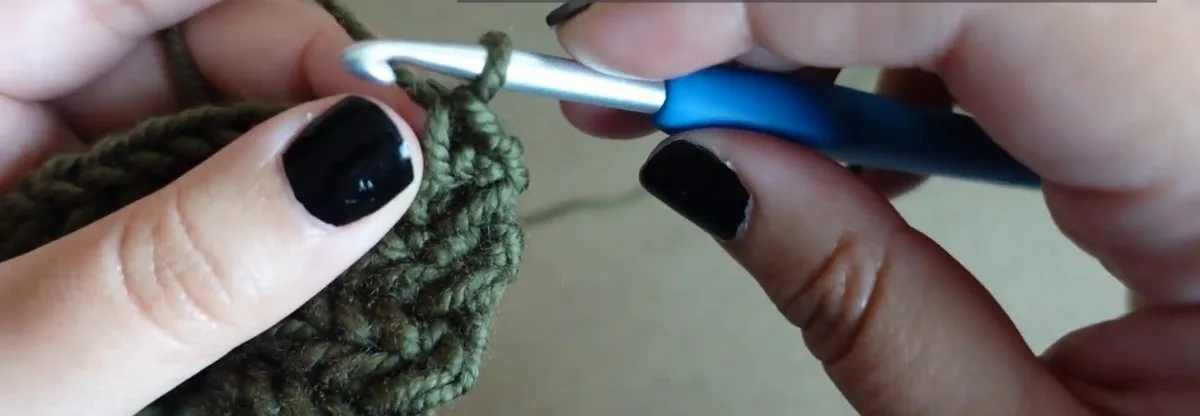
Look at the single crochet you just made. It has two legs, a left leg and a right leg. The left leg is tall because you pulled up a tall loop, and it is the leg you work through for the herringbone crochet stitch. Everything else in the herringbone crochet stitch is the same as a single crochet.
Step 5: Put the hook through the left leg, then into the next stitch
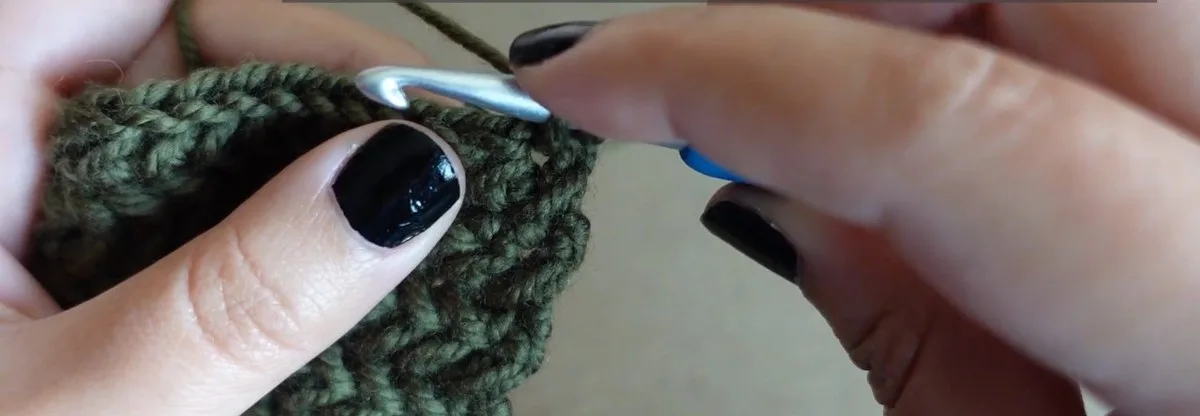
From right to left, put the hook through the left leg, then into the next stitch, going under all three loops of that stitch. Make sure you are really under all three: when the hook sits under only two, the diagonal comes out thin and the row loses its structure.
Step 6: Yarn over and pull up a tall loop
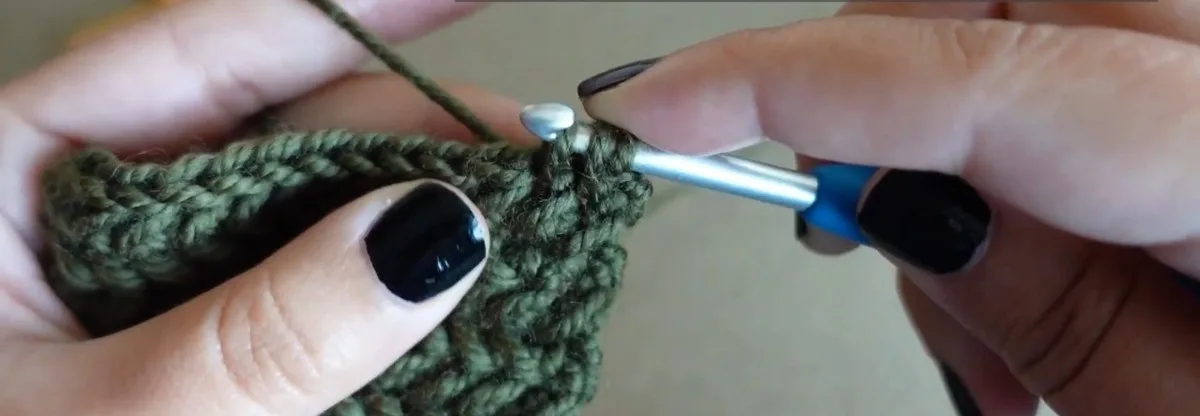
Yarn over and pull the loop up high. Pulling it up is the heart of the herringbone crochet stitch: a tall loop is what lets the left leg lean and form the diagonal, and it makes the next stitch easier to find. You now hold three loops on the hook, which is the “third loop” the creator mentions.
Step 7: Yarn over and pull through all 3 loops
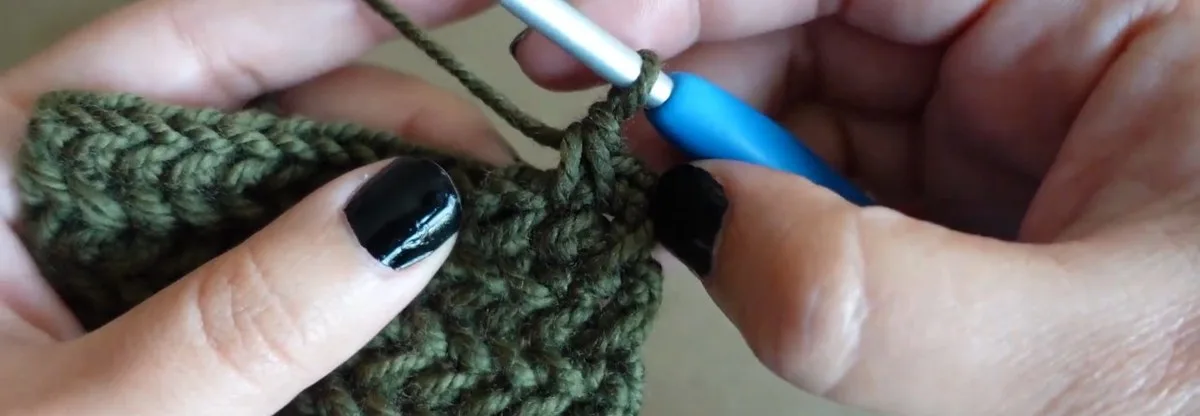
Yarn over again and pull through all three loops on the hook. That is your first forward herringbone stitch. It looks and feels like a single crochet, only worked through the left leg and with an extra loop, and the diagonal starts to appear as soon as you have two or three of them.
Step 8: Repeat across the row
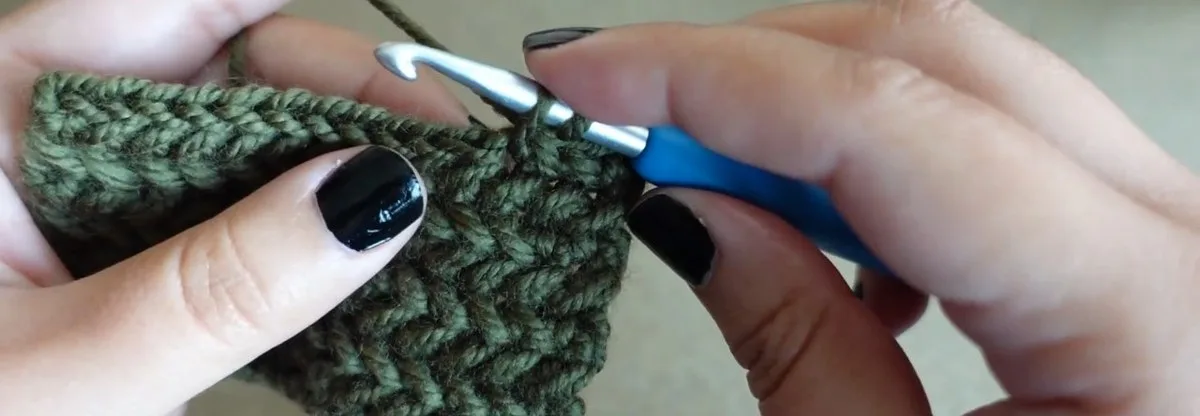
Keep going: left leg, next stitch under all three loops, yarn over and pull up a tall loop, yarn over and pull through all three. It is just like working a plain single crochet with an extra detail. The legs lean to the left and the first arrows of the herringbone crochet stitch appear.
Step 9: Work the last stitch under two loops
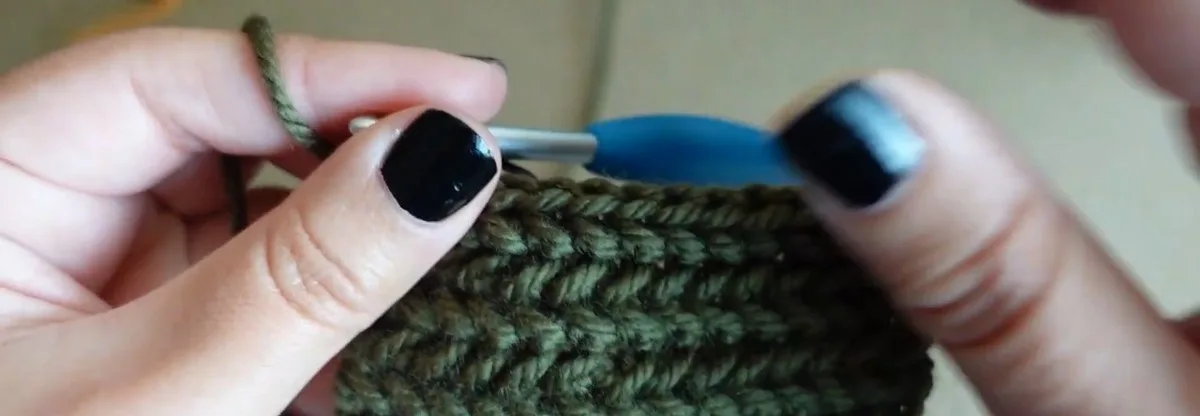
At the end of the row the last stitch is the first stitch of the row below, which was a plain single crochet, so it has only two loops and no third loop to find. Do not search for a third loop, just work under the two that exist and finish the stitch as before.
Step 10: Finish the forward row
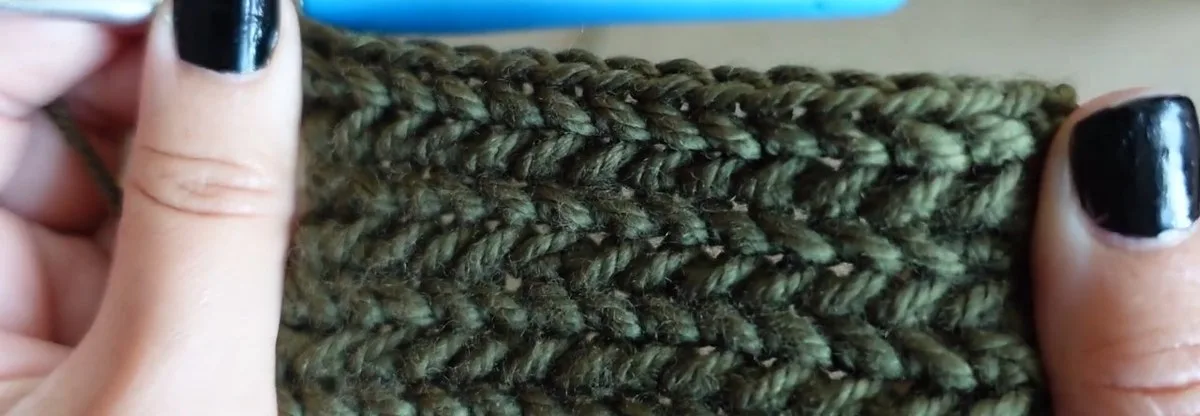
You now have a full row of the forward herringbone stitch. The creator says it looks pretty good, and the left-leaning diagonals are easy to check on the front. Now chain 1 and turn, and you are ready for the reverse row, where the stitches lean to the right.
Step 11: Start the reverse row with a reverse single crochet
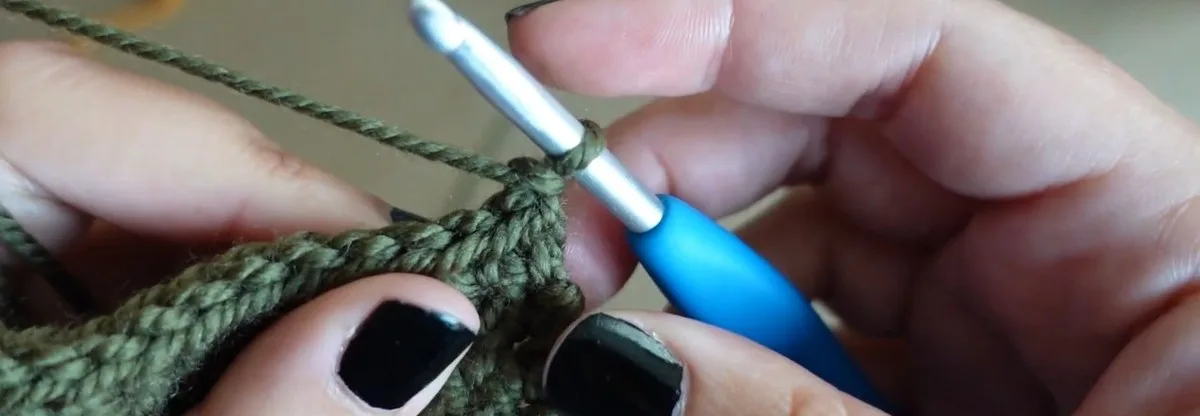
Chain 1 and turn, then work one reverse single crochet in the first stitch. Take the hook and, from back to front, put it into the first stitch under all three loops. Grab the yarn, pull it through, and you have two loops on the hook; yarn over and pull through both. The creator says a reverse single crochet is not much harder than a regular one, the only new part is going back to front.
Step 12: Practise two reverse single crochet stitches
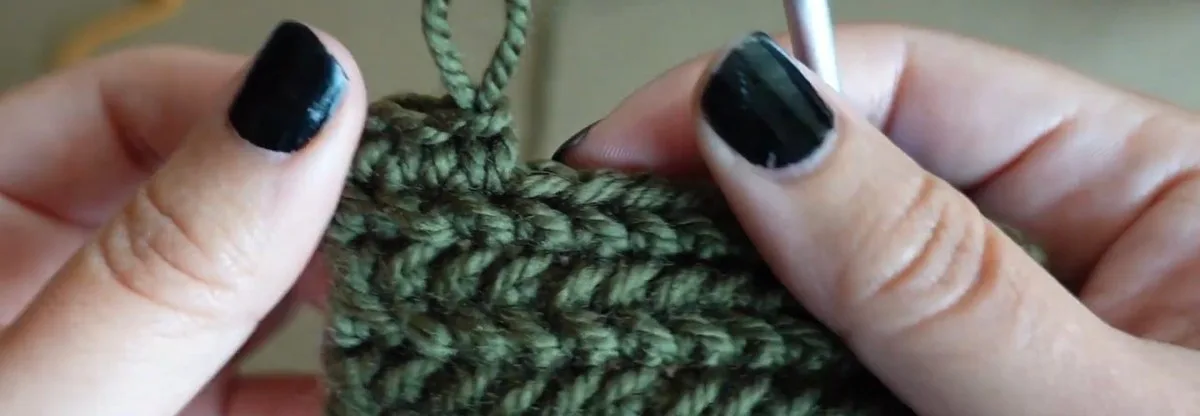
Make a couple more reverse single crochets so your hands learn the back-to-front movement, then look at them: each stitch has a left leg and a right leg again. The creator then pulls these two stitches out and goes back to having one reverse single crochet in the row, ready for the herringbone version.
Step 13: Find the leg closest to the next stitch
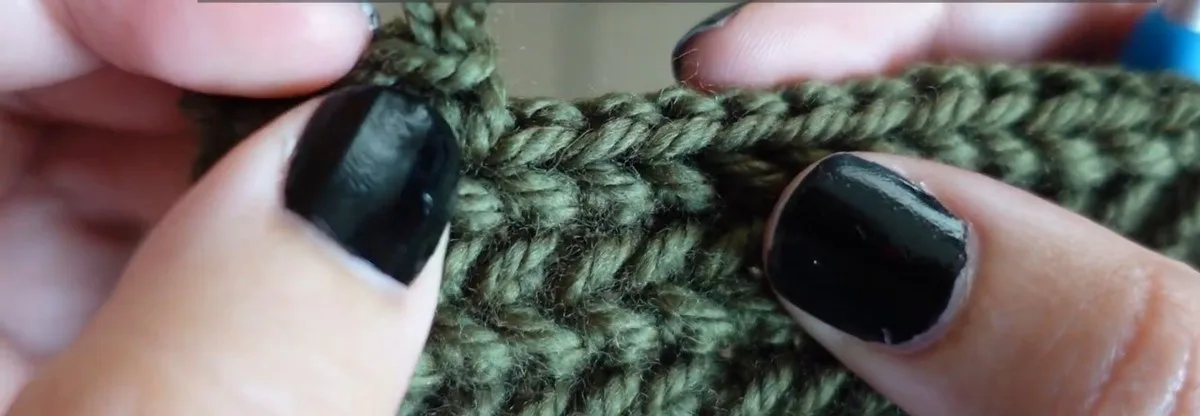
For the reverse herringbone stitch you work through the leg that is closest to the next stitch, because that is what gives a clean diagonal bar. In the reverse row that is the opposite leg from the one in the forward row, so take a moment to look before you push the hook in.
Step 14: Hook through that leg, then back to front into the next stitch
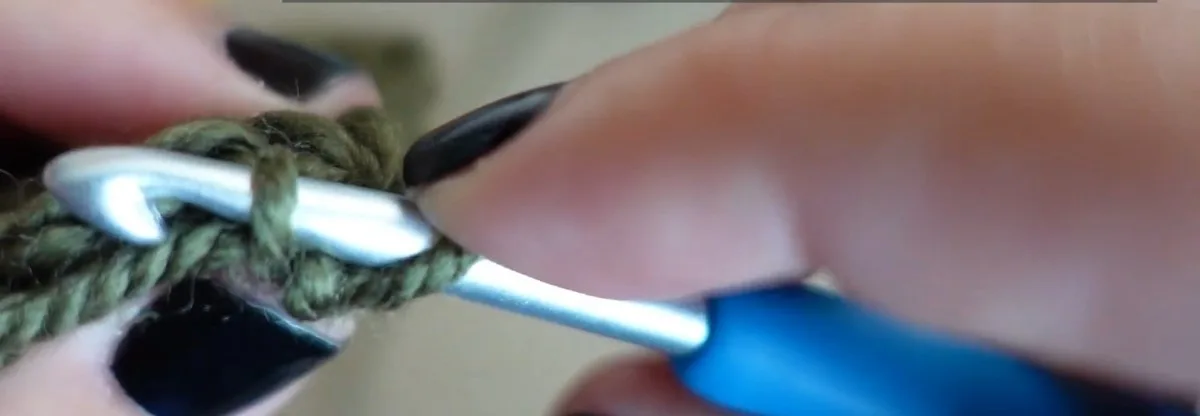
From right to left, put the hook through that leg, then, from back to front, through all three loops of the next stitch. Grab the working yarn and pull up a high loop, just as in the forward row. This is where the herringbone crochet stitch turns the other way.
Step 15: Yarn over and pull through all 3 loops
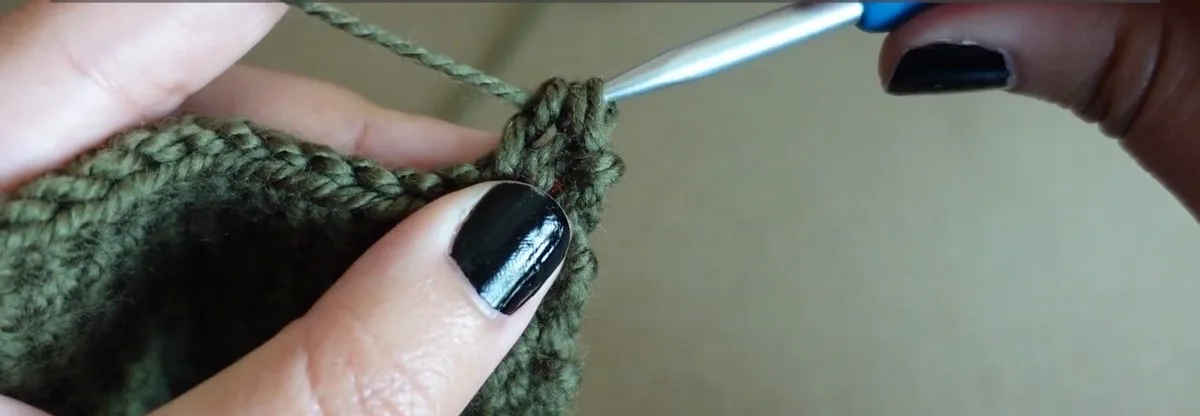
Yarn over and pull through all three loops, then look at the leg sticking out of the stitch: it is the one you use next. Put the hook through it and into the next stitch from back to front, and repeat. When you turn the work over, the first reverse herringbone stitches are lined up in a neat diagonal.
Step 16: Work across the reverse row
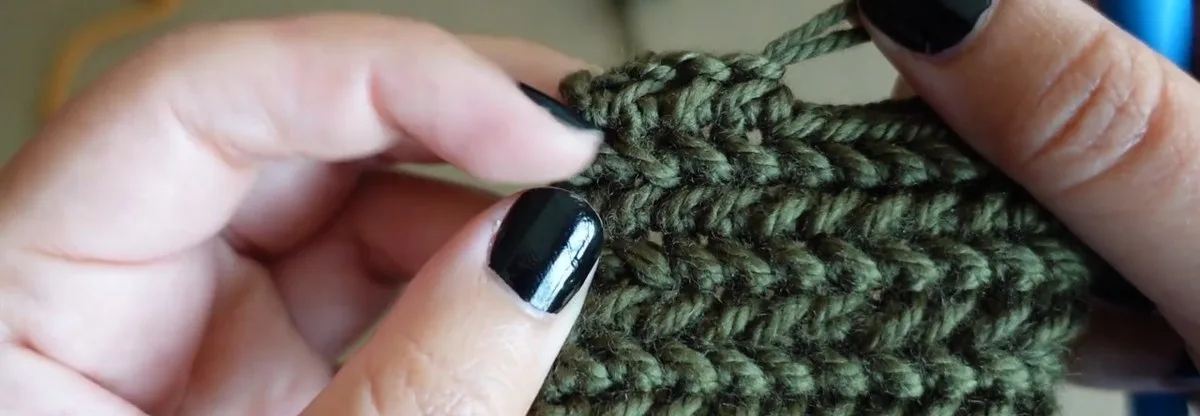
Continue to the end of the row: the leg closest to the next stitch, back to front under all three loops, a tall loop and pull through three. The creator says the only really different part is going from back to front, and that once you are used to it, it feels almost the same as the forward row.
Step 17: Check the finished pair of rows
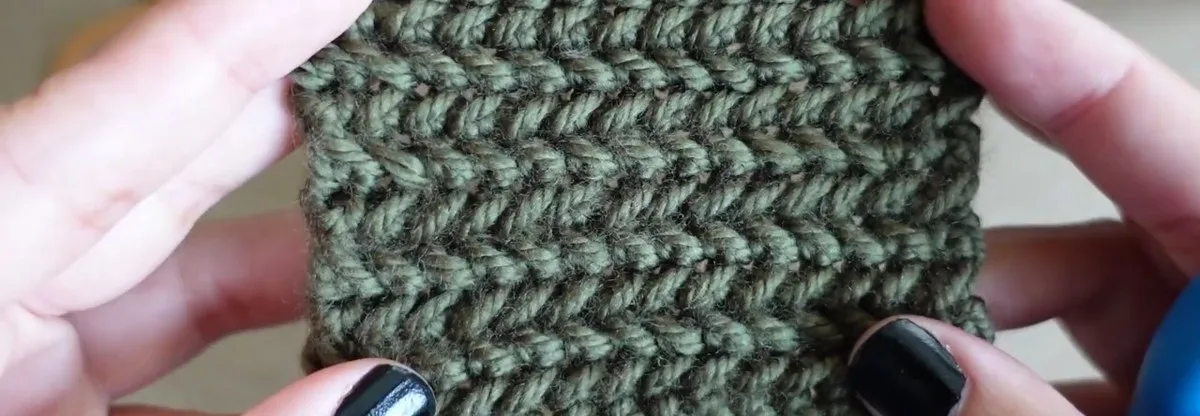
Work the last stitch of the reverse row under two loops, as before. Then turn the swatch over and look: a forward row and a reverse row together make one row of arrows. Repeat the two rows of the herringbone crochet stitch, chain 1 and turn each time, until the piece is as long as you need.
Where the Herringbone Crochet Stitch Goes Wrong
The diagonals look flat or the rows look messy
The usual cause is a hook that went under two loops instead of three. The herringbone crochet stitch depends on all three loops of every stitch, so check the row before you move on. If you can see the hole of the stitch below, you missed a loop. Pull the loop up higher and slow down on the first few stitches of each row.
The reverse row leans the same way as the forward row
If both rows of the herringbone crochet stitch lean the same way, you worked the reverse row through the same leg as the forward row. In the reverse row you use the leg closest to the next stitch, and you go from back to front. Look at the leg before you push the hook in, and pull out the row if it looks wrong.
The edges pull in or flare out
In the herringbone crochet stitch the first stitch of a forward row is a plain single crochet and the last stitch has only two loops. If you work a herringbone stitch in the first stitch or hunt for a third loop at the end, the edge count changes and the sides drift. The chain 1 does not count as a stitch, so count the stitches of the row now and then.
The fabric feels stiff
The creator says the herringbone crochet stitch was stiffer than she expected while she worked it, and the swatch got its drape from blocking. Designers also recommend a larger hook than the yarn label suggests: the ripple blanket uses 7 mm and 8 mm with a medium yarn. Try a bigger hook before you decide the stitch is too stiff.
Best Uses for the Herringbone Crochet Stitch
Because the fabric is one-sided, the herringbone crochet stitch suits projects where the front is on show and the back is hidden or does not matter. This list is our own, drawn from the patterns we read and not from the creator.
| Project | Why it works | Seen in |
|---|---|---|
| Cowl or neck warmer | The right side faces out and the plain side sits inside | Sarah Maker cowl, 24 x 10 in |
| Mug hug or coaster | Small flat square, a good way to practise | GoodKnit Kisses square |
| Blanket | A dense fabric, so plan on more yarn than for a plain single crochet blanket | ripple blanket, 40 x 52 in |
| Hat band or scarf | Rows of arrows read well on narrow pieces | see easy crochet scarf pattern |
For a comparison, the moss stitch crochet guide shows a stitch that looks the same on both sides, which is the better choice when the back will show. For a small first project in a textured stitch, the crochet ear warmer is a quick make.
Free Herringbone Crochet Stitch Patterns to Try
These are the free patterns and stitch pages we read for the herringbone crochet stitch. We list only what each page prints, and say what is missing.
| Pattern | Yarn and hook | Size | Gauge and yardage |
|---|---|---|---|
| Herringbone Single Crochet Ripple Blanket (A Crocheted Simplicity) | Lion Brand Pound of Love, 7 mm (materials list 8 mm) | 40 x 52 in | 12 stitches = 3.5 in; 2,040 yd |
| Herringbone Crochet Cowl (Sarah Maker) | Lion Brand Color Made Easy, 8 mm | 24 in across, 10 in tall | 12 stitches and 8 rows = 4 in; under 1 skein |
| Herringbone Stitch Square (GoodKnit Kisses) | Caron One Pound, 5 mm | 12 x 12 in | 16.5 stitches and 12 rows = 4 in; no yardage |
| Herringbone Stitch Page (A Crocheted Simplicity) | Lion Brand Pound of Love, 7 mm | swatch | no size or gauge printed |
| Herringbone Single Crochet Stitch Tutorial (For The Frills) | super chunky, 12 mm | swatch | no size or gauge printed |
What the pages leave out: only three print a gauge, only one a total yardage, and the hooks run from 5 mm to 12 mm. The ripple pattern lists a 7 mm hook for the body and L/8 mm (8 mm) in its materials, so read both lines before you buy a hook. Designers choose a hook for the drape they want, not just by the yarn label.
Herringbone Crochet Stitch FAQ
What is the herringbone crochet stitch?
It is a two-row repeat in which one row is worked through the left-most leg of each stitch and the next row, back to front, through the leg closest to the next stitch. Together the rows form diagonal arrows. This guide covers the herringbone single crochet.
How do you do the herringbone single crochet?
Chain 1 and turn, work a plain single crochet in the first stitch, then put the hook through the left leg and into the next stitch under all 3 loops, pull up a tall loop, yarn over and pull through all 3. Repeat to the end, working the last stitch under 2 loops.
What is the difference between herringbone single crochet and herringbone half double crochet?
The single crochet version keeps 3 loops on the hook and pulls through all of them. The herringbone half double crochet is a different stitch and, on the Moogly page, two loops remain on the hook. Check which stitch a pattern calls for.
What is reverse single crochet?
Reverse single crochet, also called crab stitch, is a single crochet worked from back to front and left to right. In the herringbone crochet stitch it starts the reverse row; the stitches after it are reverse herringbone stitches worked through the leg closest to the next stitch.
How many chains do I need for a herringbone blanket?
Chain any number of stitches plus 1. For a 36 in blanket at 3.5 stitches per inch we calculate 126 stitches, so chain 127. Swatch first and measure your own stitches per inch, because the printed gauges range from 3 to 4.1.
Is the herringbone crochet stitch reversible?
No. The creator says the fabric is one-sided: the front shows the arrows and the back is plain. Choose it for projects where the back is hidden, such as a cowl, or where you do not mind a plain side.
More Textured Stitches to Try Next
If you like a stitch that repeats in two rows, the moss stitch crochet guide is a good one to try after the herringbone crochet stitch, and the moss stitch crochet scarf turns it into a quick project. For something plainer, see the easy crochet scarf pattern. Browse all stitches and squares on the site.
Sources
- A Crocheted Simplicity, Herringbone Single Crochet Ripple Blanket
- A Crocheted Simplicity, How to Crochet the Herringbone Stitch
- Sarah Maker, Herringbone Crochet Cowl
- GoodKnit Kisses, Crochet the Herringbone Stitch
- For The Frills, Herringbone Single Crochet Stitch Tutorial
- Moogly, Herringbone Half Double Crochet
- DMC, Crab Stitch
- Lion Brand, Speed Hook Baby Blanket
- Lion Brand, Birch Lane Throw
- Craft Yarn Council, yarn weight system
Pattern credit: this herringbone stitch design is by the crochet channel thecraftiman.