Crochet Shorts: Easy Striped Pattern for a Happy Fit
These striped crochet shorts are worked from the waistband down in one piece: a ridged band, a hip section that grows with increases, and two short legs, all in single crochet. Below you get seventeen photo steps in the order the stitches are worked, a waist-to-rows table, the hook and yarn notes, and the mistakes that spoil a pair of crochet shorts.
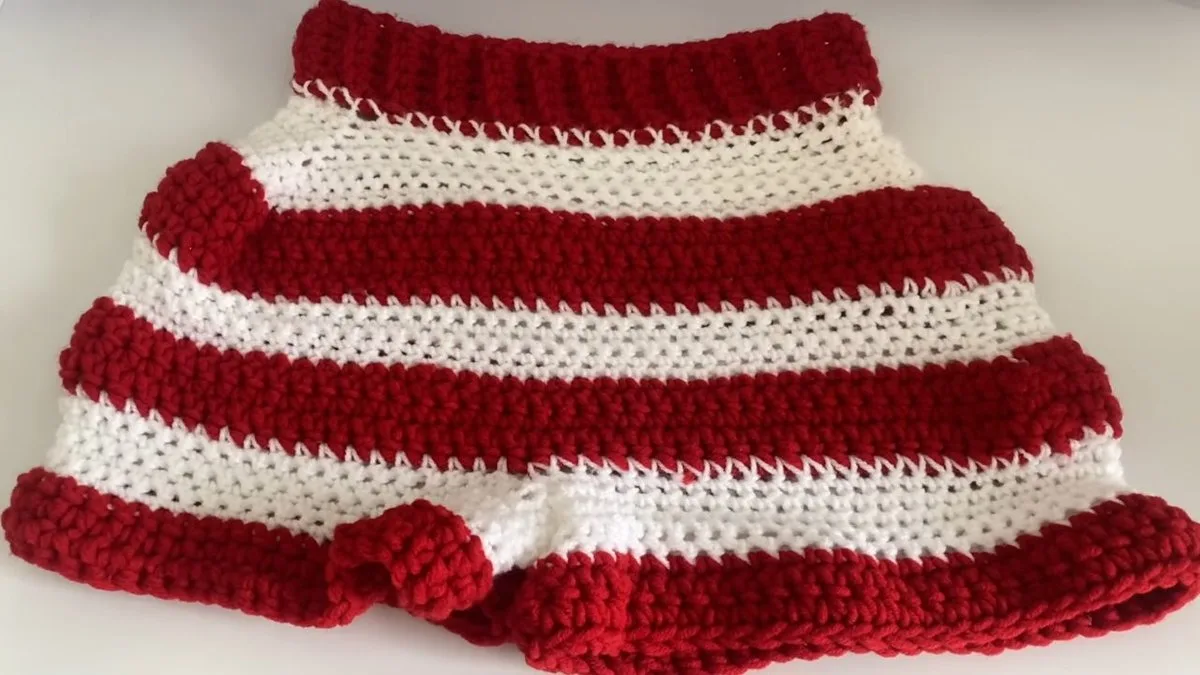
The correction up front: the yarn label for the red yarn points to a 9 mm hook, yet the designer works it with a 6 mm hook, and the white yarn, labelled 4 mm, with a 4 mm hook. The tutorial prints no gauge, no yarn amount and no leg length, so we give an exact number only where one is shown and say so wherever it is not. These are short, close-fitting crochet shorts, so the leg length is yours to choose: add rows to each leg for a longer, more covering fit.
If you are new to crochet garments, this is a gentle place to start, because every stitch is a single crochet and the shaping is just a triple stitch at each hip. The skill you need is patience with trying the piece on, because the fit is built by checking it against your own body.
- Crochet Shorts at a Glance
- What You Need for Crochet Shorts
- Crochet Shorts Size and Band Table
- Crochet Shorts: Step by Step
- Where Crochet Shorts Go Wrong
- Fit, Stretch and Care
- Five More Free Crochet Shorts Patterns
- Crochet Shorts FAQ
- Pair These Crochet Shorts With a Layer
Crochet Shorts at a Glance
The crochet shorts have three parts. The waistband is a flat strip worked in rows and sewn into a ring, the body is worked down from the band in rounds with increases at each hip, and the legs are worked one at a time after you split the stitches. The design uses the stitch names single crochet (sc) and slip stitch (sl st) only, so there is no need to translate between the two naming conventions.
| Part | What the tutorial shows | Photo steps |
|---|---|---|
| Waistband | Chain 7, single crochet rows, back loop only on alternate rows, worked until the band is your waist minus 2 in | Steps 1 to 4 |
| Ring | Slip stitch the two ends together, then 1 single crochet into each row edge, 50 in the sample | Steps 5 and 6 |
| Body | Rounds of single crochet in stripes, with 3 single crochet in one stitch at each hip | Steps 7 to 12 |
| Split | Count the stitches (88 in the sample), divide by 4 to get 22, chain 12 for the crotch | Steps 13 and 14 |
| Legs | One leg at a time, rounds of single crochet in stripes, no increases | Steps 15 and 16 |
| Finish | Match the second leg to the first and weave in the ends | Step 17 |
What is not printed: a yarn amount, a gauge, the number of rounds in the body after the white stripe, and the number of rounds in each leg. The designer says to try the piece on and stop when the length suits you, and we follow that rule rather than make up a count.
What You Need for Crochet Shorts
You need two colours of soft, stretchy yarn, two hooks, a tape measure and scissors. The sample uses a chunky red and a thinner white, both bought from a craft store, and the red is used with a larger hook than the white.
| Item | What to use |
|---|---|
| Red yarn | A soft chunky yarn; the label points to a 9 mm hook |
| White yarn | A thinner soft yarn; the label points to a 4 mm hook |
| Hook for red | 6 mm in the tutorial |
| Hook for white | 4 mm in the tutorial |
| Tools | Tape measure, scissors, optional stitch markers |
| Yardage | Not printed by the tutorial; see below |
| Skill level | Beginner: chain, single crochet, back loop only, slip stitch, increases |
Hook size: a 9 mm label sits at the top of the bulky range on the Craft Yarn Council yarn weight chart, where the guideline for bulky yarn is 6.5 to 9 mm. Working it with a 6 mm hook is a deliberate choice for a tight, firm fabric, and that is why the sample looks dense. If your swatch is stiff, go up a size; if it gapes, go down.
How much yarn to buy: the tutorial gives no amount, and we will not guess. Other free shorts patterns show how much the choice of yarn matters. The Staycation Shorts list about 450 yd in the smallest size and about 800 yd in the largest in a worsted cotton, the loungewear shorts list 700 to 1450 yd in a fingering yarn, and the Shell Shorts list 3 skeins in S/M up to 5 in 2X/3X. Buy more than you think you need, keep the receipt, and make the white stripes from the same dye lot.
Crochet Shorts Size and Band Table
There is no size chart for these crochet shorts. The only measurement you take is your waist, and the designer subtracts 2 in from it, so a 29 in waist becomes a 27 in band. The band is stretchy, so it sits snugly without a zip or button. The designer also says to try the band on as you go, stretching it first, because the fit is different on every body.
| Your waist | Band length (waist minus 2 in) | Rows at 1.85 per inch |
|---|---|---|
| 24 in | 22 in | about 41 |
| 26 in | 24 in | about 44 |
| 28 in | 26 in | about 48 |
| 30 in | 28 in | about 52 |
| 32 in | 30 in | about 56 |
| 34 in | 32 in | about 59 |
Our row table: the designer’s band is 50 rows for 27 in, which works out to 1.85 rows per inch with her red yarn and a 6 mm hook. The table above applies that rate to each waist. This is our arithmetic from two printed numbers, not something made or tested by us, so measure the band against your own body as you work and ignore the row count when they disagree.
To find where your waist and hips sit among standard sizes, the Craft Yarn Council women size chart lists waist and hip measurements from XS to 5X: for example XS is a 23 to 24 in waist and 33 to 34 in hips, M is 28 to 30 in and 38 to 40 in, and XL is 36 to 38 in and 46 to 48 in. The body sizing page explains where to place the tape. The hip section of these crochet shorts is shaped by increases and by trying on, not by a chart, so use the chart for orientation only.
Crochet Shorts: Step by Step
Work these steps in order. Each one lists what the tutorial shows, and where it leaves out a number we say so. One count matters more than the rest: the number of stitches at the split must divide by four, and that is the stitch multiple for the whole design.
Step 1: Measure your waist and chain 7
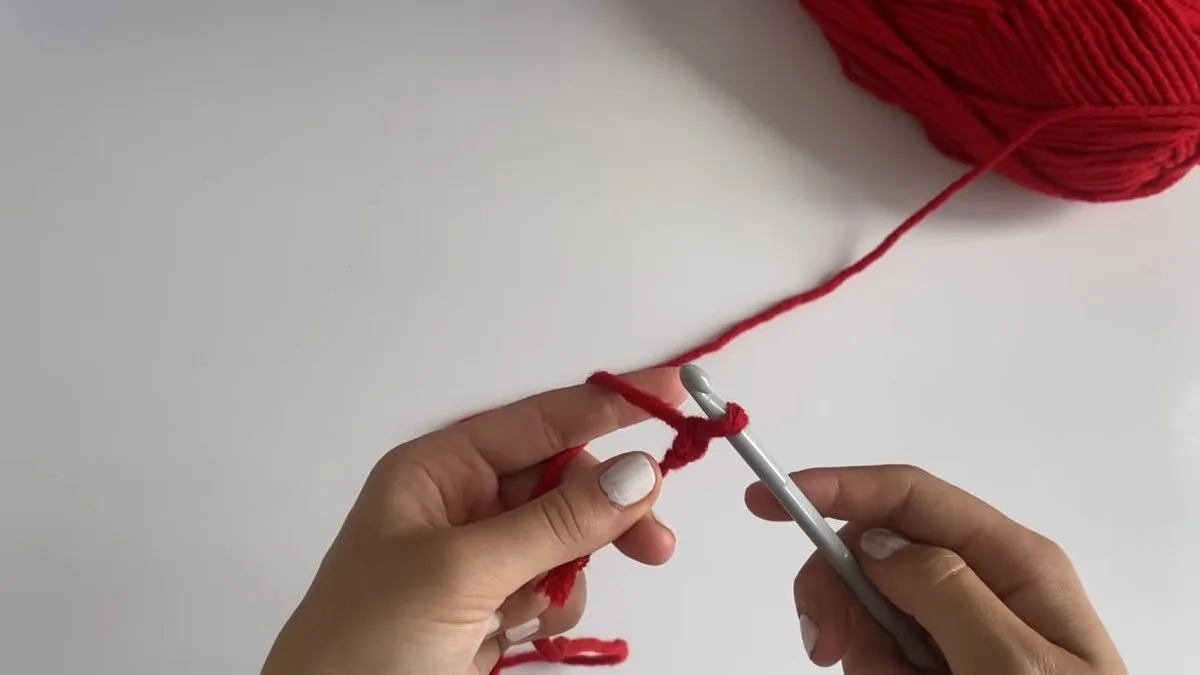
Measure around your waist and take off 2 in. The sample waist was 29 in, so the band is 27 in. Make a slip knot with the 6 mm hook on your red yarn and chain 7. The chain count is the height of the waistband, so use more chains for a deeper band and fewer for a slimmer one.
Step 2: Work the first row of single crochet

Make a single crochet in each chain across. At the end of the row, chain 1 and flip your work. The tutorial does not say whether the first chain from the hook is skipped, so count your stitches against your chain and keep them even.
Step 3: Alternate back loop rows with normal rows
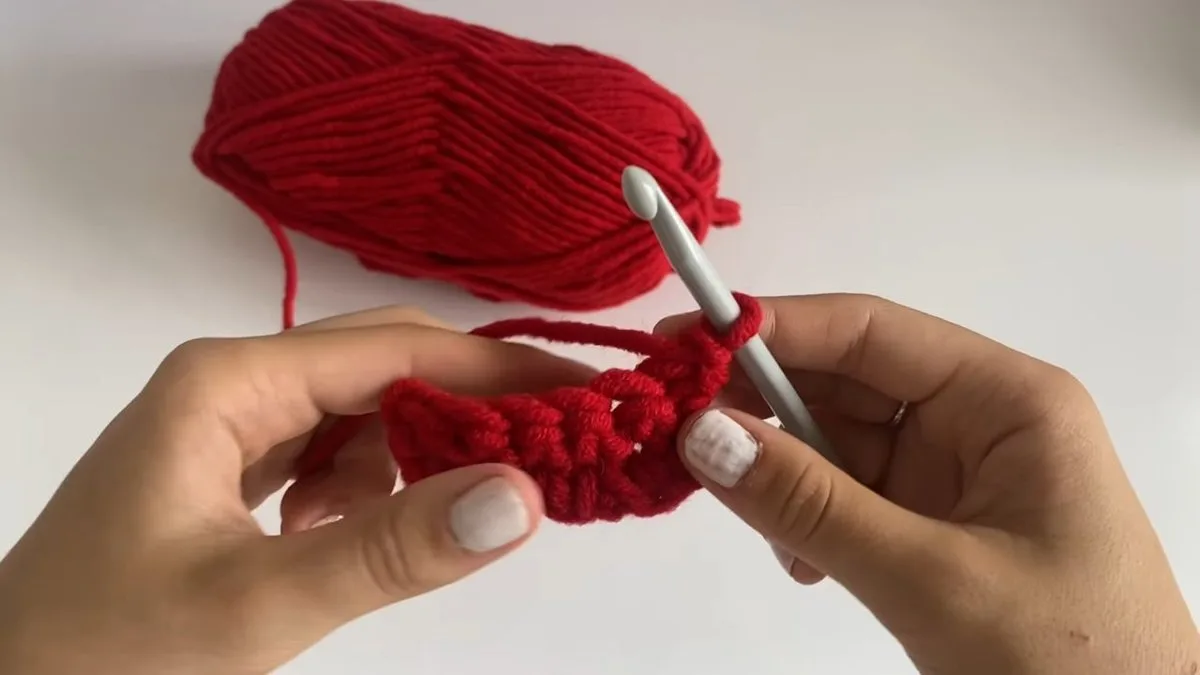
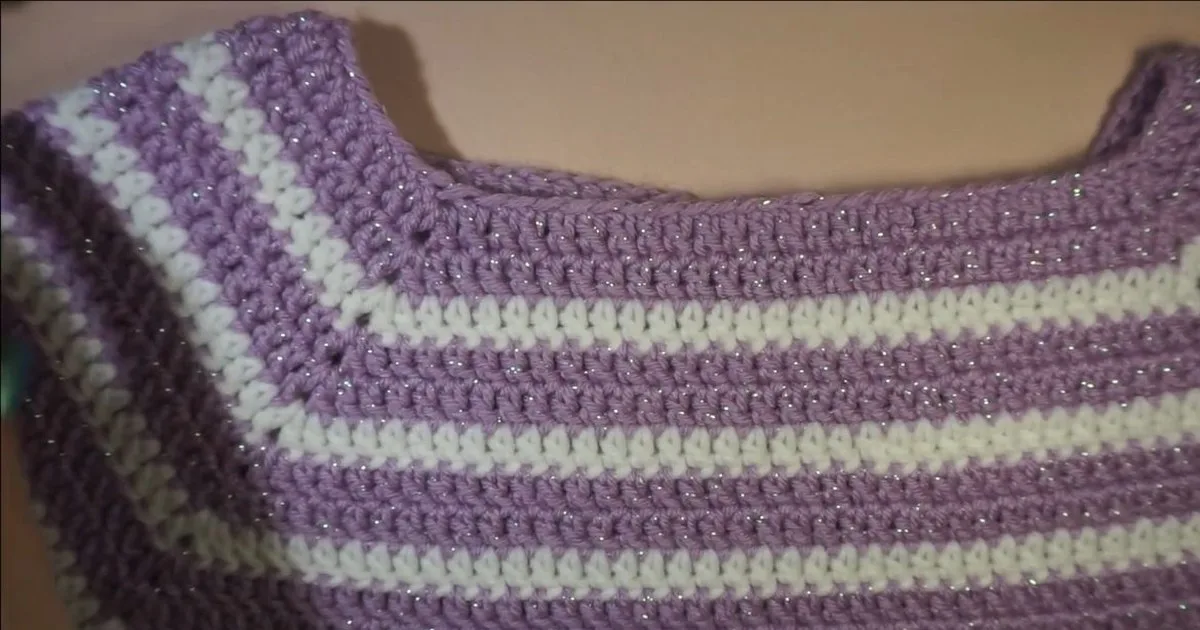
On the next row, work each single crochet into the back loop only, which means the hook goes through one loop instead of two. Chain 1 and flip. On the row after that, work into both loops as normal. Keep alternating, back loop row, normal row, back loop row, and the ridges appear along the band.
Step 4: Keep going until the band fits
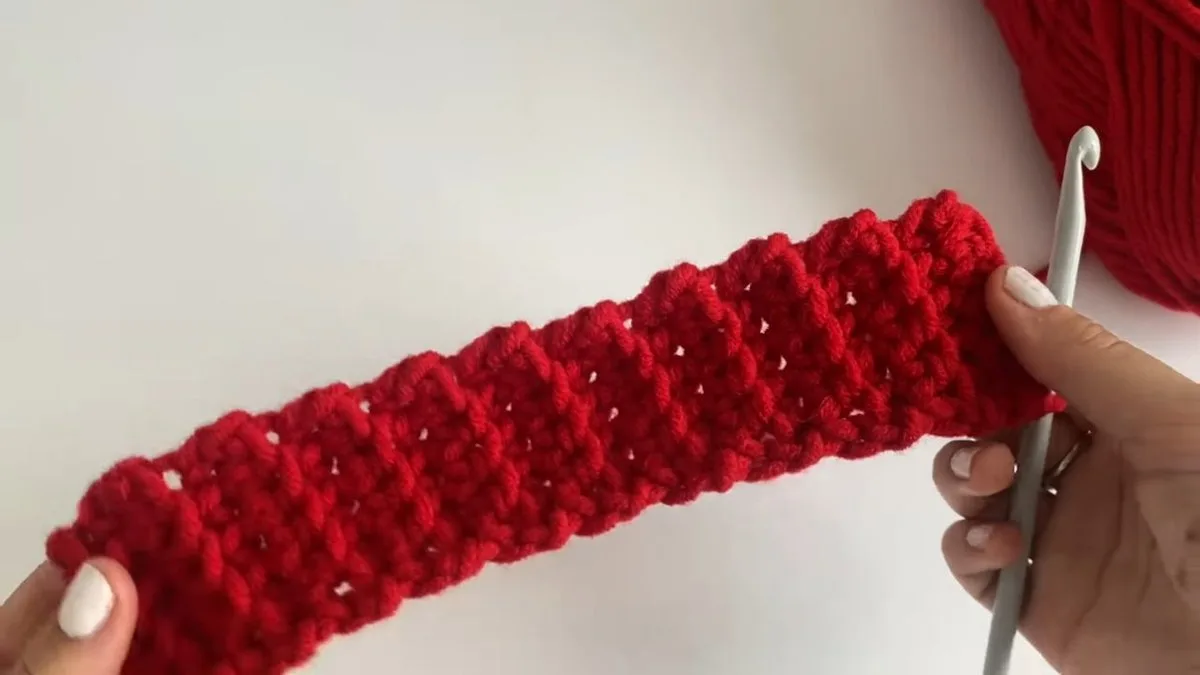
Repeat the pair of rows until the band reaches your waist minus 2 in. Stretch it as you measure and try it around you, because the band should sit snugly. The sample band was a little under 27 in once tried on, and it was fine because crochet stretches.
Step 5: Close the band into a ring
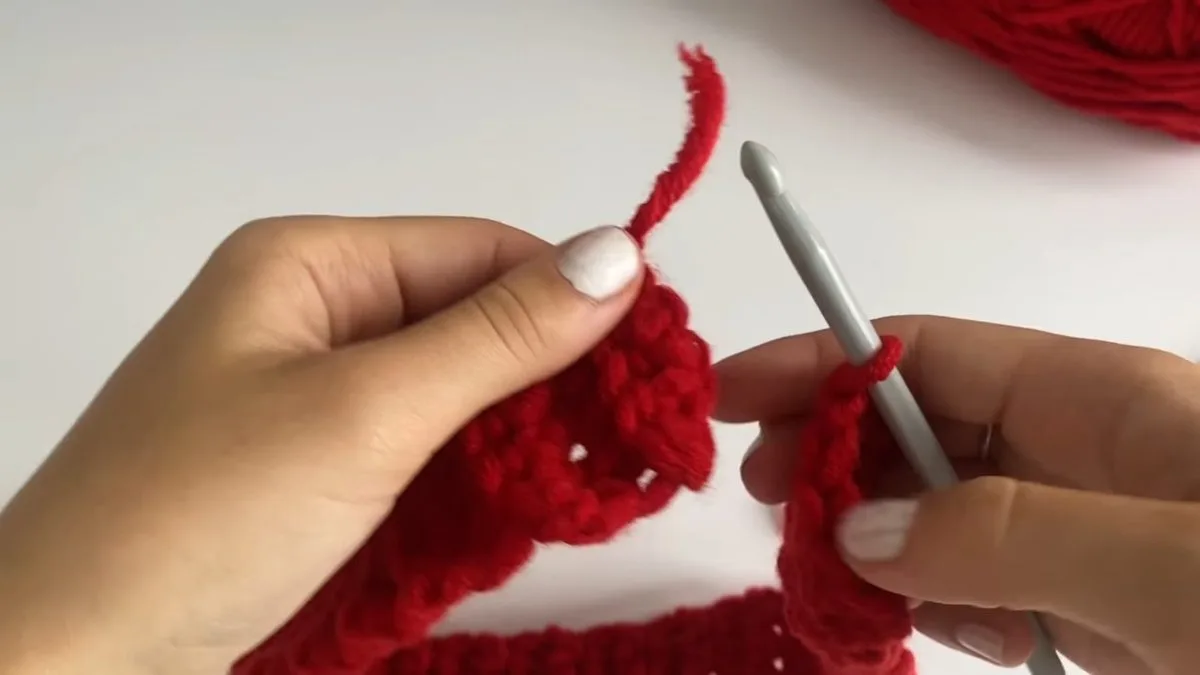
Line up the two short ends so the stitches match. Put the hook through one stitch on each end, yarn over, pull through both, then pull through the loop on the hook. That is one slip stitch. Repeat for every pair of stitches across, then chain 1. The seam forms a flat ridge inside the waistband.
Step 6: Count the rows and work around the edge
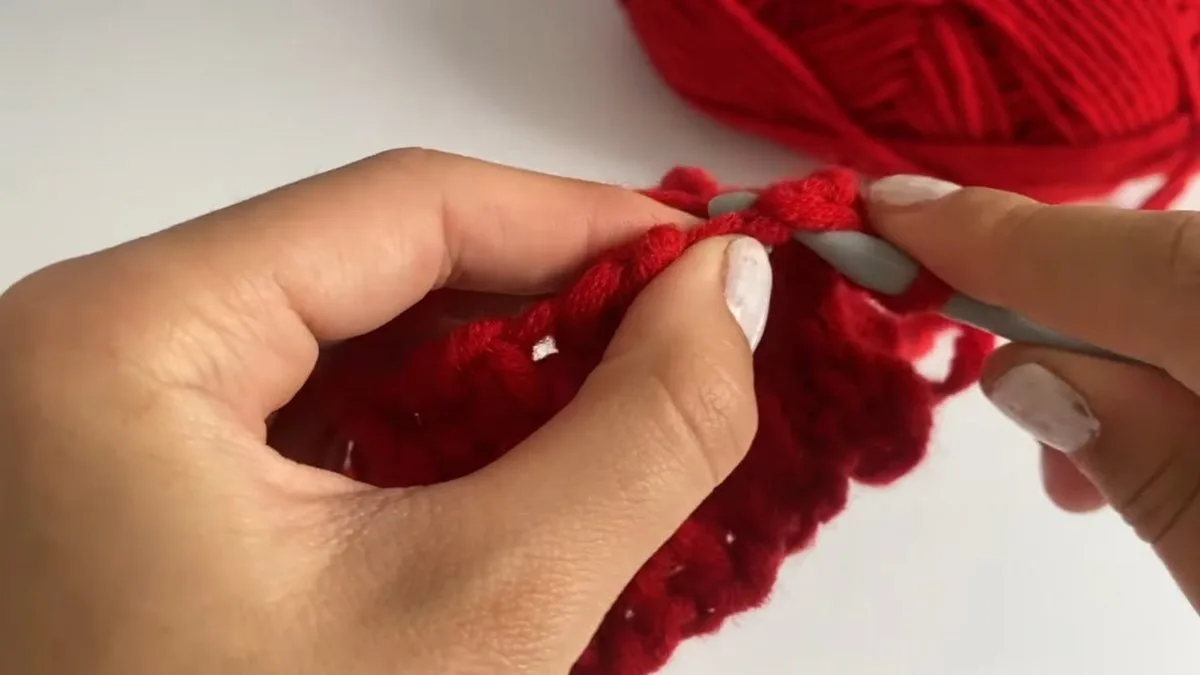
Count the rows along one edge of the band. The sample has 50. Work one single crochet into each row edge, including the slip stitch seam row, all the way around, so you end with the same number of stitches as rows. Slip stitch into the first chain to join. This is round 1, and it finishes the red section of the waistband.
Step 7: Change to the white yarn
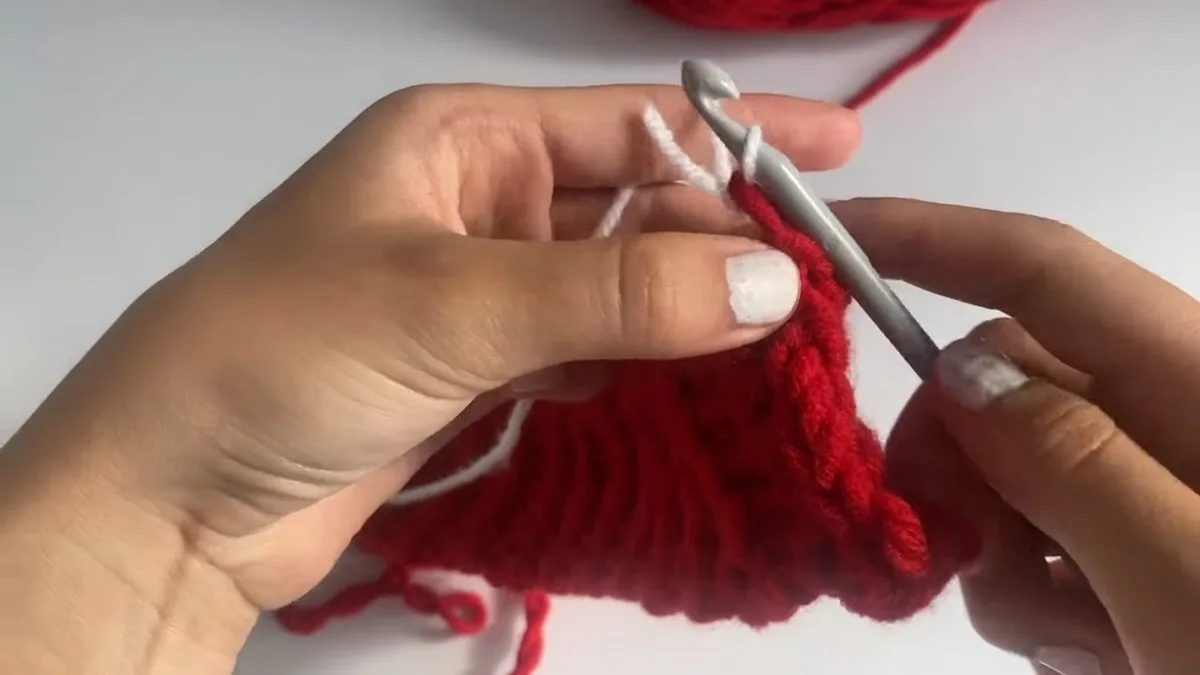
Make a slip knot with the white yarn on the 4 mm hook, pull it through the last red stitch, and pull the red end tight so the join is secure. Cut the red yarn. Chain 1 and turn your work. If you want thinner stripes, change colour more often from here.
Step 8: Work the first round in white
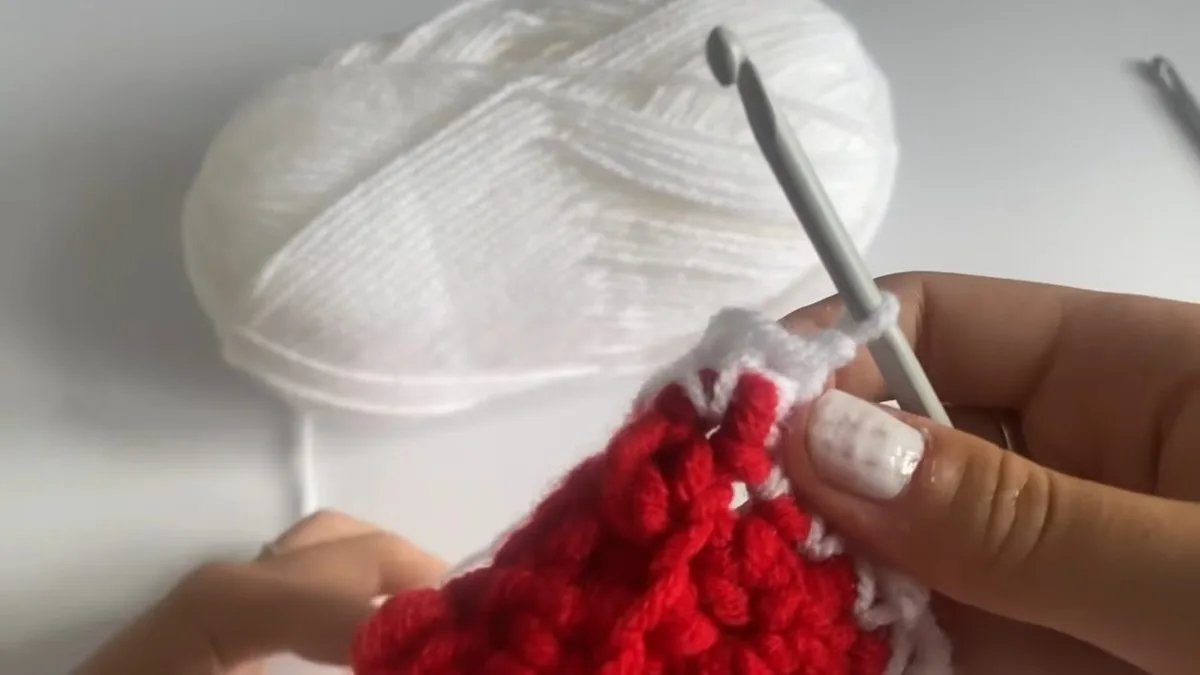
Work single crochet in each stitch of the previous round, going around, and slip stitch to the first stitch. Chain 1, turn, and fold the piece flat. The little tail at the start of your work now marks one side of the hips, and the fold gives you the opposite side.
Step 9: Increase at each hip
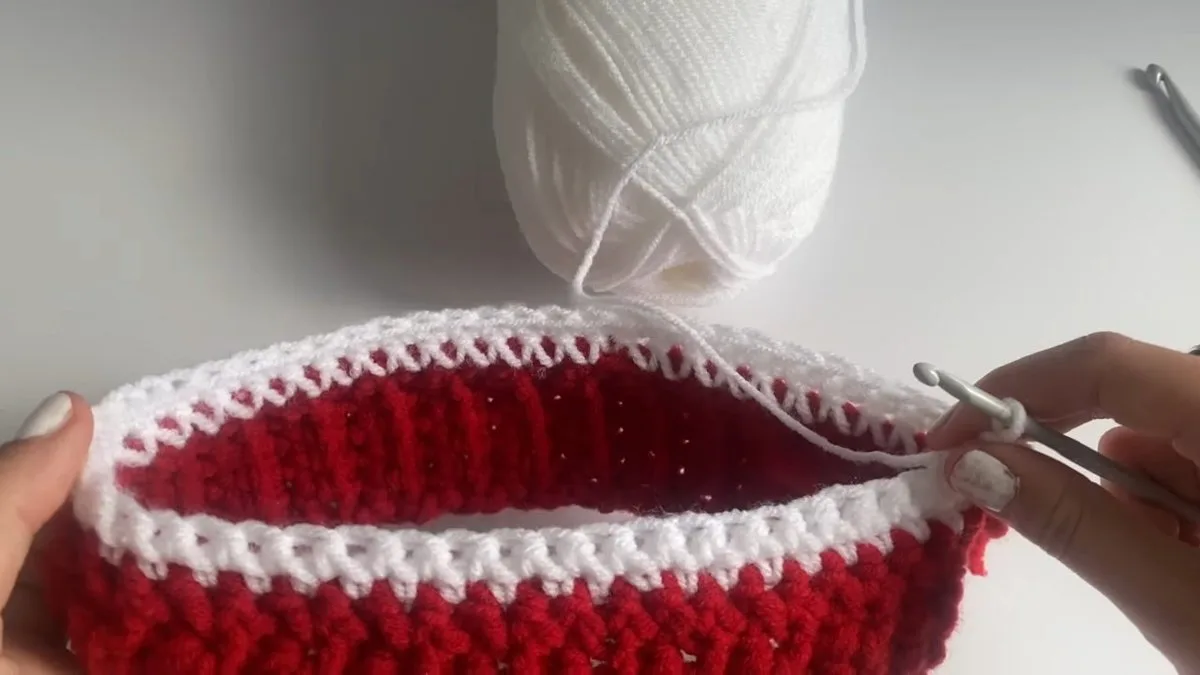
The increase is 3 single crochet in one stitch. Keep the work folded flat as you go. Work to the tail marker, make the 3 single crochet into that stitch, then single crochet to the fold on the other side and make the same increase there. Stitch markers help if you do not want to rely on the fold. The sides now start to widen like two small triangles.
Step 10: Work the white stripe
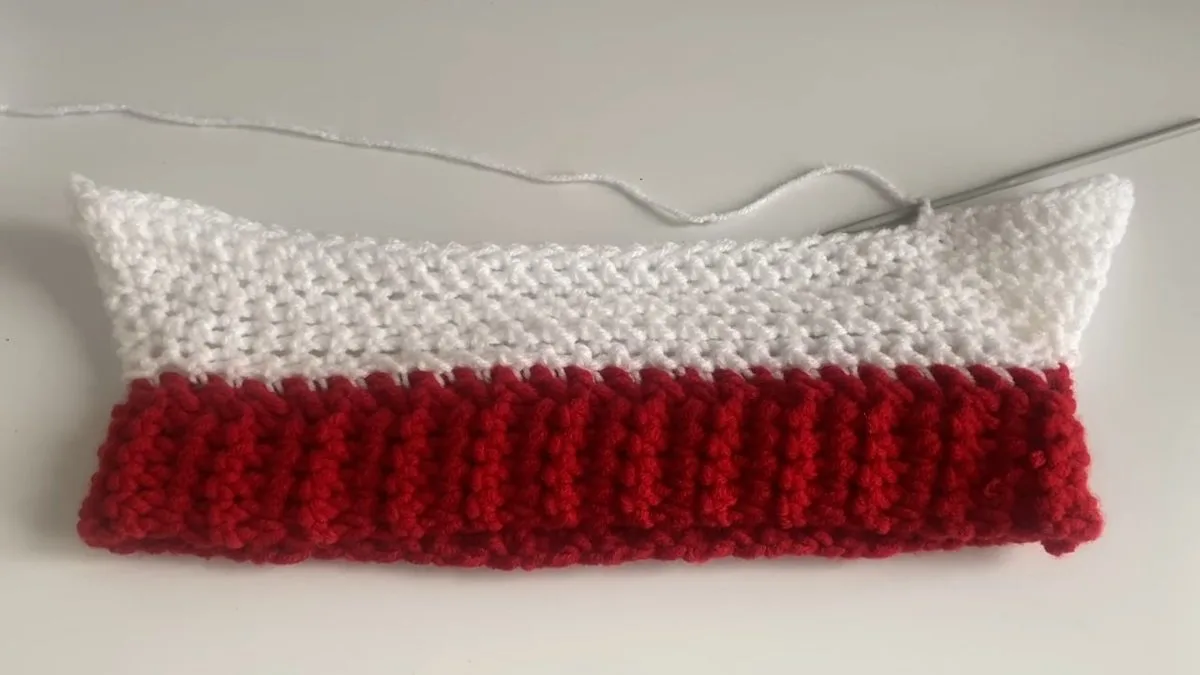
On each following round, work the next increase into the middle stitch of the three you made last round. The tutorial says the second of the previous increase stitches, and you can see the triangle grow on each side. Keep repeating. The sample has 10 rows of white, a thick stripe, but you can change colour sooner for thinner stripes.
Step 11: Switch back to red
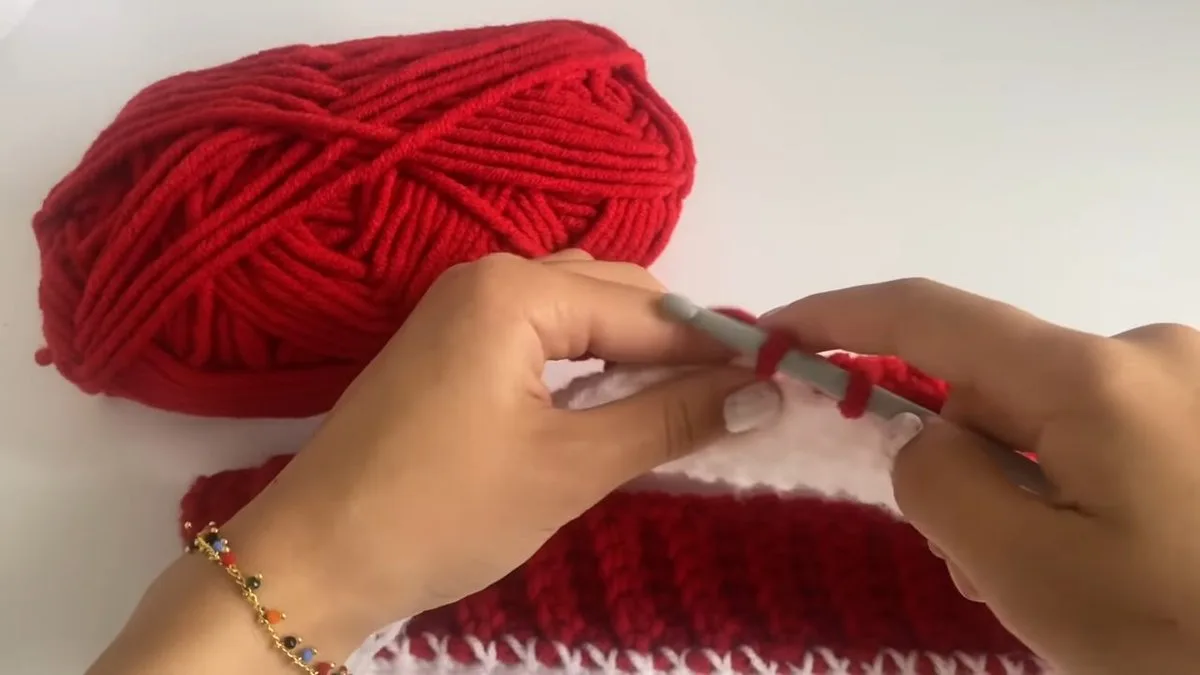
Make a slip knot with the red yarn, pull it through the white, and pull the white tight. Cut the white if you are done with it, or keep it to carry up for a wider stripe. Chain 1 and keep making single crochet around, still increasing at both hips as before. You can stop increasing whenever the hip section feels the right size.
Step 12: Keep striping down to the crotch

Repeat the pattern of rounds, with the increases, until you reach the crotch. A good reference is another pair of shorts that fit you: hold it against your work and stop where its legs begin to split. Try the piece on often. Remember that the fabric is very stretchy, so aim for snug, almost hard to pull on, because it will stretch as you wear it.
Step 13: Count your stitches and divide by four
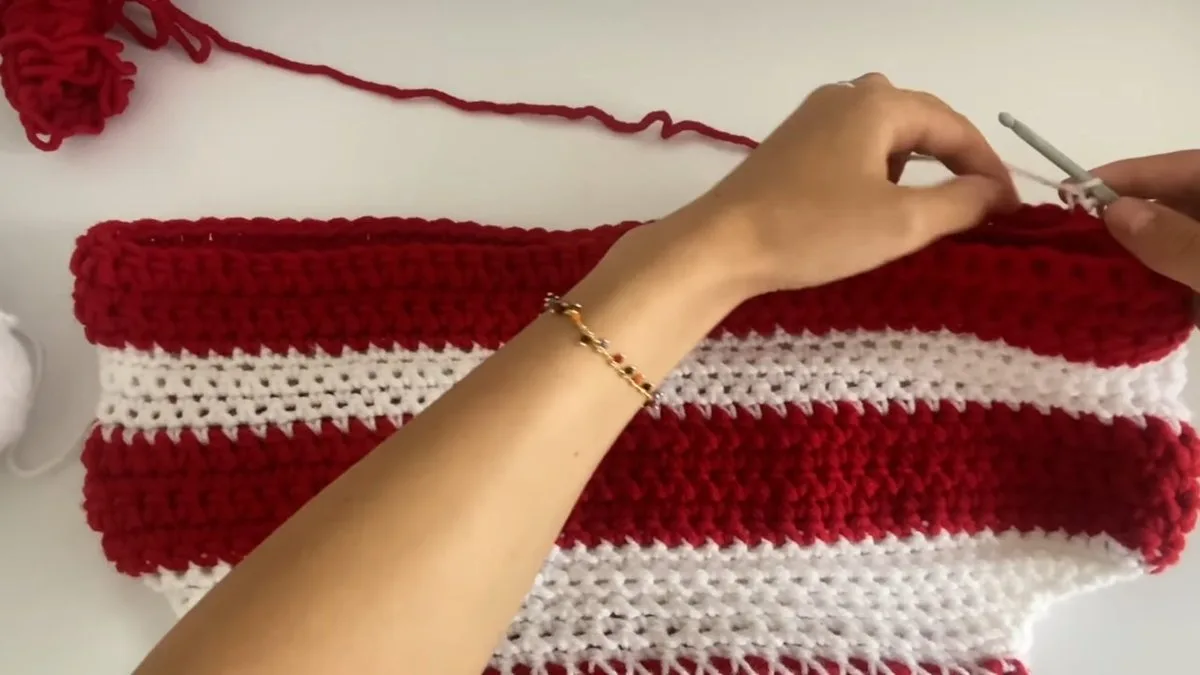
Switch to a new colour if you like, and count every stitch along the top edge. The sample has 88. Divide by 4 to get 22. Work 22 single crochet to the first marker. The stitch multiple for this step is 4: your total should divide evenly, so check it before you go on.
Step 14: Chain 12 and skip to the halfway stitch
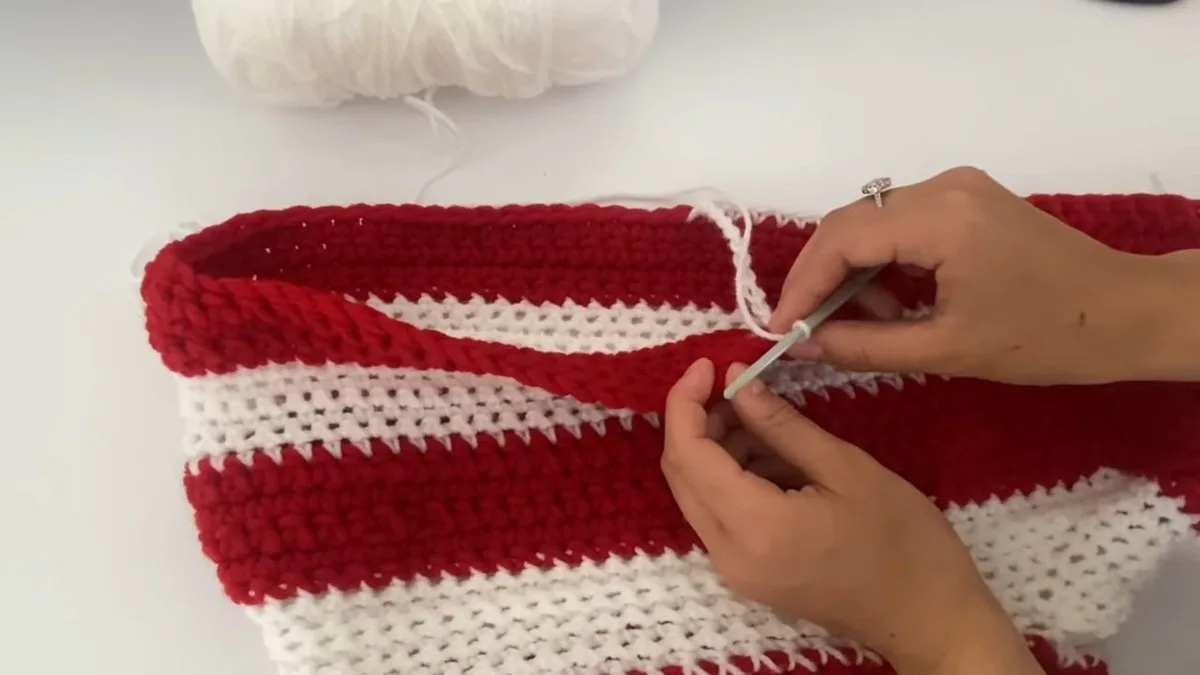
After the 22 stitches, chain 12. This chain bridges the crotch. Now count to the halfway stitch, which is 44 in the sample, because 22 times 2 is the total divided by two. Insert the hook in that stitch and make a single crochet into it. The stitches you skipped will become the second leg.
Step 15: Work the first leg
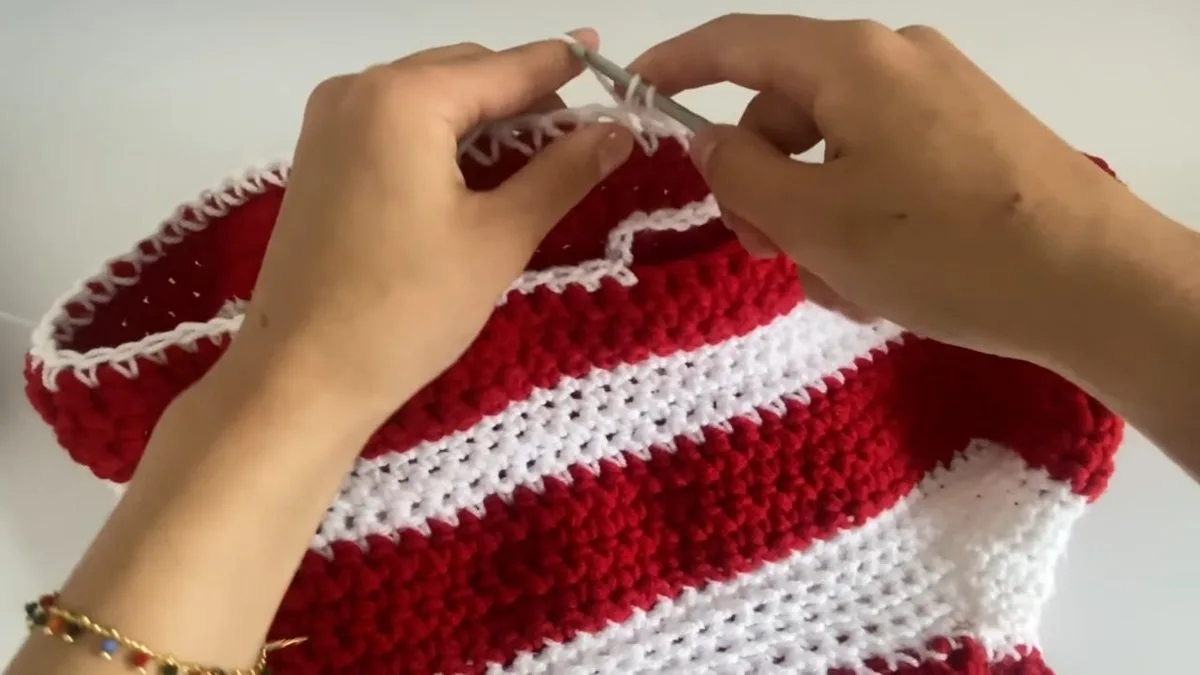
Work single crochet in each remaining stitch around to where you started, then single crochet into each of the 12 chains. Slip stitch, chain 1, and turn. Keep working rounds, one direction and then the other, changing colours for stripes, until the leg is the length you want. The tutorial gives no count for the leg rounds, so try the piece on before you finish.
Step 16: Work the second leg
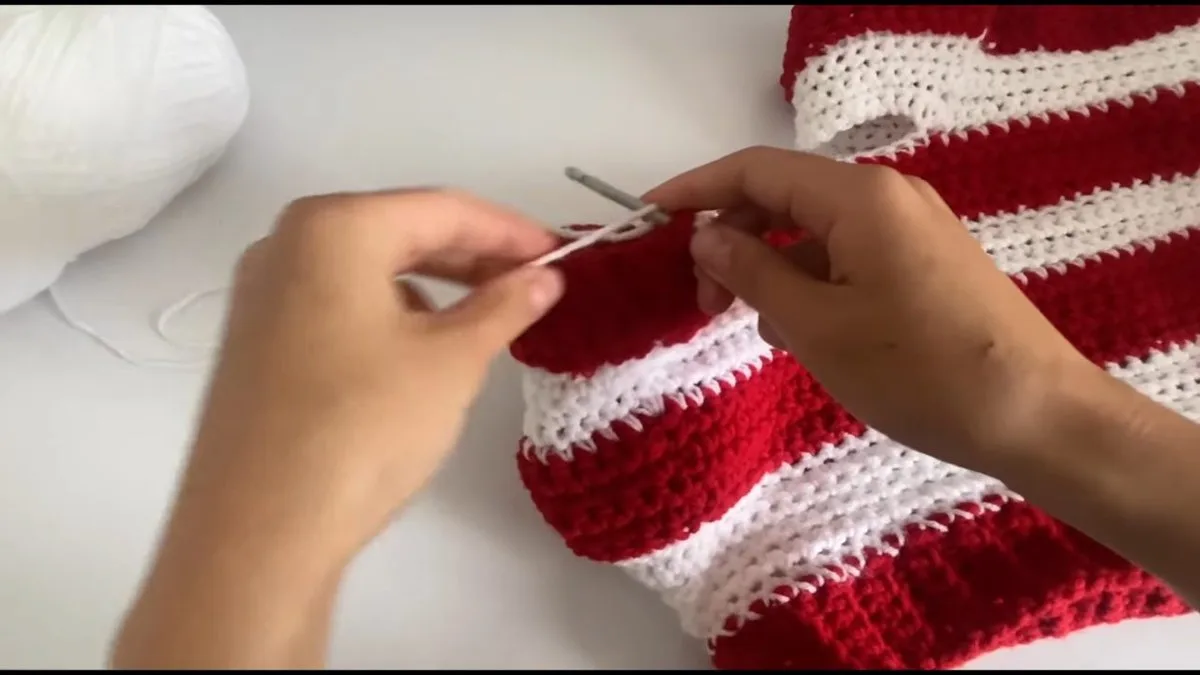
Cut the yarn on the first leg. Make a slip knot, attach it where you began the split, and single crochet all the way around the second opening. Slip stitch, chain 1 and turn. Do not increase any more, unless your fit needs it. Match the stripe colours and the number of rounds to the first leg so the two look the same.
Step 17: Check the pair and weave in the ends
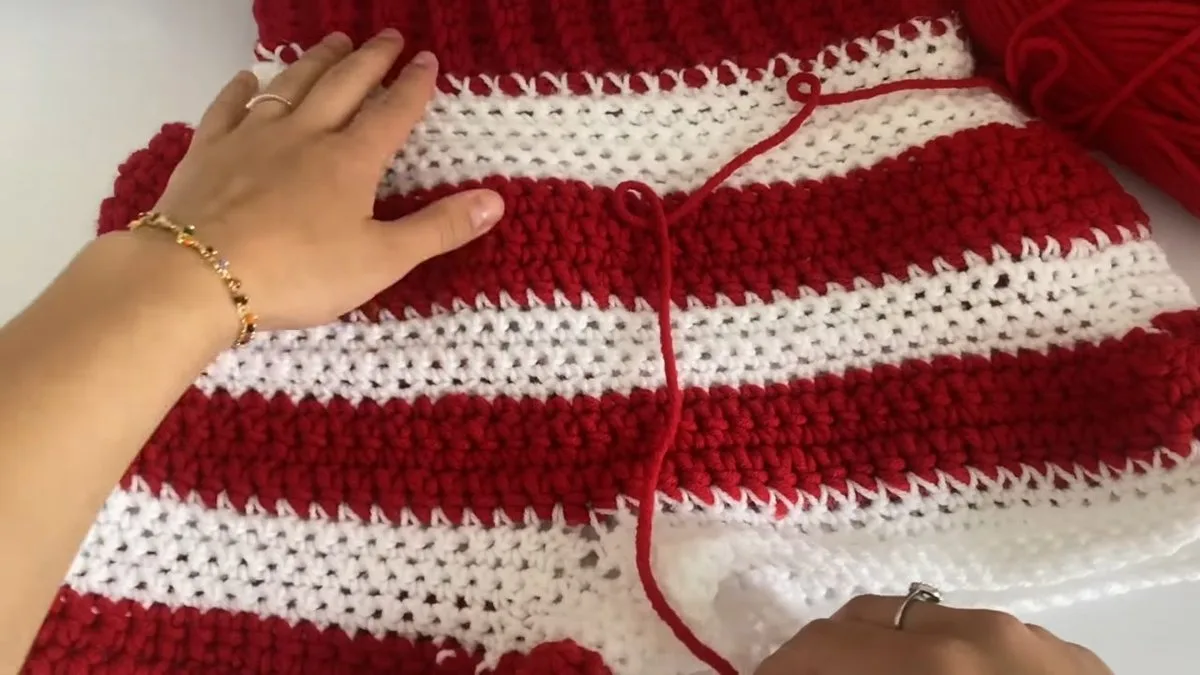
Lay the crochet shorts flat and compare the legs. Cut the yarn, pull the end through and tighten, then thread each tail through a few stitches to hide it. Try the pair on once more, and if the legs are shorter than you want, add rounds before you finish off.
Where Crochet Shorts Go Wrong
The waist is too loose or too tight
The commonest fault in a pair of crochet shorts is a band that does not match the body. Stretchy single crochet forgives a lot, but a band cut to your full waist measurement slides down. Take off the 2 in, try the band on stretched, and add or remove rows before you close the ring.
The stitch count does not match the sample
Count your own stitches rather than trust ours. By our arithmetic, each increase round adds four stitches, two at each hip, so the sample’s 50 stitches plus its increases would not land exactly on 88, which means the tutorial does not show every round or every first-round count. Use your own total at the split and make sure it divides by four.
The hips look lopsided
The two increases must sit at the same point on each round. Keep the piece folded flat so the tail marker and the fold line up, or put a stitch marker on each side. Always place the increase into the middle stitch of the previous three, so the triangles grow straight.
The legs are different lengths
The second leg is worked after the first, so it is easy to stop at a different round. Count the rounds on the first leg, write down the colour changes, and match them on the second.
Fit, Stretch and Care
A knitted or crocheted fabric made of single crochet in a firm tension stretches a lot, so the designer advises aiming for a tight fit that is nearly hard to pull on. Always stretch the piece before you try it on, and stop increasing as soon as the hip section fits you.
The tutorial gives no fibre content and no care instructions, so follow the care label of the yarn you buy, and test a swatch before you wash the finished piece. Wash and dry the swatch the way you plan to wash the shorts, then measure it again, because some yarns grow when wet.
The short leg is part of the design. If you prefer a longer, more covering pair, keep working leg rounds until you reach the length you want and use the same stripe order on both legs.
Five More Free Crochet Shorts Patterns
If you want a pattern with sizes, a gauge and a yarn list, these five free pages are worth a look. For each we list only what the page prints.
| Pattern | Style | Hook | Sizes and yarn |
|---|---|---|---|
| Crochet Granny Shorts (Red Heart) | Joined granny squares | not printed in the page text | Hip 30 to 48 in finished; one 250 g Red Heart All In One Granny Square kit |
| Granny Crochet Shorts (Caron) | Granny shorts | the page shows two different sizes | Hip sizes 34 to 54 in; Caron Simply Soft |
| Crochet Loungewear Shorts (Heart Hook Home) | Legs alternate single and double crochet | 4 mm | XS to 3XL; 700 to 1450 yd of fingering yarn; gauge 20 stitches and 17 rows over 4 in |
| Staycation Shorts (Heart Hook Home) | Half double crochet with a shell edge | 4 mm body, 5.5 mm edge | XS to 2XL; about 450 to 800 yd of worsted cotton; gauge 17 stitches and 12 rows over 4 in |
| Shell Shorts (Hooked on Homemade Happiness) | Shell stitch, top down | 4.5 mm | XS to 3X; 3 skeins of Lion Brand 24/7 Cotton in S/M up to 5 in 2X/3X |
What the five pages leave out: the two granny pages print no gauge and no total yardage, and the Caron page shows two different hook sizes, so we left that field out rather than pick one. These written patterns are more detailed than a stripe sample, so check the size chart on the page before you buy yarn.
Crochet Shorts FAQ
Are these crochet shorts easy for a beginner?
Yes. Every stitch is a single crochet, with a slip stitch for the seam and a triple stitch at each hip. The new skills are working into the back loop only and trying the piece on as you go.
What hook size is best for crochet shorts?
The tutorial uses a 6 mm hook with a chunky red yarn labelled for 9 mm, and a 4 mm hook with a thinner white yarn. The Craft Yarn Council lists 6.5 to 9 mm for bulky yarn, so choose the hook that gives a firm fabric on your swatch.
How do I size crochet shorts to my waist?
Measure around your waist and take off 2 in. A 29 in waist becomes a 27 in band, and the band is worked until it reaches that length. Try it on stretched before you close the ring.
How much yarn do crochet shorts need?
The tutorial prints no amount. Other free shorts patterns list about 450 to 800 yd of worsted cotton or 3 to 5 skeins, so buy more than you think and keep the receipt.
How do I make crochet shorts longer?
Keep working rounds on each leg until it reaches the length you want, and match the stripe colours on both legs. The tutorial gives no count for the leg rounds, so try the piece on as you work.
How do I wash crochet shorts?
Follow the care label of your yarn, since the tutorial names no fibre. Wash and dry a swatch first, then measure it again to see whether the yarn grows or shrinks.
Pair These Crochet Shorts With a Layer
Once the crochet shorts are finished, add something to wear over them. The crochet pullover sweater pattern makes a cosy top, the crochet vest pattern is a quick layer, and the granny square cardigan works over both. For warm legs under them, see the crochet leg warmers, and browse every crochet clothes pattern on the site.
Sources
- Yarnspirations, Red Heart Crochet Granny Shorts
- Yarnspirations, Caron Granny Crochet Shorts
- Heart Hook Home, Crochet Loungewear Shorts
- Heart Hook Home, Staycation Shorts
- Hooked on Homemade Happiness, Shell Shorts
- Craft Yarn Council, yarn weight chart
- Craft Yarn Council, women size chart
- Craft Yarn Council, body sizing
Pattern credit: this shorts design is by the crochet channel Savannah Williams.