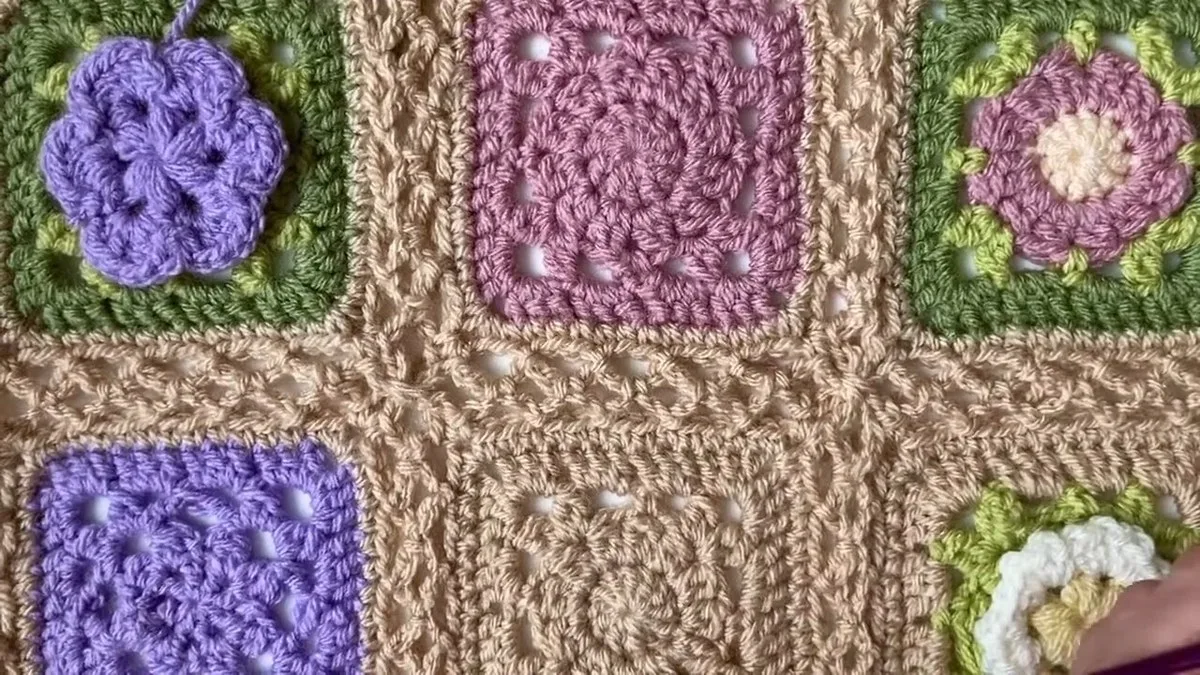
How to Join Granny Squares: Easy Gift to Make
If you are wondering how to join granny squares, the slip stitch and chain method is the friendliest answer: you edge each square, then join it to its neighbour while you work the last round, so there is no sewing at the end. This guide shows every step with a photo, a comparison with four other ways to join, a chart of how many squares and how many edging stitches a blanket takes, and the mistakes that leave gaps at the corners. Joined squares are also an easy gift to make, since a baby or lap blanket takes only a few dozen of them.
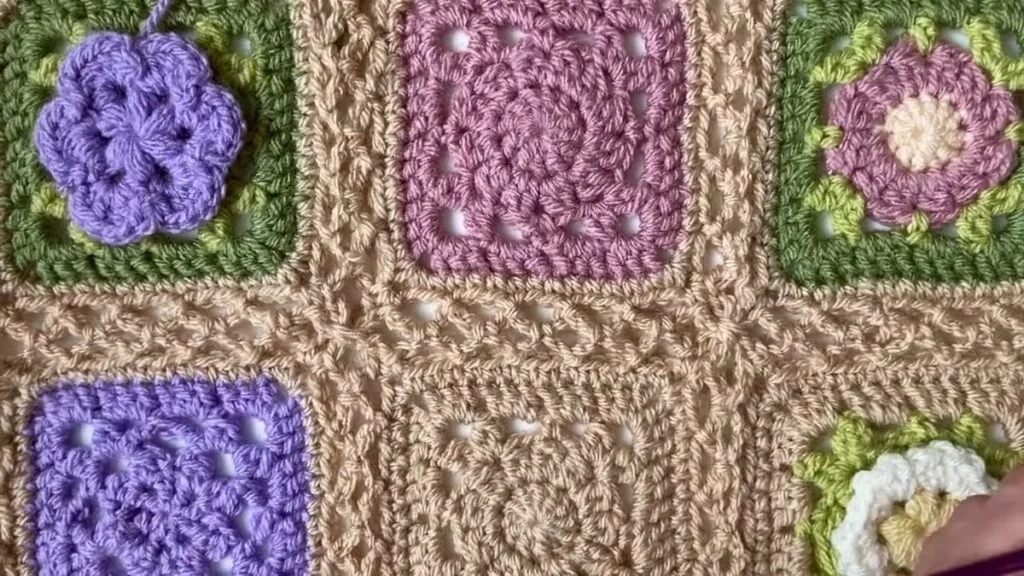
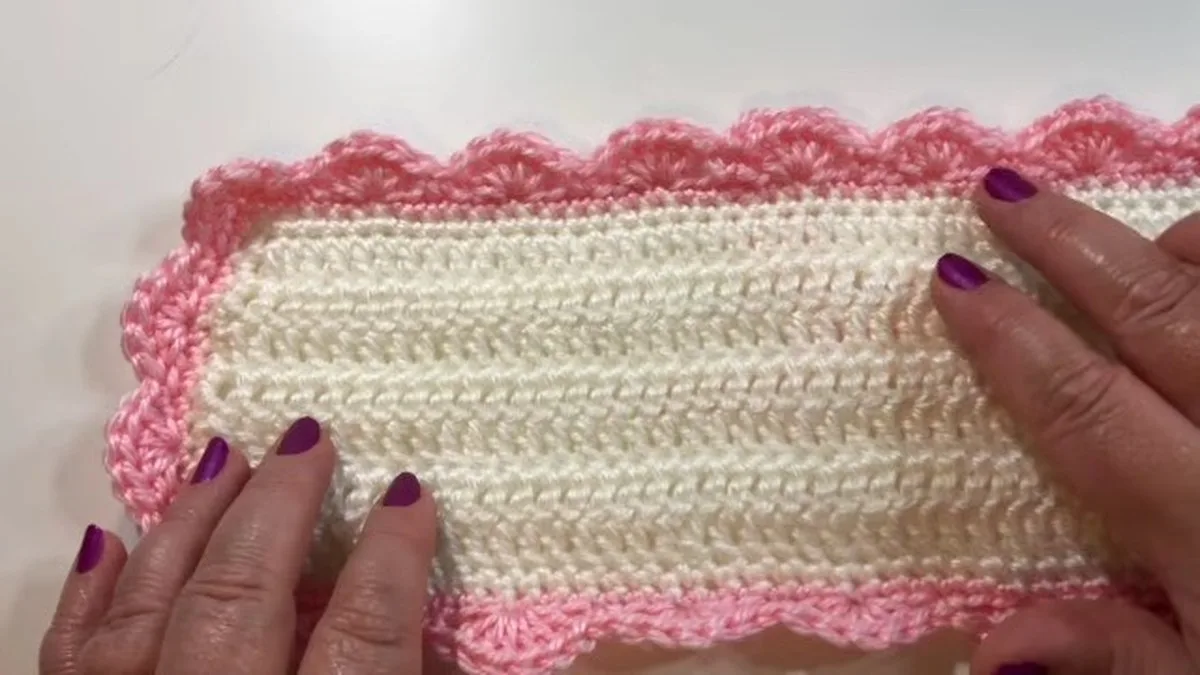
What makes this join different: the squares are joined with a lacy network of chain loops, not a ridge or a flat seam. You make a full edging round on the first square, then on every new square you replace some of the chains with slip stitches into the square that is already in place. The creator joins her squares in a stone-coloured edging, and says you can edge a few squares in other colours for a patchwork look.
The edge counts, the corner rule and the order of joining come from the creator’s own instructions. The comparison, the square counts and the edging totals are our own arithmetic, labelled as ours, because we have not made a blanket with them.
- How to Join Granny Squares at a Glance
- Stitch Names to Know Before You Learn How to Join Granny Squares
- Materials for How to Join Granny Squares
- Squares and Edging Stitches by Blanket Size
- How to Join Granny Squares: Step by Step
- Mistakes When You Learn How to Join Granny Squares
- How to Join Granny Squares: Five Methods Compared
- How to Join Granny Squares FAQ
- More Granny Square Reading Before You Join
How to Join Granny Squares at a Glance
The method has three parts: an edging round worked in single crochet, a join round of slip stitches and chain loops, and a corner rule that keeps the squares from piling up at the meeting points. Here is the short version before the photos.
| Part | What you work | Count in the sample |
|---|---|---|
| Squares | Plain granny squares, finished before you start joining | 4 x 4 in, 12 stitches along each edge |
| Edging round | Single crochet in every stitch; at each corner 1 single crochet, chain 2, 1 single crochet | 14 stitches along each edge |
| Join round, first square | Slip stitch in stitches 3, 6, 9 and 12, chain 4, skip 2 between; corners: single crochet, chain 4, single crochet | 4 slip stitches along each edge |
| Join round, next squares | Replace each chain 4 with chain 2, slip stitch into the other square’s chain space, chain 2 | Matches the loops of the first square |
| Corners | Join two corners, leave two free, join the free ones on the diagonal | Two corners joined per pair |
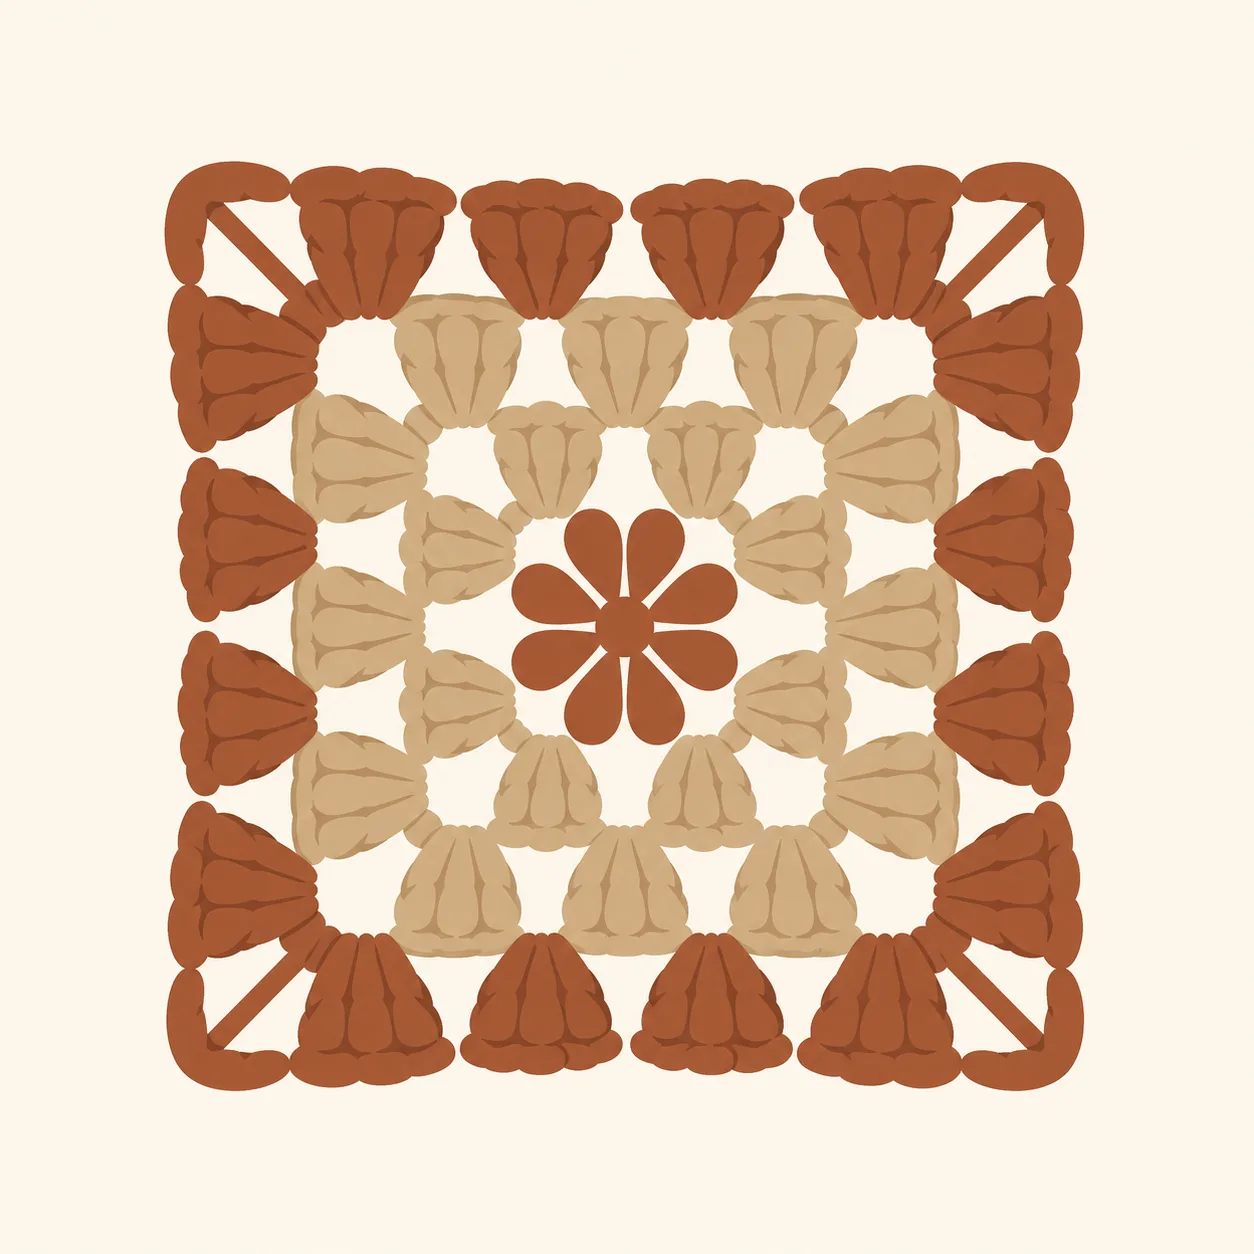
Stitch multiple: the join round works because the edge has 12 stitches plus the 2 corner stitches, and 12 is a multiple of 3. That gives a slip stitch every third stitch: 3, 6, 9 and 12. If your squares have a different number of stitches per edge, pick a stitch multiple that fits, and keep the same number of chain loops on both squares so they line up.
Stitch Names to Know Before You Learn How to Join Granny Squares
Patterns differ in what they call the basic stitches. The creator says the stitch she works along the edge is a single crochet in one naming convention and a double crochet in the other, which can confuse you when you read a pattern from another country. In this guide we use the single crochet name for the short stitch with no yarn over, the one the edging round is made of.
| In this guide | What you do | Also called |
|---|---|---|
| Single crochet | Insert the hook, pull up a loop, yarn over and pull through both loops | Double crochet in the other naming convention |
| Slip stitch | Insert the hook, pull the yarn through the stitch and the loop on the hook in one move | Same in every pattern |
| Chain space | The gap made by a chain loop of a previous round | Same |
| Corner | The chain 2 gap at each corner of a granny square, where 3 stitches normally meet | Same |
If a pattern you follow tells you to join with single crochet and you work slip stitches, the seam will be thinner. Our comparison table further down lists which methods give a ridge and which give a lacy join.
Materials for How to Join Granny Squares
You need very little to join granny squares this way: finished squares, one joining colour, a hook and scissors. The creator uses Stylecraft Special DK, a popular acrylic DK yarn, in the colour Stone for most of the squares, and a few squares are edged in yellow and pink instead.
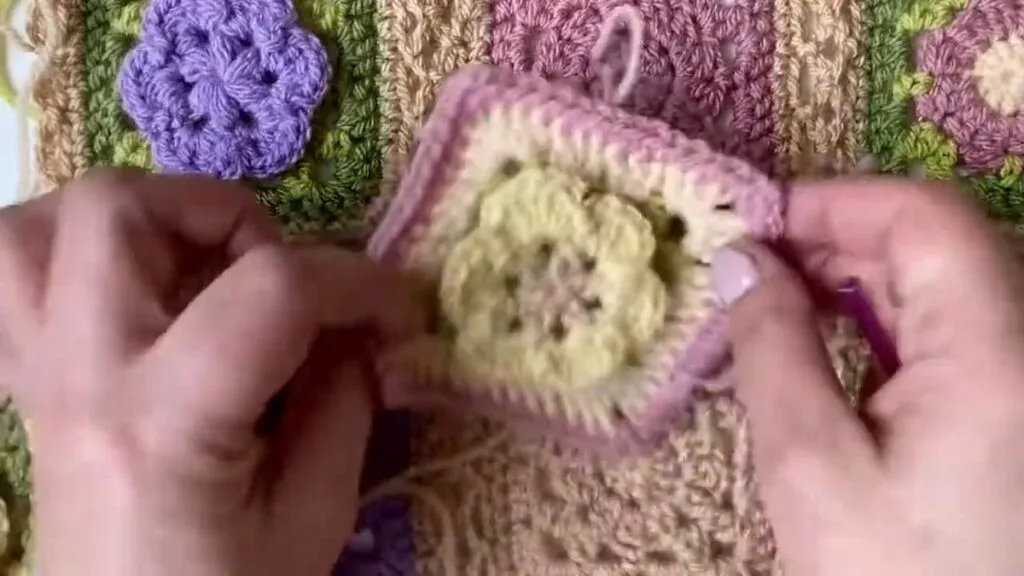
| Item | What to use |
|---|---|
| Squares | Granny squares already finished and the ends woven in; the creator’s are 4 x 4 in |
| Joining yarn | One colour for the whole blanket, same weight as the squares; sample: DK acrylic in Stone |
| Hook | The creator does not name a size; use the hook that gave you your squares |
| Tools | Scissors and a yarn needle for the ends; a few stitch markers to mark the corners |
| Skill level | Confident beginner: single crochet, slip stitch, chain, counting stitches |
Hook note: the Craft Yarn Council lists 4.5 to 5.5 mm for DK yarn (category 3) and 5.5 to 6.5 mm for worsted (category 4). The creator prints no hook size, no gauge and no yardage for the join, so we give none either. Work one edging round on a square and a short join to a spare square, and change hooks if the chain loops look too tight or too loose.
Squares and Edging Stitches by Blanket Size
Before you edge anything, work out how many squares you need. Lion Brand suggests making a 4 to 6 inch test square and dividing the finished size you want by that number, once for the width and once for the length. Its own example is a 6 in square, which needs about 8 across by 10 down for a 48 x 60 in throw, 80 squares in all.
| Blanket (in) | Squares of 4 in | Squares in all | Edging stitches in all |
|---|---|---|---|
| Baby 24 x 36 | 6 across x 9 down | 54 | 3,024 |
| Lap 36 x 40 | 9 across x 10 down | 90 | 5,040 |
| Throw 45 x 55 | 12 across x 14 down | 168 | 9,408 |
How we got these: each square has 4 edges of 14 stitches, counting the corner stitches, which is 56 single crochets in the edging round. A 36 x 40 in lap blanket is 9 squares across and 10 down, 90 squares, so 90 x 56 = 5,040 edging stitches. We assume every square measures 4 in after edging, which the creator does not say; measure one of yours and divide again. The edging adds a round, so your squares may end up larger than 4 in. This is our arithmetic, not a tested pattern. For more blanket sizes see how big a baby blanket should be.
Yarn: no page we read prints how many extra yards the joining takes. Moogly says a slip stitch seam uses the least yarn of the crocheted seams, but gives no number, so we do not estimate one. Buy a spare ball of the joining colour, and keep the dye lot together.
How to Join Granny Squares: Step by Step
Work all steps with the same joining colour. Steps 1 to 4 edge a square, steps 5 and 6 add the first join round, steps 7 to 10 join the second square, and steps 11 to 14 add the third square and the diagonal corner.
Step 1: Attach the joining colour to the first stitch
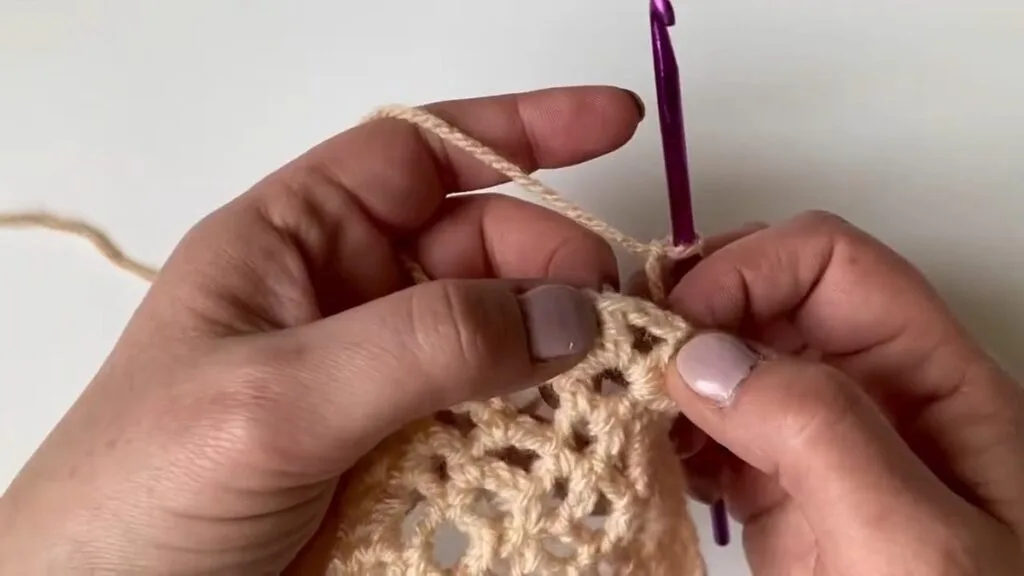
Pick your joining colour and make a slip knot. Put it on the hook and attach it to the first stitch on one edge of a square with a slip stitch, then pull the tail tight.
Step 2: Work a single crochet in every stitch
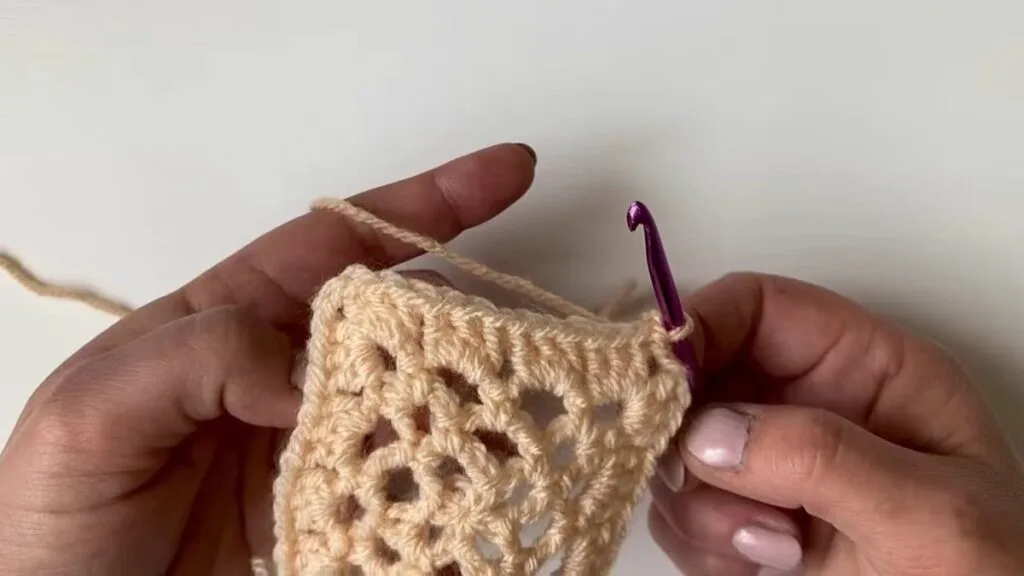
Make 1 single crochet in each stitch along the edge. Do not skip any and do not add any. With 12 stitches on the edge, you work 12 single crochets before you reach the corner.
Step 3: Make the corner: 1 single crochet, chain 2, 1 single crochet
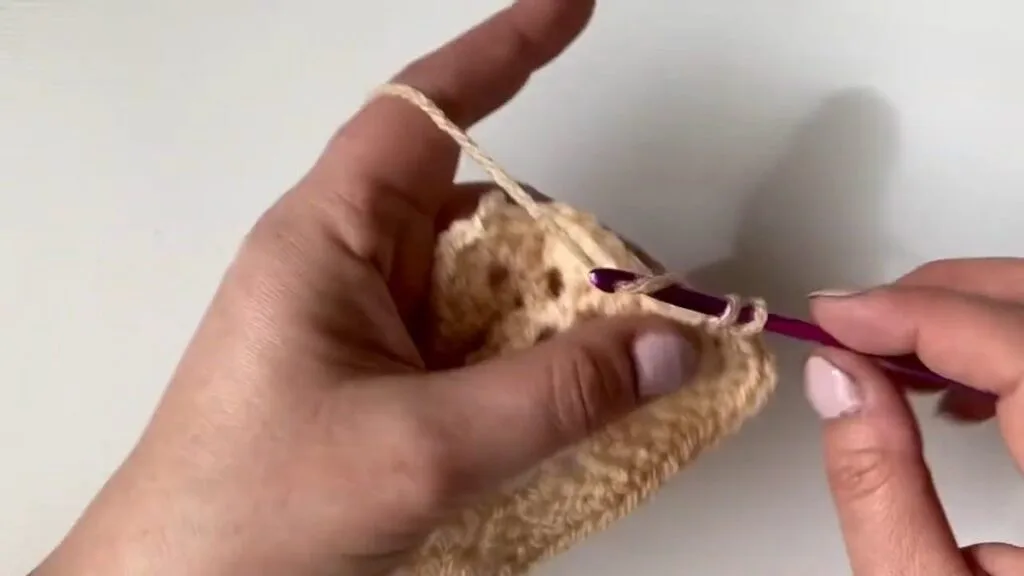
At each corner work 1 single crochet in the corner, chain 2, then 1 single crochet in the same corner. Then carry on in the stitches of the next edge. Those corner stitches are why each edge ends up with 14 stitches, 12 plus 2.
Step 4: Finish the edging round and join with a slip stitch
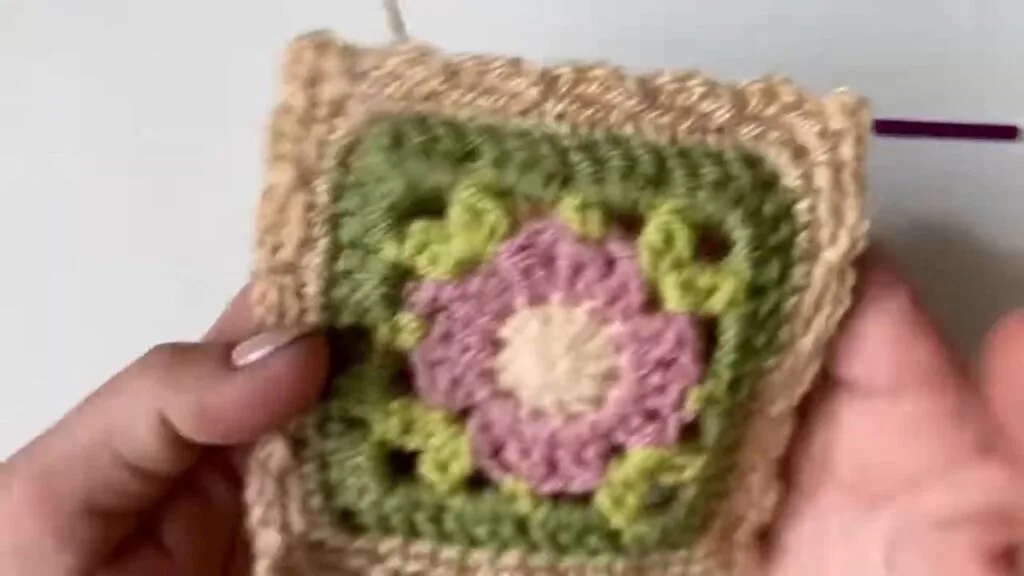
Keep going around until you reach the last corner, make 1 single crochet, chain 2, 1 single crochet, then slip stitch into the first stitch of the round, chain 2 and cut the yarn. Pull the tail through and tighten the knot; you can weave the ends in later. Count each edge now: you should have 14 stitches.
Step 5: Slip stitch into stitch 3 and chain 4

The first square has nothing to join to yet, so you give it a join round of loops that the next squares can hook into. Attach your yarn, slip stitch across to stitch 3, then chain 4, skip 2 stitches and slip stitch into the next stitch. The slip stitches land in stitches 3, 6, 9 and 12.
Step 6: Go around the first square and the corners
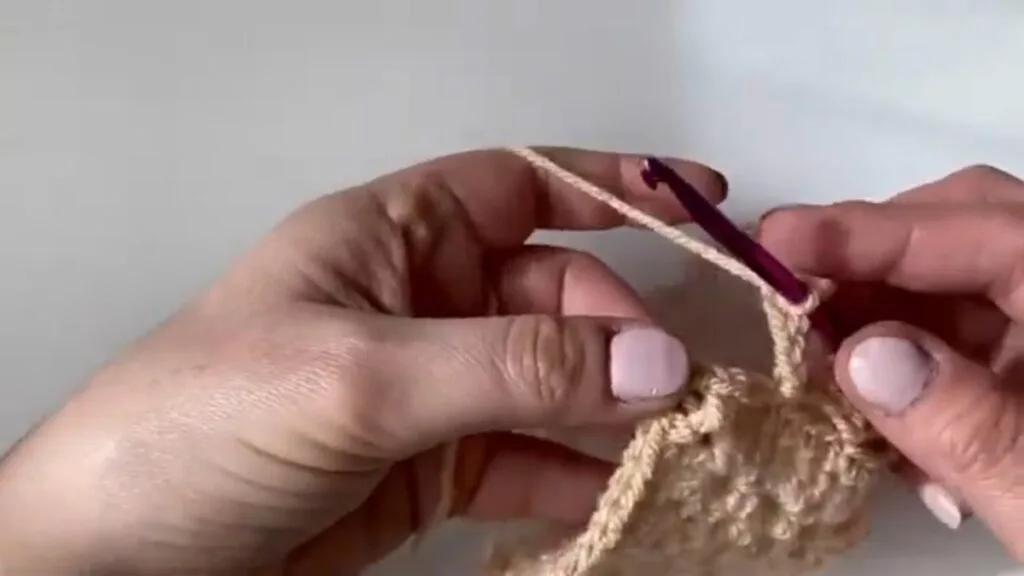
Repeat along every edge: slip stitch, chain 4, skip 2. At each corner make 1 single crochet in the corner, chain 4, and 1 single crochet back in the same corner. Join to the start. You now have a finished, edged square with a ring of chain 4 loops, ready to take its first neighbour.
Step 7: Lay the second square next to the first
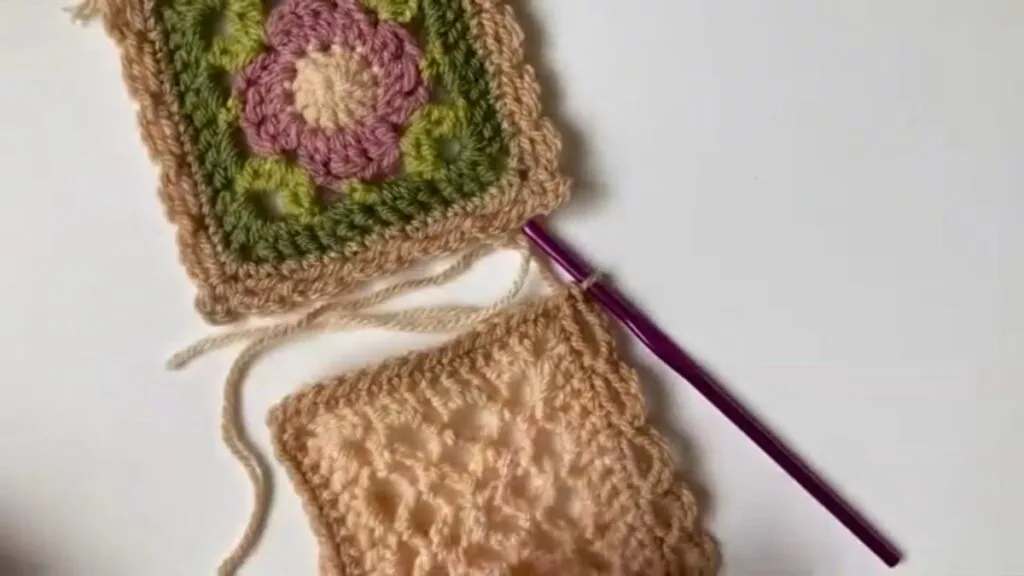
Edge the second square as in steps 1 to 4. Lay the two squares side by side with the right sides facing you. Think about where this pair sits in the blanket: the two corners that face the outside edge of the blanket are joined to each other, and the two that face the inside of the blanket stay free for now.
Step 8: Join the first corner
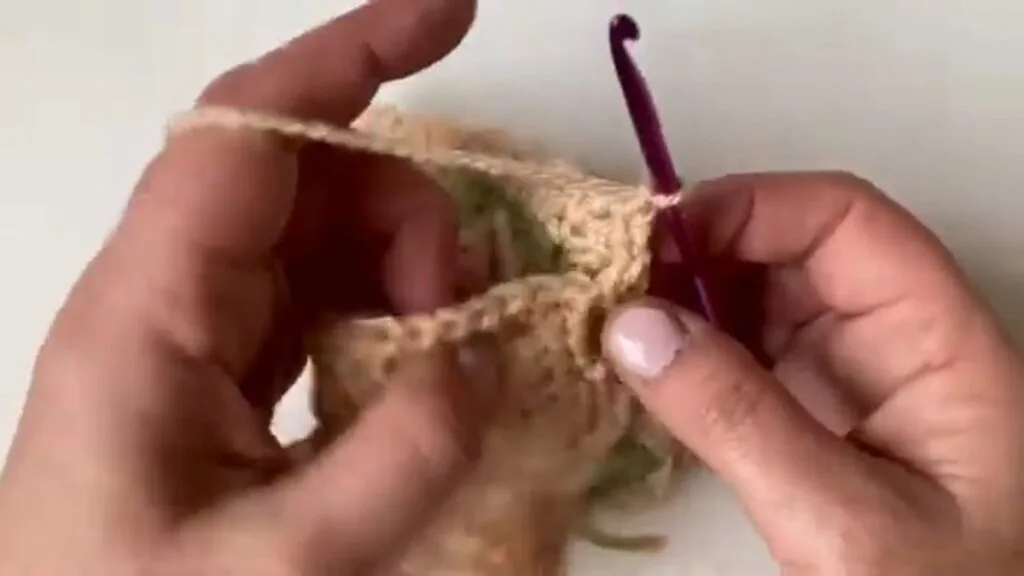
Start the join round on the second square as before, and at the corner make 1 single crochet, then chain 2. Slip stitch into the corner chain space of the first square, then chain 2 and make 1 single crochet back in the corner of the second square. The two corners are now linked, with a chain 2 on each side of the slip stitch.
Step 9: Join along the edge

Wherever the first square’s round says chain 4, work chain 2, slip stitch into the matching chain space of the other square, then chain 2. Between the joins, skip 2 stitches and slip stitch into the next stitch of the square you are working. That is the pattern all along the edge. We read the creator’s sequence this way because she does not count the joins aloud.
Step 10: Leave the far corner free and finish the round
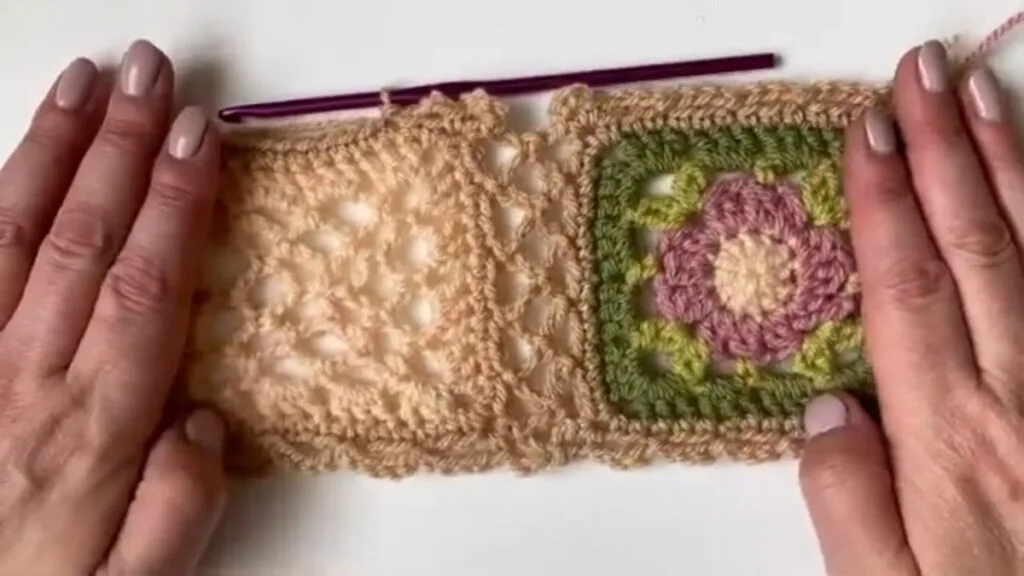
At the far end of the edge, make a single crochet in the corner, chain 4 and another single crochet back in the same corner, exactly like a corner of the first square. Go around the rest of the square with chain 4 loops, join with a slip stitch to the first stitch, chain 2 and cut the yarn. The two squares are now joined along one edge, and the two far corners are free.
Step 11: Place the third square
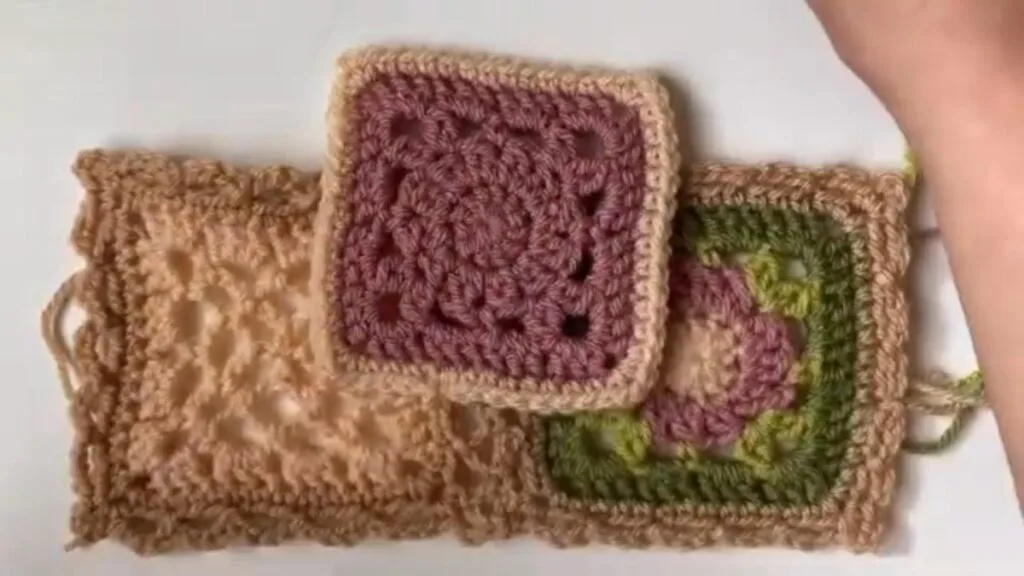
Edge a third square. Place it beside the pair so its edge meets the inside edge of a square that is already joined. Choose the corner where the first two squares are joined, because that is where all three will meet.
Step 12: Join the third square along its edge
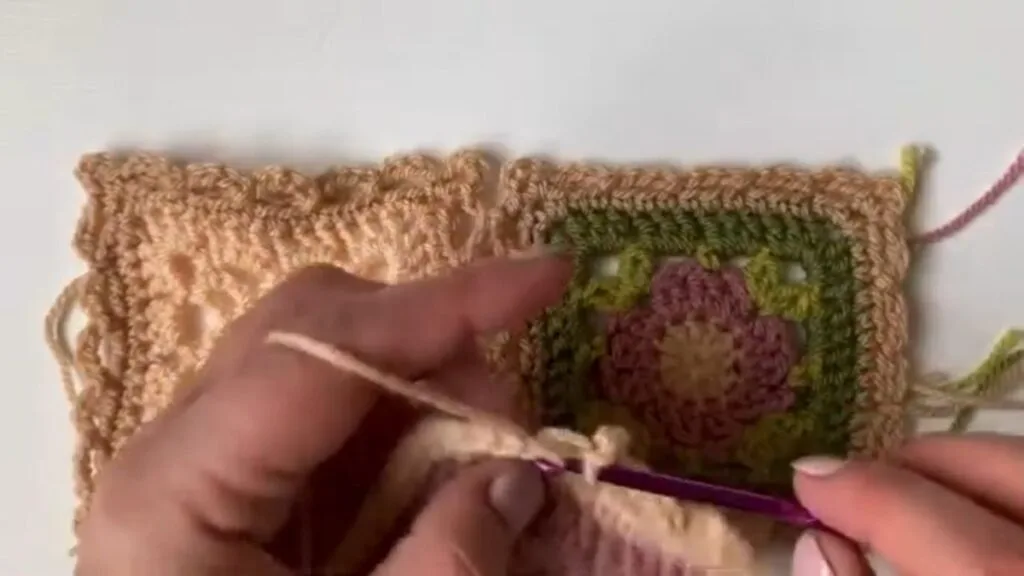
Attach the joining yarn with a slip stitch to stitch 3 of the third square and work the same sequence: chain 4 on your own square, with chain 2, slip stitch, chain 2 wherever it meets the neighbour. At the corner work 1 single crochet, then chain 2 as before.
Step 13: Join the diagonal corner
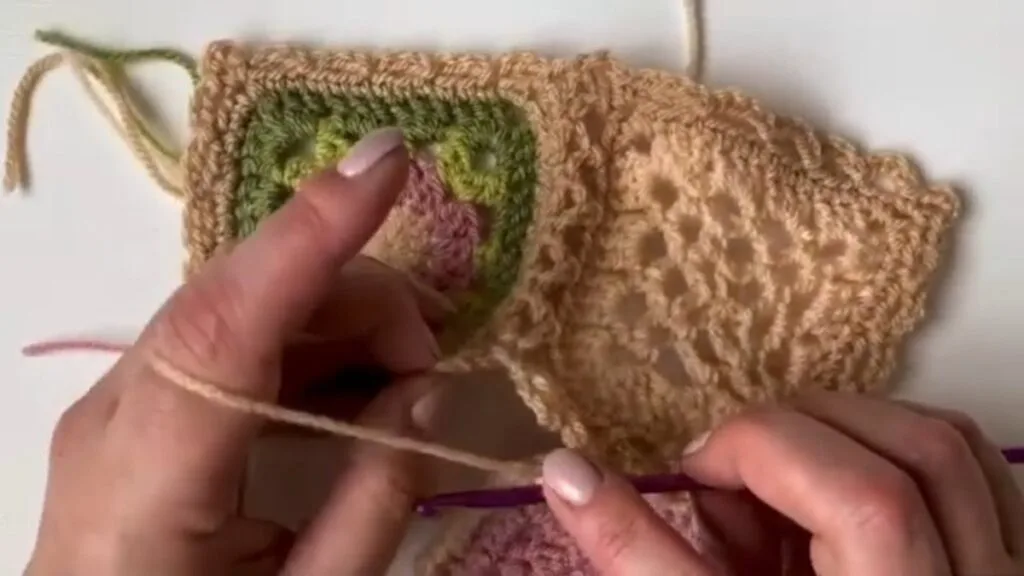
At the shared corner, ignore the corner of the square you have just worked. Go straight to the diagonal corner: slip stitch into it, then chain 2 and make another single crochet in the corner of your own square. The corner of the neighbour you skipped is already joined, so all four corners will meet without a gap.
Step 14: Pull the corners together as you go
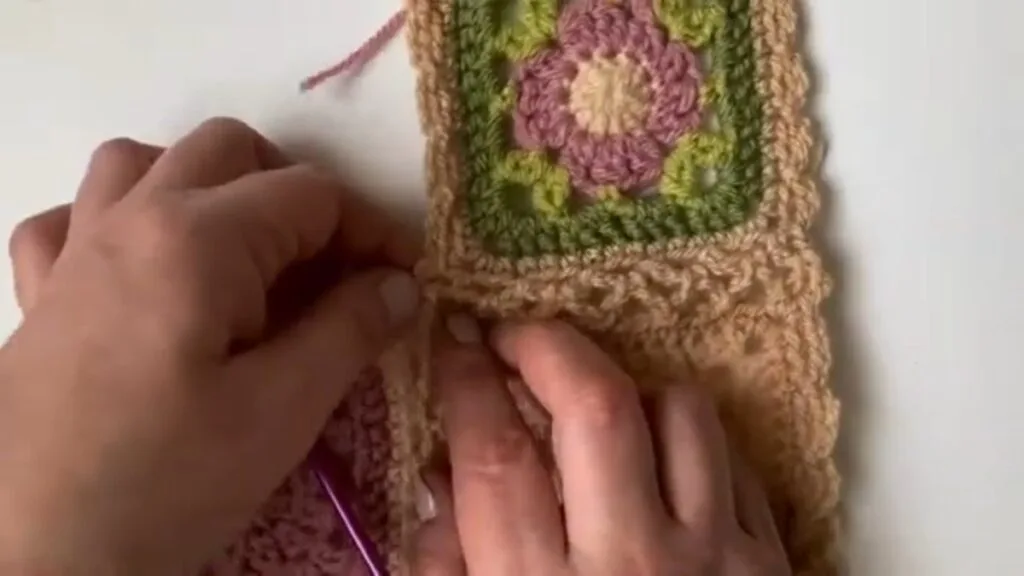
The creator explains that when you come to the next square you come up along the edge, go underneath the corner of the earlier square and slip stitch it, which pulls all the squares together. Keep joining the squares in rows, and weave in the ends when a section is done.
Mistakes When You Learn How to Join Granny Squares
Gaps and a pile-up where four squares meet
The point where four squares meet is the weak spot of any join. The creator solves it by joining two corners, leaving the other two free, and then joining the free ones on the diagonal. Other sources do it differently: Yarnspirations works 3 double crochets in the corner, slip stitches to square 1, then to square 3, then works 3 more in the same corner, and Moogly joins through the chain 2 spaces and skips the diagonal square. None of the pages we read uses the word cross, so these are the printed approaches.
Joins that do not line up
If the chain loops on the two squares do not match, one square has the wrong number of stitches or slip stitches in the wrong places. Count 14 stitches along each edge before you start the join round, and mark stitch 3 on each edge with a stitch marker. The same count on both squares keeps the pattern even.
A join that pulls the blanket out of shape
A join worked too tightly will make the seam shorter than the squares. Keep your chain 2 loops as loose as the rest of the fabric. Lion Brand says to block the squares before you join them so they match in size, and joining unblocked squares is a common reason why a row of squares ends up wavy.
How to Join Granny Squares: Five Methods Compared
The slip stitch and chain method is only one of several ways to join granny squares. This table puts it beside four methods from free tutorials we read, and says what each page prints, not what we guess. The look column is as the sources describe it, or as the photos show for the creator’s method.
| Method | Worked how | Look (as printed) | Ends and extras | Source |
|---|---|---|---|---|
| Slip stitch and chain (this guide) | During the last round of each new square | Open, lacy network of chain loops (as in our photos) | Edge both squares first; the ends are woven in after | The creator |
| Slip stitch or single crochet seam | Crocheted after the squares are finished | Raised ridge; the single crochet seam makes the visible ridge | Easy to frog, as the page says | Moogly |
| Whip stitch seam | Sewn with a yarn needle | Disappears into the crochet | Edges can pop out, a reader comment says | Lion Brand |
| Join as you go with slip stitches | During the last round of each square | Not described | Ends handled as you go; some still need weaving | Yarnspirations |
| Zigzag slip stitch join | Columns first, then rows | Not described | Join all squares in each column first | Bella Coco |
What the sources leave out: none of the five pages prints how much extra yarn the joining needs, and only the Moogly page names a hook and a yarn for its demo. Bella Coco also has a flat slip stitch join that its page calls a flat, slimline seam. If you want a flat seam, that is the one to try. If you want the lacy look in the creator’s photos, use the slip stitch and chain join in this guide.
How to Join Granny Squares FAQ
What is the easiest way to join granny squares?
The slip stitch and chain method is one of the easiest ways to join granny squares because you only need chain, single crochet and slip stitch. You edge each square, then join as you work the last round, so you finish with no sewing.
How do you join granny squares with a slip stitch?
Edge both squares with single crochet, then work the join round on the new square. Where you would chain 4, chain 2, slip stitch into the matching chain space of the neighbouring square, and chain 2. Skip 2 stitches and slip stitch into the new square, then repeat along the edge.
How many stitches should each edge have before I join granny squares?
In the creator’s method each square has 12 stitches along each edge, which becomes 14 with the corner stitches, 56 around. Slip stitches go in stitches 3, 6, 9 and 12. If your squares are a different size, keep the stitch multiple the same on both squares so the loops line up.
How do you join the corners when four squares meet?
The creator joins two corners and leaves the other two free, then joins the free corners on the diagonal so every corner links up. Yarnspirations and Moogly print other ways, and the section on where joining goes wrong lists them.
Do I join granny squares before or after adding a border?
In this method the edging round is the first step, so the border colour is the joining colour. You can edge a few squares in a different colour for a patchwork look. If you want a separate outer border, add it after the last square is joined.
How many granny squares do I need for a blanket?
Divide the width and the length of the blanket by the size of one finished square, rounding up, then multiply the two numbers. For 4 in squares, a 36 x 40 in lap blanket needs 9 x 10, which is 90 squares. Measure one of your own squares first, because the edging adds a round.
More Granny Square Reading Before You Join
Once your squares are joined, the next step is deciding what to make. For a garment, our crochet granny square cardigan uses 16 squares and a clear joining plan, and the crochet vest pattern turns 2 squares into a vest. To size a blanket from your squares, read how big a baby blanket is. Browse all stitches and squares on the site.
Sources
- Moogly, Slip Stitch and Single Crochet Seaming
- Lion Brand, How to Invisibly Seam Granny Squares
- Yarnspirations, The Ultimate Guide to Join-As-You-Go Crochet
- Moogly, Tight Braid Join
- Bella Coco Crochet, Zigzag Slip Stitch Join
- Bella Coco Crochet, Slip Stitch Join
- Lion Brand, Granny Square Patterns
- Craft Yarn Council, yarn weight system
Pattern credit: this slip stitch and chain join is by the crochet channel Samantha Clair Crochet.